


Workers are the machines a worker manager server uses to complete imaging, and processing jobs. Workers are designed to centralize and streamline some of the jobs that used to be performed exclusively by agents. You can designate the types of jobs a worker can perform, limit a worker to only perform jobs for particular resource pools, and start or stop a worker during maintenance periods. A worker performs tasks for all resource pools associated with its worker manager server unless you opt to limit the worker to particular resource pools.
This page contains the following sections:
- Adding a worker
- Fields
- Editing worker designated work
- Starting and stopping workers
- Workers
- Limiting workers to particular resource pools
See these related pages:
Adding a worker
When you add a worker manager server to your Relativity environment, you specify the workers that you want that worker manager server to govern. Thus, it's impossible to add workers without adding a worker manager server.
Fields
Access a worker's fields by navigating to the Servers sub-tab and clicking the name of the worker.
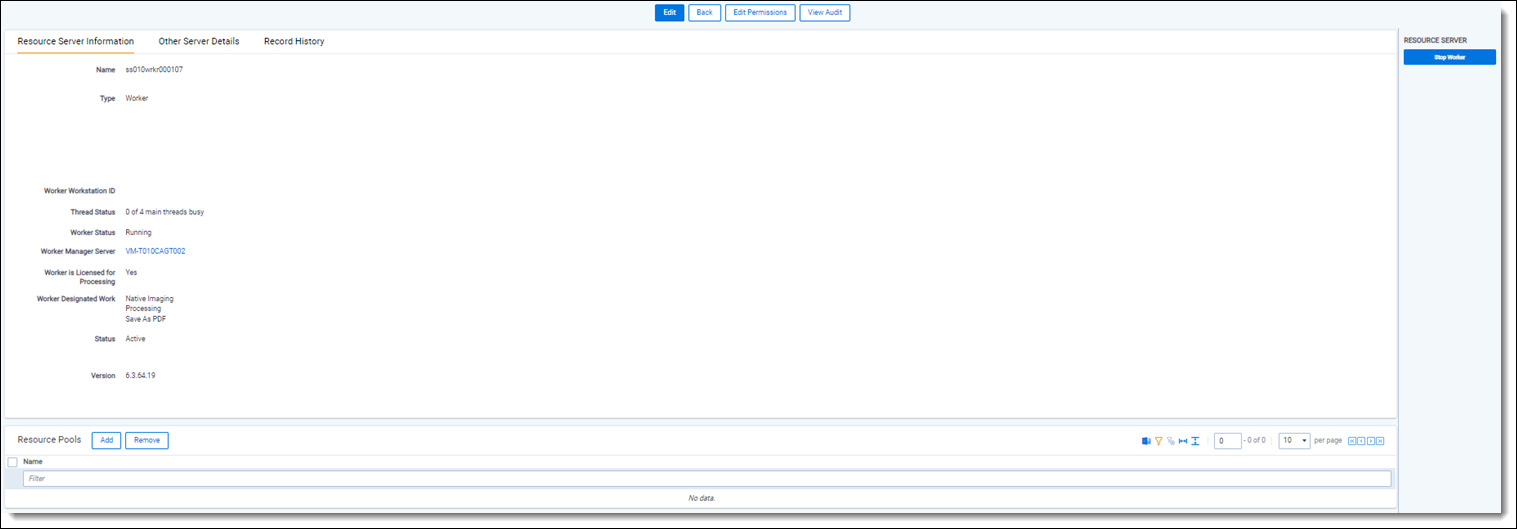
Each worker displays the following fields:
- Name - displays the worker's computer name. The worker manager server reads the computer name of the worker during the installation process.
- Type - displays the word "Worker" and populates the Type column on the Servers tab so that you can more easily sort servers and workers.
- Worker Workstation ID - displays the ID applied to the worker by the worker manager server on installation.
- Thread Status - displays the number of threads that are busy and available on the worker. If the thread status reads, "1 of 16 main threads busy", it means that only one of the 16 available threads on the worker is performing a task. The total number of threads a worker can have is determined by both the number of processing cores on the worker and the amount of RAM installed.
- Worker Status - displays whether or not the worker is running or stopped. Click the Change Worker Status button to start or stop the worker.
- Worker Manager Server - displays the name of the worker manager server managing the queue for this worker.
- Worker is Licensed for Processing - displays whether or not the worker is licensed to perform processing jobs.
- Worker Designated Work - displays all job types this worker is able to perform.
- Status - displays whether or not the worker is Active or Inactive.
- Version - displays the version of Invariant on the worker manager server managing the queue for this worker.
- Resource Pools - displays all resource pools the worker can perform tasks for. If this list is empty, the worker can perform tasks for any resource pool associated with the worker manager server.
Editing worker designated work
The worker manager server automatically detects all potential tasks any worker is able to perform and configures each worker's Worker Designated Work fields accordingly. To improve the performance of a worker, you can select only the job types you want sent to the worker. The worker's main threads are only used to perform designated work. You must select at least one task type for each worker.
Note: By default, when you install Relativity, each worker in your environment is designated to do all available work (processing and imaging).
You can designate a worker to perform one or more of the following job types:
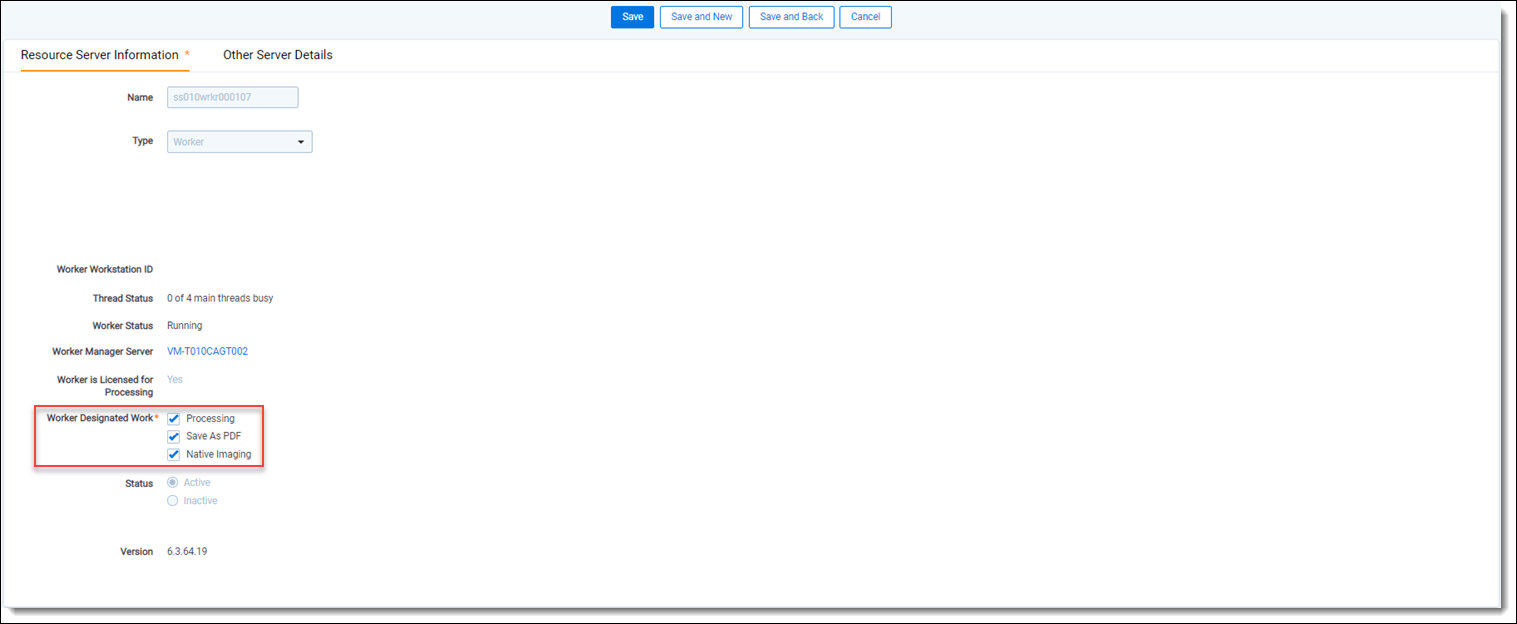
- Processing - if checked, permits the worker to perform processing. If unchecked, the worker can't perform processing tasks. Processing is only available for workers licensed for processing. This option is uneditable if any of the following conditions exist:
- The worker doesn't have the prerequisites installed to perform processing tasks.
- Your instance of Relativity isn't licensed for processing.
- The license status for this worker is set to Processing Disabled, see Workers.
- Save As PDF - if checked, permits the worker to save documents as PDF files through the Save As PDF mass operation. If this is unchecked, you won't have the option to Save as PDF through the mass operation drop-down menu. Specifically, the option will be available, but if you select it, the job will simply hang without showing progress and without displaying any errors. If this is unchecked, users won't have the option to Save as PDF through the mass operation drop-down menu. For more information, see Mass PDF.
- Basic Imaging / Native Imaging - permits the worker to perform imaging jobs if checked. If unchecked, the worker can't perform imaging tasks. Either Basic Imaging or Native Imaging appears as an option for the Worker Designated Work field. If you see Basic Imaging, it means that the worker doesn't have the necessary prerequisite software required to perform native imaging. If you see Native Imaging, it means that the worker has the prerequisite software installed to perform native imaging.
Use the following steps to edit the worker designated work field:
- Navigate to the Servers sub-tab.
- Click the worker you want to edit.
- Click Edit.
- Modify any field according to your preference.
- Click Save.
Note: If you are unable to make any selections on the Worker designated work field, use the Change Worker Status button to switch the worker to Stopped, then switch the worker back to Started. See Starting and stopping workers for more information.
Starting and stopping workers
The button on the Resource Server console lets you start or stop a worker. If the Stop Worker button is available and clicked, the imaging set using this server becomes suspended, and Relativity generates a notification email. In this case, the button changes to a Start Worker button that you must click in order to run imaging jobs through that imaging set. If the Start Worker button is available and clicked, the worker can run imaging jobs through that imaging set and the button changes to Stop Worker.

- Start Worker - worker can receive jobs sent from the worker manager server.
- Stop Worker - prevents the worker from receiving jobs sent from the worker manager server.
Limiting workers to particular resource pools
You can limit a worker to only perform jobs for particular resource pools. When you associate a worker with a resource pool, its resources are only available for jobs that originate from within that resource pool. You can limit a worker to multiple resource pools.
Limiting a worker to a resource pool
Use the following steps to limit a worker to a resource pool:
- Navigate to the Resource Pools sub-tab.
- Click the name of the resource pool you want to limit a worker to.
- Click Add in the Agent and Worker Servers section.
- Select the checkbox next to the name of the worker you want to limit to this resource pool and move the selection to the right column.
- Click Apply.
Note: If you add a worker to one or more resource pools, it is unable to perform tasks for any other resource pool. If you don't add the worker to any resource pools, it can perform tasks that originate from any resource pool associated with the worker manager server.
Removing a worker from a resource pool
Use the following steps to remove a worker from a resource pool:
- Navigate to the Resource Pools sub-tab.
- Click the name of the resource pool you want to remove the worker from.
- Select the checkbox next to the name of the worker you want to remove from this resource pool in the Agent and Worker Servers tab.
- Click Remove.
- Click Remove again in the confirmation modal.
Note: If a worker is not limited to any resource pools, it performs tasks that originate from any resource pool associated with the worker manager server.