Transcript reports and printing transcripts
You can export the different annotations and items that have been linked to transcripts using either the
Relativity.Transcripts or Transcripts application, depending on the file type you are working with. If you have
an MDB file, you can use Relativity.Transcripts and you can use the Transcripts application if you have one of
the following file formats: .ptf, .xmptf, .rtf, .trn, .lef, .xmef, and .txt.
Once you have downloaded a report to your workstation, you can conveniently print the PDF.
You can also print a .ptf, .xmptf, .rtf, .trn, .lef, .xmef, and .txt. transcript document from the Viewer using
the Transcript application.
Relativity.Transcripts
Creating a transcript report
You can create a transcript report in the Viewer if you open an MDB transcript document or you can create a report from the Transcripts tab.
To create a transcript report:
- Do either of the following:
- From the Documents tab:
- Navigate to the Documents tab and open an MDB transcript document.
- Click on the Export icon to expand the panel.
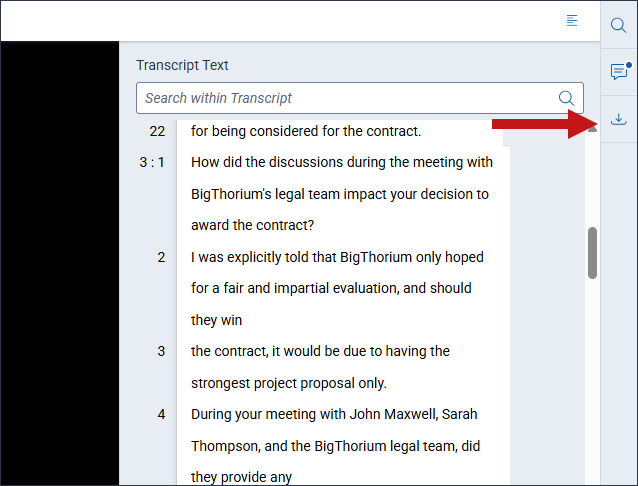
- From the Transcripts tab:
- Navigate to the Transcripts tab and select any transcripts from the list that you would like to include in the report.
- Click Export.
The Export panel expands.
- Select one of the following report Type options. Each report has different fields available so that you can
tailor the report to your needs. You can click on the name of each report Type below to learn more about its
fields.
- Transcript with Annotations—Generate a report that includes the full
transcript text and any desired type of annotation.
- Annotations—Generate a report that only includes the selected types
of annotations. The line in the transcript before and after the selected annotation types also
displays in the report.
- Key Terms—Generate a report that only includes sections of the transcript
that match the entered key terms. The line in the transcript before and after the key term matches
also displays in the report.
- Complete the remaining fields for the report Type as desired.
- Click Export.
A PDF copy of the transcript report is downloaded to your workstation.
Transcript with Annotations
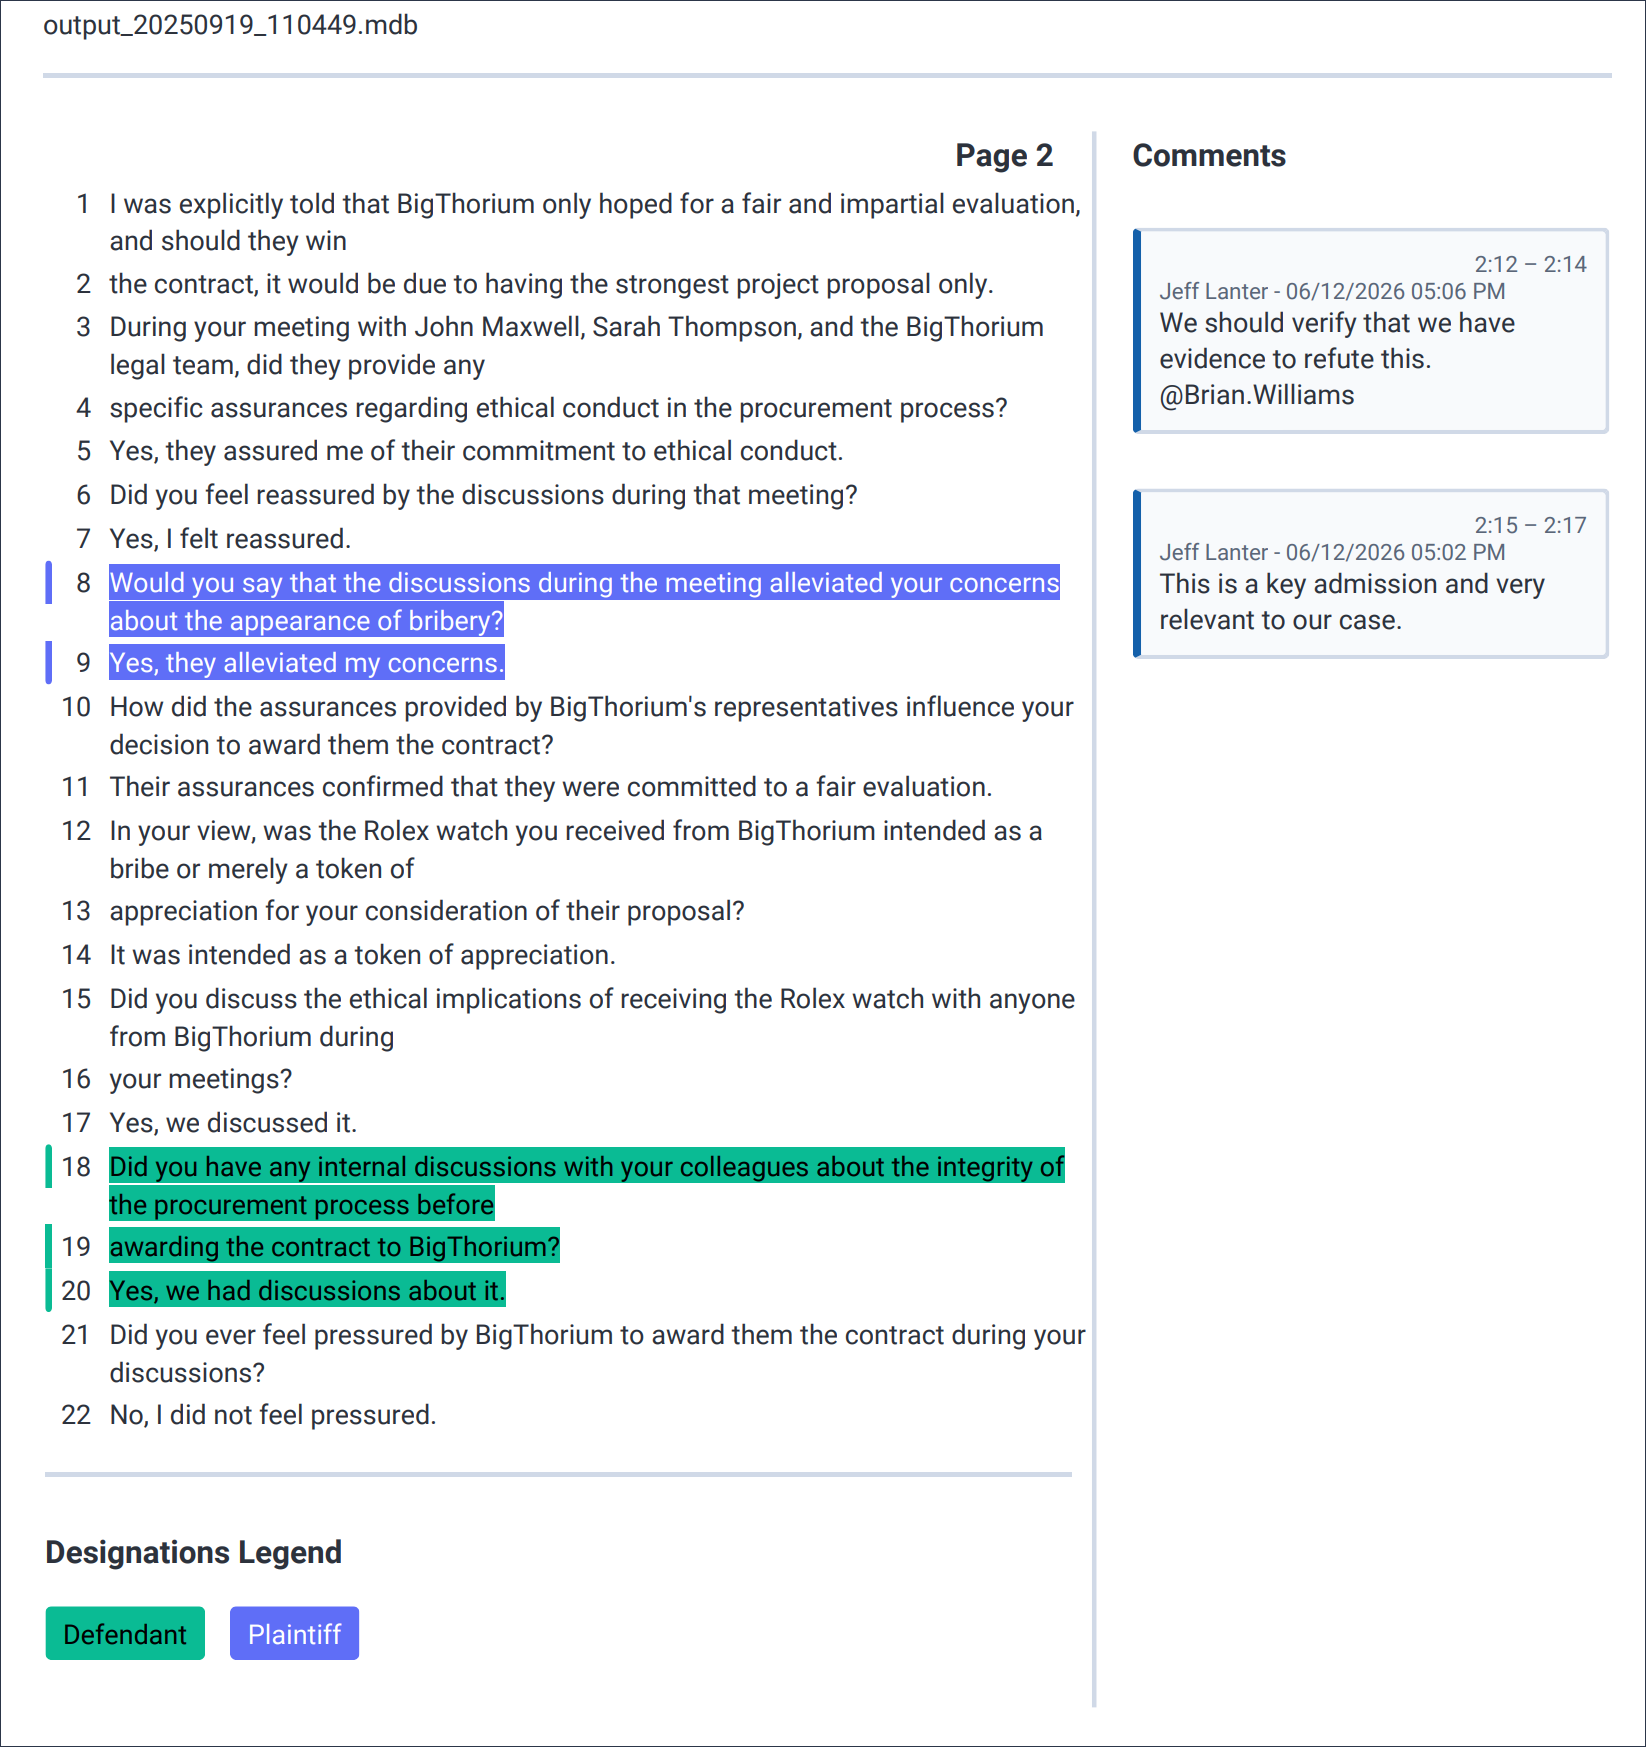
This report contains the following fields:
- Pages per sheet—Select one of the following options to determine how the transcript displays in the
report:
- 1 Page—One page of the transcript displays on a single page in the report. Optionally, you
can
include comments if you select this option.
- 4 Pages—Four pages of the transcript display on a single page in the report. Comments cannot
be
included in the report with this option selected.
- Print with—Optionally, you can select one of the following options to include the name of the
workspace
or the transcript in the report:
- All—Select to display both the name of the workspace and the transcript file in the report.
- Workspace Name—Select to display the name of the workspace where you generated the report.
- Transcript Name—Select to display the name of the transcript file based on the File Name
field.
- Location—These options only display if you select one of the Print with options. Select an
option
to determine the location of the Workspace Name or Transcript Name in the report.
- Header—Select to include the Workspace Name or Transcript Name at the top of the report.
- Footer—Select to include the Workspace Name or Transcript Name at the bottom of the report.
- Left—Select to include the Workspace Name or Transcript Name on the left side of the report.
- Center—Select to include the Workspace Name or Transcript Name in the center of the report.
- Right—Select to include the Workspace Name or Transcript Name on the right side of the
report.
- Include—Select one of the following options to determine if comments and designations display in the
report:
- All—This option is only available if you select 1 Page for the Pages per sheet field.
Select to include both comments and designations in the report.
- Comments—This option is only available if you select 1 Page for the Pages per sheet
field.
Select to display comments in the report.
- Designations—Select to display designations in the report.
- Designation Types—This option only displays if All or Designations are selected for the
Include option. By default, all designation types are included in the report.
You can use this option
to
determine which types of designations display in the report. Click on the drop-down menu and select or
deselect
designation types as desired. Only the selected designation types will display in the report.
- Legend—This option only displays if All or Designations are selected for the Include
option. Enable this option to display a legend that contains the designation type on each page that has one
or
more designations. If this option is disabled, the legend does not display in the report.
Annotations
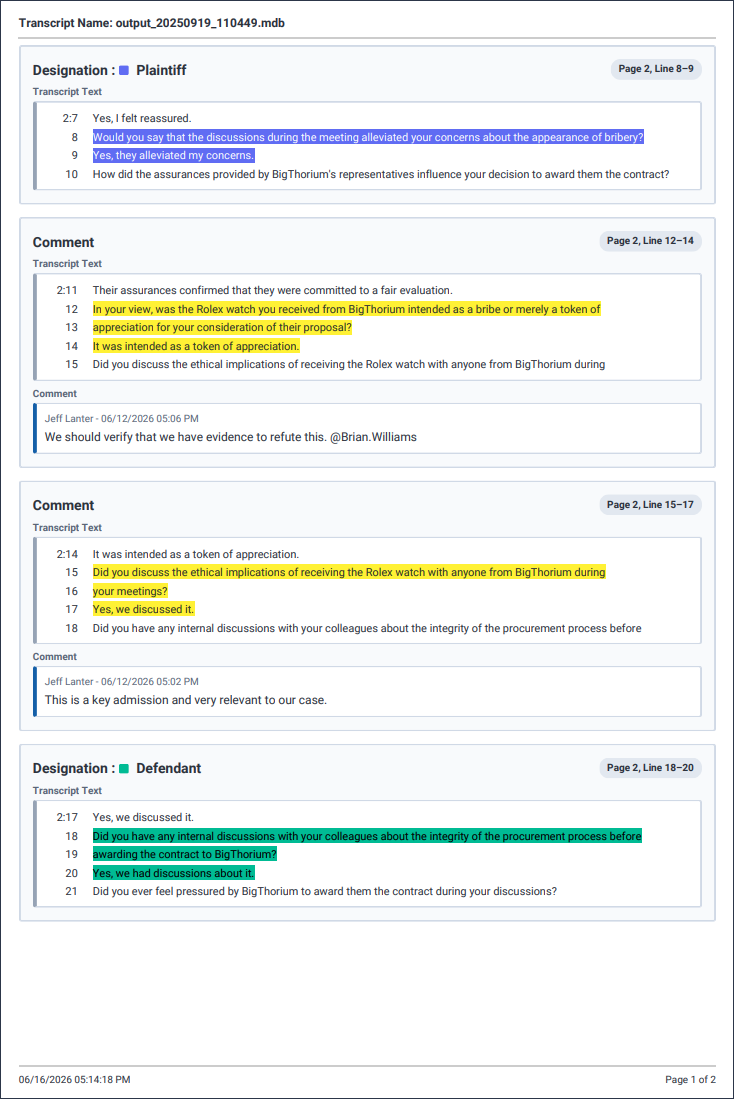
This report contains the following fields:
- Include—Select one of the following options to determine if comments, exhibit links, and designations
display in the report:
- All—Select to display comments, exhibit links, and designations in the report.
- Comments—Select to display comments in the report.
- Exhibits—Select to display exhibit links in the report.
- Designations—Select to display designations in the report.
- Designation Types—This option only displays if All or Designations are selected for the
Include option. You can use this option to determine which types of designations display in the report.
Enable
this option to display a legend that contains the designation type on each page that has one or more
designations. If this option is disabled, the legend does not display in the report.
- Include entire question & answer—This option determines if the nearest question and answer are
included in the annotation.
- Yes—If selected, the nearest question and answer are included in the annotation. For this
option
to work, the transcript file should have the questions and answers marked with the letters Q and A.
If
your transcript file does not have questions and answers marked, consider using the Additional lines
above & below option to provide more context in the report.
- No—If selected, the nearest question and answer are not included in the annotation.
- Additional lines above & below—Click on the drop-down menu and select an option to determine how
many
rows above and below each comment, exhibit links, and designation display in the report. For example, if you
select 2, there will be two lines above and below each comment, exhibit links, and designation in the
report.
Key Terms
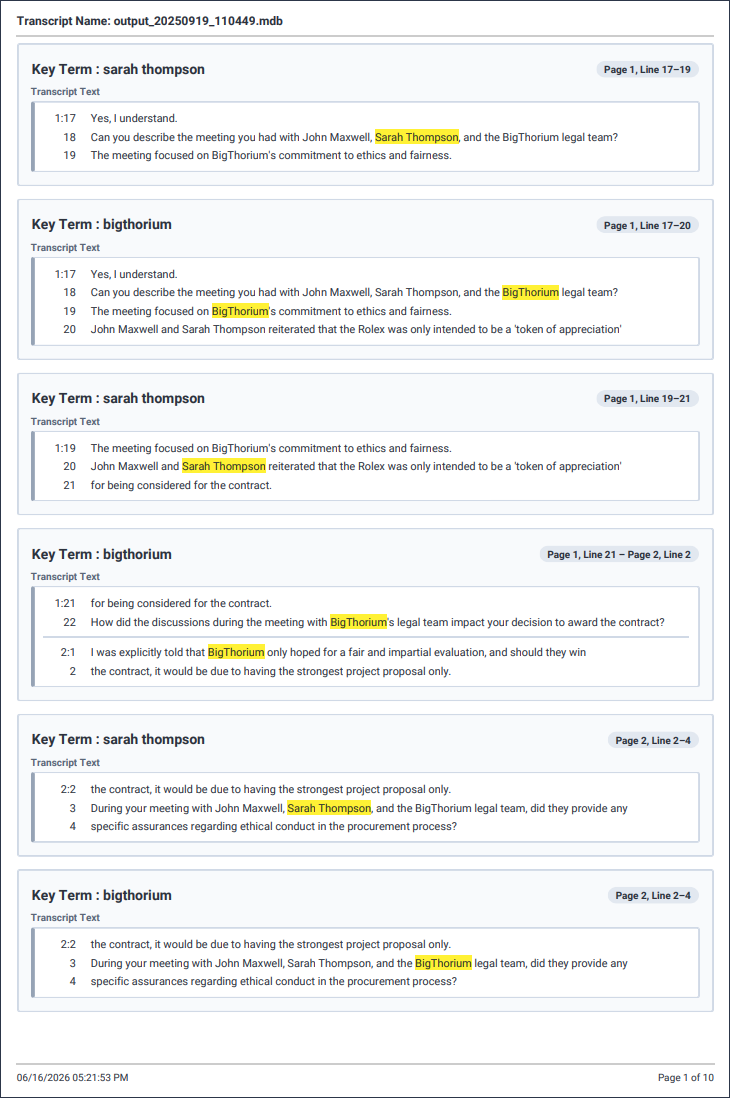
This report contains the following fields:
- Include entire question & answer—This option determines if the nearest question and answer are
included in the annotation.
- Yes—If selected, the nearest question and answer are included in the annotation. For this option
to work, the transcript file should have the questions and answers marked with the letters Q and A. If
your transcript file does not have questions and answers marked, consider using the Additional lines
above & below option to provide more context in the report.
- No—If selected, the nearest question and answer are not included in the annotation.
- Additional lines above & below—Click on the drop-down menu and select an option to determine how
many rows above and below each key term match in the report. For example, if you select 2, there will be two
lines above and below each key term match in the report.
- Key Terms—enter the exact terms you would like to search for in the transcript document and highlight
in the report and press Enter on your keyboard. Enter each term on its own separate line. Wildcards
are not supported.
Transcripts application
Creating a transcript report
To create a transcript report:
- Navigate to the Documents tab.
- Select one or more transcript documents to report on.
- Click the mass operations button and select Transcript Report. A pop-up appears.
- Select one of the following report types:
- Complete the remaining applicable fields.
- Select Export.
Annotations Digest
The Annotations Digest report exports a PDF with the selected annotations that contains the following
information:
- Case Name
- Transcript Name
- Type of annotation with total number of annotations selected
- Individual representations of each annotation with corresponding page and line numbers
- Case Dynamics items
- Time and date of digest generation
To run the Annotations Digest, fill out the following fields:
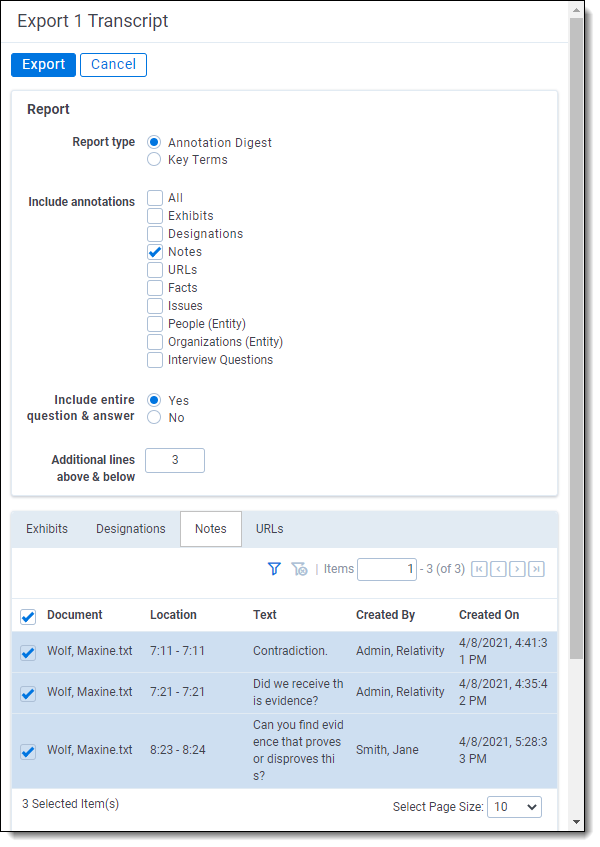
Key Terms
The Key Terms report exports a PDF with the chosen key terms that contains the following information:
- Case Name
- Transcript Name
- List of key terms
- Individual representations of each key term with corresponding page and line numbers, including the
additional lines above and below the term
- Time and date of digest creation
Key terms are highlighted in the report.
To run the Key Terms report, fill out the following fields:
- Include Entire Question and Answer - select Yes/No to include the nearest question and answer in the
selected annotation.
- Additional Lines Above & Below - enter up to 10 additional lines that you would like to include
above and below the line where the term is located.
- Key Terms - enter the key terms you would like to run the report on, with each term on a separate
line.
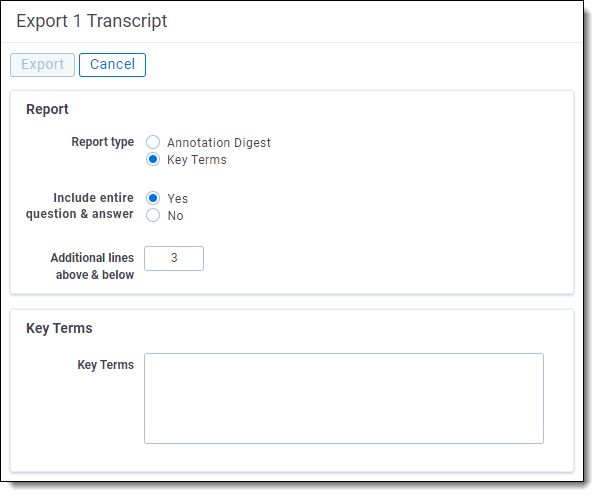
Printing from the Viewer
To print transcripts from the Viewer:
- Open a .ptf, .xmptf, .rtf, .trn, .lef, .xmef, or .txt document in the Viewer.
- Click on the Print/Save As PDF icon in the Viewer toolbar.
- Complete the following fields as desired:
- Pages per sheet—Select to print transcript pages as one page per sheet or select condensed
printing to print four pages to a sheet.
- Branding—Select to include branding as a Center Header, Center Footer, or select None for no
branding.
- Include—Select to include the Workspace Name, Transcript Name, Deposition Date, Deponent
Name, and/or Page Numbers.
- Print with—Select any of the following to include them in the print out:
- Designations—Designations will only display if you select to print transcripts as one
page per sheet.
- Notes—Notes will only display if you select to print transcripts as one page per
sheet. If Notes is selected, comments within notes are included so you can see the full
dialogue on printed transcripts.
- Legends—Select this option to include a designation cover page and legend to help you
understand the designations included in the printed transcript. The designation legend is
displayed at the bottom-right of the transcript page. If there is more content than can be
displayed in a single page, the extra designation legend content will display on a second
page.
- Select Print Transcript.


