


Importing data through Integration Points
Integration Points provides you with the ability to import a CSV file, LDAP, or load file directly into your workspace, and scheduling future or recurrent import jobs.
Although importing and exporting a load file is possible in Integration Points, the Relativity Desktop Client is the main application recommended for a stable and efficient load file import and export.
All Integration Points jobs are fully editable after run.
Note: Changing root folder permissions during import is not a supported workflow.
Importing a CSV file
To create an integration point specifically for importing an FTP (CSV file), perform the following steps:
- Navigate to the Integration Points tab in your workspace and click New Integration Point.
- In the Setup layout, complete the following fields:
- Name—the name of your integration for reference purposes.
- Type—select Import to designate the job as a data import. Selecting Import makes all of the possible import sources available for selection in the Source field below.
- Source—select FTP (CSV File) to sync to a Custodian list on an FTP Server to automatically update custodian information in your workspace. We strongly recommend using a secured FTP server and not using anonymous authentication.
- Destination—by default, this is set to Relativity and is uneditable when you select Import as the type, since you've already designated that you want to import into a Relativity workspace. You'll select the specific workspace on a subsequent layout.
- Transferred Object—select the specific Relativity Dynamic Object to which you want to import the data. If you're importing the entity object, select Entity here.
- Profile—complete the remaining Integration Points settings based on the settings of a saved profile. This includes all of the fields in the Connect to Source layout, as well as field mappings. If no profiles exist in the workspace, you don't have the option of selecting them. To apply a profile that you've already created, select it from the drop-down list. For more information on profiles, see Integration Points profiles.
- Email Notification Recipients—enter the email addresses of those who should receive notifications of whether the integration point export succeeded or failed. Use semi colons between addresses.
- Log Errors—select Yes or No to denote whether Relativity tracks item level errors.
- If you select Yes, each job also logs any item level errors.
- If you select No, Relativity doesn't log these item level errors.
- Regardless of your selection, job-level errors are always recorded in Relativity.
- Enable Scheduler—gives you the option of scheduling additional imports. Selecting Yes makes the following fields available:
- Frequency —the interval at which Relativity syncs this integration point.
- Daily—select this option to sync once every day.
- Weekly—select this option to sync on a weekly basis. You can specify how often in the Reoccur field, in which you'll provide a number value in the Every # week(s) choice. You can then specify on which day of the week the sync will take place by checking any of the days of the week listed.
- Monthly—select the day of the month that you want this integration point to sync once every month.
- Reoccur—enter the number of month(s) in which this integration point recurrently syncs.
- Send On
- Day _ the month—select the day of the month that you want this integration point to sync.
- The _ of the Month—select this option for this integration point to sync on the chosen day of every month. For example, "The Second Friday of the month."
- Start Date—the date that you want Integration Points to start syncing the data.
- End Date—(Optional) the date that you want Integration Points to stop syncing the data. Leaving the End Date blank causes the Integration Point to run indefinitely at the scheduled interval.
- Scheduled Time—the time at which this integration point syncs. This time is local to your PC, not to the server.
- Frequency —the interval at which Relativity syncs this integration point.
- Click Next to advance to the Connect to Source layout.
- In the Connect to Source layout complete the following fields:
- Connection Information
- Host—the FTP (File Transfer Protocol) or SFTP (SSH File Transfer Protocol) server address. For example, filetransfer.example.com. If Relativity can't locate this address, you will receive an error stating that the remote couldn't be resolved, and you won't be able to proceed.
- Protocol—select the FTP or SFTP protocol.
- Port—the server port to which you want to connect. The FTP protocol default Port number is 21. The SFTP protocol default Port number is 22.
- Notes: If you need to open any port, please contact Relativity Support and allow at least three days to respond. Opening a new port for your RelativityOne instance requires a Security assessment. To successfully import an FTP (CSV file), the standard network ports should be open on both RelativityOne and FTP server for outgoing connections from RelativityOne's Web and Agent servers and for listening (FTP server). Note that the firewall solutions may impact the connectivity between RelativityOne and the FTP server.
- Username—(Optional) the username to use for authentication. If left blank, Integration Points will use "anonymous."
- Password—(Optional) the associated password to use for authentication. If left blank, Integration Points will use "anonymous."
- File Information
- CSV Filepath—the location of the CSV file that Integration Points imports from the FTP/SFTP server. If you set the generated CSV file to always include the date, you can specify this file path value to use date wildcards so that Integration Points always imports the latest file. For example, the following file path will import the most recently dated file:
/export/nightlyexport/*yyyy*-*MM*-*dd*_HRIS_export.csv- Wildcards are case sensitive.
- The wildcard feature only pulls data from a file name with the current date.
- You can also use hh:MM:ss for hours, minutes, and seconds, with capital M's for minutes. When using times, only file names within the last hour are found.
- CSV Filepath—the location of the CSV file that Integration Points imports from the FTP/SFTP server. If you set the generated CSV file to always include the date, you can specify this file path value to use date wildcards so that Integration Points always imports the latest file. For example, the following file path will import the most recently dated file:
- Click Next to advance to the Map Fields layout, which contains a list of Relativity fields from their destination RDO as well as attributes that the source provider pulled back.
- In the Map Fields wizard, Map the attributes or fields so that Integration Points imports the targeted data into specific Relativity fields. You have the following options for mapping fields:
- Use the Shift + click and Ctrl + click method to select multiple fields at a time, similar to field mapping in the Relativity Desktop Client.
- Use the text search boxes above the Source and Destination lists to find a particular field.
- Use the single and double arrows or double-click a field to move selected fields between columns.
- Use the horizontal scroll bar in each column as needed to fully view long field names.
- Each column displays the number of fields available in that column. This allows you to quickly compare the number of mapped fields to make sure they match. If they do not match, an error will display when you attempt to save the Integration Point.
- The field names in the Destination column include the type of each field listed.
- Click the Map Fields button between the Source and Destination columns to automatically map all fields with matching names, except single/multiple object fields. If you have Destination fields that are mapped to Fields in the Field Catalog, Relativity tries to find name matches between these Catalog Fields, as well.
When mapping fields there are items to note:
If the WebAPIPath instance setting in the kCura.IntegrationPoints section isn't configured correctly after upgrade or installation, the Source field list is empty because it can't return any attributes, and you aren't able to map fields.
You don’t need to map all attributes or fields. Only the Unique Identifier and Object Identifier are required. The Unique Identifier should contain a value that no other item in the workspace contains. For example, use the GUID or Unique Name. The Object Identifier is the specific field on the object that holds the displayed identifier, which might not be unique. For example, the Full Name field is the Object Identifier of the Entity RDO but it might not be unique. These two identifier values can be the same.
The Full Name field is not available as an option for mapping. If you need to update the entity object, please use the LDAP provider. The LDAP provider allows the addition of new records with a field other than Full Name as the identifier. Alternatively, you may consider using Relativity Desktop Client for entity updates.
- Complete the following Import Settings on the Map Fields layout:
- Overwrite— determines how the system overwrites records once you promote data to the review workspace. This field provides the following choices:
- Append Only—promote only new records into the review workspace.
- Overlay Only—update existing records only in the review workspace. Any documents with the same workspace identifier are overlaid. This field acts as a link indicating to Relativity where to import the data. When you select this or Append/Overlay, you must complete the Multi-Select Field Overlay Behavior field described below.
- Append/Overlay—adds new records to the review workspace and overlays data on existing records. When you select this or Overlay Only, you must complete the Multi-Select Field Overlay Behavior field described below. You aren't able to create folders or re-folder documents when you select Append/Overlay.
- Multi-Select Field Overlay Behavior—determines how the system overlays records when you promote documents to the review workspace. This field is only available if you've selected either Overlay Only or Append/Overlay above. This field provides the following choices:
- Merge Values—merges all values for multi-choice and multi-object fields in the source data with corresponding multi-choice and multi-option fields in the workspace, regardless of the overlay behavior settings in the environment.
- Replace Values—replaces all values for multi-choice and multi-object fields in the source data with corresponding multi-choice and multi-option fields in the workspace, regardless of the overlay behavior settings in the environment.
- Use Field Settings—merges or replaces all values for multi-choice and multi-object fields in the source data with corresponding multi-choice and multi-option fields in the workspace according to the overlay behavior settings in the environment.
- Use Folder Path Information—use a metadata field to build the folder structure for the documents that you promote to the review workspace.
- Select Yes to use a metadata field to build the folder structure for the documents that you promote to the review workspace. Selecting Yes makes the Folder Path Information field required below.
- Select No if you don't want to build a folder structure based on metadata. In this case, Relativity loads all documents directly into the folder indicated by the promote destination, and you create no new folders in the destination workspace.
- Folder Path Information—specify a metadata field to build the folder structure for the documents that you promote to the review workspace. For the purposes of ECA and Investigation, select the Processing Folder Path option.
- Unique Identifier—for every import, you must select a field that contains the unique identifier, a field with a primary key such as a Control Number or an ArtifactID, for the specific import. If you select an Overlay or Append/Overlay to run, Integration Points uses this field as the key to determine which records already exist in the Relativity workspace.
- Use Folder Path Information—select a source field in the drop down that contains a folder path structure that you want to be created in the workspace for your documents to be placed into.
- Extracted Text—select the destination field that is mapped to a path to Extracted Text files. The content of these files will be read into the selected field. Note that only Long Text destination fields that are mapped will show up as options in the Extracted Text dropdown. You can select an encoding type for the extracted text files as well.
- Custodian Manager Contains Link—this Yes/No field is only visible when you select the Entity RDO from the LDAP source provider, and lets you indicate if Legal Hold should expect a linked value in the manager field from LDAP.
- Overwrite— determines how the system overwrites records once you promote data to the review workspace. This field provides the following choices:
- Click Save to save the Integration Point.
Once you save the Integration Point, you can run the import job. For more information, see Running the import job.
Importing LDAP
Before importing LDAP, the Integration Points LDAP Provider needs to be connected to the LDAP server. To connect successfully, open the standard network ports for both RelativityOne and the LDAP Server for outgoing connections from RelativityOne's Web and Agent servers and for listening (LDAP Server). To connect these ports, contact Relativity Support.
Note: To successfully connect Integration Points LDAP Provider to the LDAP server, the standard network ports should be open on both RelativityOne and the LDAP Server for outgoing connections from RelativityOne's Web and Agent servers and for listening (LDAP Server). LDAP connection requires using 636 (Secure Socket Layer) network ports. Custom ports are not supported and may not work correctly. Please be aware that firewall solutions may impact the connectivity between RelativityOne and LDAP server.
To create an integration point specifically for importing LDAP, perform the following steps:
- Navigate to the Integration Points tab in your workspace and click New Integration Point.
- In the Setup layout, complete the following fields:
- Name—the name of your integration for reference purposes
- Type—select Import to designate the job as a data import. Selecting Import makes all of the possible import sources available for selection in the Source field below.
- Source—select LDAP here, since you want to import data from a Lightweight Directory Access Protocol source. For example, use this source provider to import an organization's people directory.
- Destination—by default, this is set to Relativity and is uneditable when you select Import as the type.
- Transferred Object—select the specific Relativity Dynamic Object to which you want to import the data. It's typical to use the LDAP source to sync the Entity object.
- Profile—complete the remaining Integration Points settings based on the settings of a saved profile. This includes all of the fields in the Connect to Source layout, as well as field mappings. If no profiles exist in the workspace, you don't have the option of selecting them. To apply a profile that you've already created, select it from the drop-down list. For more information on profiles, see Integration Points profiles.
- Email Notification Recipients—enter the email addresses of those who should receive notifications of whether the integration point export succeeded or failed. Use semi colons between addresses.
- Log Errors—select Yes or No to denote whether Relativity tracks item level errors.
- If you select Yes, each job also logs any item level errors.
- If you select No, Relativity doesn't log these item level errors.
- Regardless of your selection, job-level errors are always recorded in Relativity.
- Enable Scheduler—gives you the option of scheduling additional imports. Selecting Yes makes the following fields available:
- Frequency —the interval at which Relativity syncs this integration point.
- Daily— select this option to sync once every day.
- Weekly—select this option to sync on a weekly basis. You can specify how often in the Reoccur field, in which you'll provide a number value in the Every # week(s) choice. You can then specify on which day of the week the sync will take place by checking any of the days of the week listed.
- Monthly—select the day of the month that you want this integration point to sync once every month.
- Reoccur—enter the number of month(s) in which this integration point recurrently syncs.
- Send On
- Day _ the month—select the day of the month that you want this integration point to sync.
- The _ of the Month—select this option for this integration point to sync on the chosen day of every month. For example, "The Second Friday of the month."
- Start Date—the date that you want Integration Points to start syncing the data.
- End Date—(Optional) the date that you want Integration Points to stop syncing the data. Leaving the End Date blank causes the Integration Point to run indefinitely at the scheduled interval.
- Scheduled Time—the time at which this integration point syncs. This time is local to your PC, not to the server.
- Frequency —the interval at which Relativity syncs this integration point.
- Click Next to advance to the Connect to Source layout.
- In the Connect to Source layout complete the following fields:
- Connection Path - the server used to locate the directory. For example, “Relativity.corp.” Note that you can optionally include specific organizational unit references by adding a forward slash (/) after the server. The following example looks up items in the Relativity.corp domain within the Employees organizational unit:
Relativity.corp/OU=Employees,OU=Accounts,OU=Relativity,DC=Relativity,DC=corp
- Object Filter String—this string specifies certain attributes that the requested LDAP entries must contain that Integration Points considers for import. For example, if you want to import users, you'd use an object filter string such as (objectClass=user). For more information on search filter syntax, refer to this Microsoft article: Search Filter Syntax.
- Authentication—Secure Socket Layer is the only applicable authentication types for port 636.
- Username—if required by the server’s authentication, enter a username to connect to the server (connection path).
- Password—if required by the server’s authentication, you can enter a password to connect to the server (connection path).
- Import Nested Items—select Yes for the import to include all sub directories in the specified connection path. Select No for the import to include only the first level items brought back in the connection path.
- Connection Path—the server used to locate the directory. For example, “Relativity.corp.” Note that you can optionally include specific organizational unit references by adding a forward slash (/) after the server. The following example looks up items in the Relativity.corp domain within the Employees organizational unit:
Relativity.corp/OU=Employees,OU=Accounts,OU=Relativity,DC=Relativity,DC=corp
- Object Filter String—this string specifies certain attributes that the requested LDAP entries must contain that Integration Points considers for import. For example, if you want to import users, you would use an object filter string such as (objectClass=user). For more information on search filter syntax, refer to this Microsoft article: Search Filter Syntax.
- Authentication—Secure Socket Layer is the only applicable authentication type for port 636.
- Username—if required by the server’s authentication, enter a username to connect to the server (connection path).
- Password—if required by the server’s authentication, you can enter a password to connect to the server (connection path).
- Import Nested Items—select Yes for the import to include all sub directories in the specified connection path. Select No for the import to include only the first level items brought back in the connection path.
- Click Next to advance to the Map Fields layout, which contains a list of Relativity fields from their destination RDO as well as attributes that the source provider pulled back.
- In the Map Fields wizard, Map the attributes or fields so that Integration Points imports the targeted data into specific Relativity fields. You have the following options for mapping fields:
- Use the Shift + click and Ctrl + click method to select multiple fields at a time, similar to field mapping in the Relativity Desktop Client.
- Use the text search boxes above the Source and Destination lists to find a particular field.
- Use the single and double arrows or double-click a field to move selected fields between columns.
- Use the horizontal scroll bar in each column as needed to fully view long field names.
- Each column displays the number of fields available in that column. This allows you to quickly compare the number of mapped fields to make sure they match. If they do not match, an error will display when you attempt to save the Integration Point.
- The field names in the Destination column include the type of each field listed.
- Click the Map Fields button between the Source and Destination columns to automatically map all fields with matching names, except single/multiple object fields. If you have Destination fields that are mapped to Fields in the Field Catalog, Relativity tries to find name matches between these Catalog Fields, as well.
- Complete the following Import Settings on the Map Fields layout:
- Overwrite—determines how the system overwrites records once you promote data to the review workspace. This field provides the following choices:
- Append Only—promote only new records into the review workspace.
- Overlay Only—update existing records only in the review workspace. Any documents with the same workspace identifier are overlaid. This field acts as a link indicating to Relativity where to import the data. When you select this or Append/Overlay, you must complete the Multi-Select Field Overlay Behavior field described below.
- Append/Overlay—adds new records to the review workspace and overlays data on existing records. When you select this or Overlay Only, you must complete the Multi-Select Field Overlay Behavior field described below. You aren't able to create folders or re-folder documents when you select Append/Overlay.
- Multi-Select Field Overlay Behavior—determines how the system will overlay records when you push documents to the review workspace. This field is only available if you've selected either Overlay Only or Append/Overlay above. This field provides the following choices:
- Merge Values—merges all values for multi-choice and multi-object fields in the source data with corresponding multi-choice and multi-option fields in the workspace, regardless of the overlay behavior settings in the environment.
- Replace Values—replaces all values for multi-choice and multi-object fields in the source data with corresponding multi-choice and multi-option fields in the workspace, regardless of the overlay behavior settings in the environment.
- Use Field Settings—merges or replaces all values for multi-choice and multi-object fields in the source data with corresponding multi-choice and multi-option fields in the workspace according to the overlay behavior settings in the environment.
- Unique Identifier—for every import, you must select a field that contains the unique identifier, a field with a primary key such as a Control Number or an ArtifactID, for the specific import. If you select an Overlay or Append/Overlay to run, Integration Points uses this field as the key to determine which records already exist in the Relativity workspace.
- Use Folder Path Information—use a metadata field to build the folder structure for the documents that you promote to the review workspace.
- Select Yes to use a metadata field to build the folder structure for the documents that you promote to the review workspace. Selecting Yes makes the Folder Path Information field required below.
- Select No if you don't want to build a folder structure based on metadata. In this case, Relativity loads all documents directly into the folder indicated by the promote destination, and you create no new folders in the destination workspace.
- Extracted Text—select the destination field that is mapped to a path to Extracted Text files. The content of these files will be read into the selected field. Note that only Long Text destination fields that are mapped will show up as options in the Extracted Text dropdown. You can select an encoding type for the extracted text files as well.
- Custodian Manager Contains Link—this Yes/No field is only visible when you select the Entity RDO from the LDAP source provider, and lets you indicate if Legal Hold should expect a linked value in the manager field from LDAP.
- Overwrite—determines how the system overwrites records once you promote data to the review workspace. This field provides the following choices:
- Click Save to save the Integration Point.
Note: If the WebAPIPath instance setting in the kCura.IntegrationPoints section isn't configured correctly after upgrade or installation, the Source field list is empty because it can't return any attributes, and you aren't able to map fields.
Note: You don’t need to map all attributes or fields. Only the Unique Identifier and Object Identifier are required. The Unique Identifier should contain a value that no other item in the workspace contains. For example, use the GUID or distinguishedName attribute. The Object Identifier is the specific field on the object that holds the displayed identifier, which might not be unique. For example, the Full Name field is the Object Identifier of the Entity RDO but it might not be unique. These two identifier values can be the same.
Once you save the Integration Point, you can run the import job. For more information, see Running the import job.
Importing a document load file
To create an integration point specifically for importing a document load file, perform the following steps:
- Navigate to the Integration Points tab in your workspace and click New Integration Point.
- In the Setup layout, complete the following fields:
- Name—the name of your integration for reference purposes
- Type—select Import to designate the job as a data import. Selecting Import makes all of the possible import sources available for selection in the Source field below.
- Source—select Load File here, since you want to import a load file into a workspace. On the Connect to Source layout, you'll have the option of specifying whether your importing a document, image, or production load file.
- Destination—by default, this is set to Relativity and is uneditable when you select Import as the type, since you've already designated that you want to import into a Relativity workspace. You'll select the specific workspace on a subsequent layout.
- Transferred Object—select the specific Relativity Dynamic Object to which you want to import the data. Since you're importing the document object, select Document here.
- Profile—complete the remaining Integration Points settings based on the settings of a saved profile. This includes all of the fields in the Connect to Source layout, as well as field mappings. If no profiles exist in the workspace, you don't have the option of selecting them. To apply a profile that you've already created, select it from the drop-down list. For more information on profiles, see Integration Points profiles.
- Email Notification Recipients—enter the email addresses of those who should receive notifications of whether the integration point export succeeded or failed. Use semi colons between addresses.
- Log Errors—select Yes or No to denote whether Relativity tracks item level errors.
- If you select Yes, each job also logs any item level errors.
- If you select No, Relativity doesn't log these item level errors.
- Regardless of your selection, job-level errors are always recorded in Relativity.
- Enable Scheduler—gives you the option of scheduling additional imports. Selecting Yes makes the following fields available:
- Frequency—the interval at which Relativity syncs this integration point.
- Daily—select this option to sync once every day.
- Weekly—select this option to sync on a weekly basis. You can specify how often in the Reoccur field, in which you'll provide a number value in the Every # week(s) choice. You can then specify on which day of the week the sync will take place by checking any of the days of the week listed.
- Monthly—select the day of the month that you want this integration point to sync once every month.
- Reoccur—enter the number of month(s) in which this integration point recurrently syncs.
- Send On -
- Day _ the month—select the day of the month that you want this integration point to sync.
- The _ of the Month—select this option for this integration point to sync on the chosen day of every month. For example, "The Second Friday of the month."
- Start Date—the date that you want Integration Points to start syncing the data.
- End Date—(Optional) the date that you want Integration Points to stop syncing the data. Leaving the End Date blank causes the Integration Point to run indefinitely at the scheduled interval.
- Scheduled Time—the time at which this integration point syncs. This time is local to your PC, not to the server.
- Frequency—the interval at which Relativity syncs this integration point.
- Click Next to advance to the Connect to Source layout.
- In the Connect to Source layout complete the following fields.
Load File Settings
- Import Type—select the type of load file you'd like to import to the workspace. Select Document Load File from the drop-down list.
- Workspace Destination Folder—select the specific folder within the destination workspace in which you want to place the documents you're importing. The folder tree you see when you click this drop-down menu is identical to the folder structure in the destination workspace.
- Import Source—click the down arrow and select a load file from the workspace's DataTransfer import location in the fileshare.
- These locations are hard-coded into Relativity and can't be changed. You can't load or export data to a different location than is listed here.
- For reference purposes, the folder(s) displayed in the Import Source field actually reside in the following generic path: Network\Server\Fileshare\EDDS{WorkspaceArtifactID}\DataTransfer\Import. Accordingly, when an admin adds data to the Import folder inside the DataTransfer folder inside the folder displaying the workspace's artifact ID, that data then becomes available for selection in the Import Source field.
- Start Line—select the line number in the load file where you want the import process to begin. The default value is 1, which results in loading the entire file.
File Encoding—the following fields are only available if you selected Document Load File for the Import Type field above.
- File Encoding—select an encoding for the document load file. (Consult your processing vendor or department to determine the correct encoding option, if necessary.) If your file contains a language other than English, choose a Unicode option. Note the following details about encoding:
- Relativity immediately applies any changes that you make to the encoding of a load file, and displays these changes in the column header preview.
- Relativity provides you with the ability to audit the encoding of a load file.
- Column—select the character used to separate columns.
- Quote—select the character used as the text qualifier.
- Newline—select the character used to indicate the end of a line in any extracted text or long text field.
- Multi-Value—select the character used to separate choices within a field.
- Nested Value—select the character used to separate the different levels of a multi-choice hierarchy. For example, you might import a field with following values: “Hot\Really Hot\Super Hot; Look at Later”. Using a semi-colon (;) as a multi-value delimiter, and a backslash (\) as a nested value delimiter, Relativity displays the choices
- File Column Headers—displays the load file's column headers. Relativity automatically updates this section of the Load File tab when you select the file encoding. Note the following details about file column headers:
- After you select an encoding, this section displays the fields in the load file. The column headers in the file display as vertical list. The fields display in alphanumeric order. The numeric value in parentheses indicates the position of the field within the file.Click Next to advance to the Map Fields layout, which contains a list of Relativity fields from their destination RDO as well as attributes that the source provider pulled back.
- In the Map Fields wizard, Map the attributes or fields so that Integration Points imports the targeted data into specific Relativity fields. You have the following options for mapping fields:
- Use the Shift + click and Ctrl + click method to select multiple fields at a time, similar to field mapping in the Relativity Desktop Client.
- Use the text search boxes above the Source and Destination lists to find a particular field.
- Use the single and double arrows or double-click a field to move selected fields between columns.
- Use the horizontal scroll bar in each column as needed to fully view long field names.
- Each column displays the number of fields available in that column. This allows you to quickly compare the number of mapped fields to make sure they match. If they do not match, an error will display when you attempt to save the Integration Point.
- The field names in the Destination column include the type of each field listed.
- Click the Map Fields button between the Source and Destination columns to automatically map all fields with matching names, except single/multiple object fields.
Note: If the WebAPIPath instance setting in the kCura.IntegrationPoints section isn't configured correctly after upgrade or installation, the Source field list is empty because it can't return any attributes, and you aren't able to map fields.
Note: You don’t need to map all attributes or fields. Only the Unique Identifier and Object Identifier are required. The Unique Identifier should contain a value that no other item in the workspace contains. For example, use the GUID or Unique Name. The Object Identifier is the specific field on the object that holds the displayed identifier, which might not be unique. For example, the Full Name field is the Object Identifier of the Entity RDO but it might not be unique. These two identifier values can be the same.
- Complete the following Import Settings on the Map Fields layout:
- Overwrite—determines how the system overwrites records once you promote data to the review workspace. This field provides the following choices:
- Append Only—promote only new records into the review workspace.
- Overlay Only—update existing records only in the review workspace. Any documents with the same workspace identifier are overlaid. This field acts as a link indicating to Relativity where to import the data. When you select this or Append/Overlay, you must complete the Multi-Select Field Overlay Behavior field described below.
- Append/Overlay—adds new records to the review workspace and overlays data on existing records. When you select this or Overlay Only, you must complete the Multi-Select Field Overlay Behavior field described below. You aren't able to create folders or re-folder documents when you select Append/Overlay.
- Multi-Select Field Overlay Behavior—determines how the system will overlay records when you push documents to the review workspace. This field is only available if you've selected either Overlay Only or Append/Overlay above. This field provides the following choices:
- Merge Values—merges all values for multi-choice and multi-object fields in the source data with corresponding multi-choice and multi-option fields in the workspace, regardless of the overlay behavior settings in the environment.
- Replace Values—replaces all values for multi-choice and multi-object fields in the source data with corresponding multi-choice and multi-option fields in the workspace, regardless of the overlay behavior settings in the environment.
- Use Field Settings—merges or replaces all values for multi-choice and multi-object fields in the source data with corresponding multi-choice and multi-option fields in the workspace according to the overlay behavior settings in the environment.
- Copy Native Files—this Yes/No field is only visible when you select the Documents RDO, and lets you indicate whether Integration Points should import any native files in the sync.
- Native File Path—this field appears if you select Yes to import the native files. From the drop-down menu, select the source provider attribute containing the file path links to the natives that you want to import.
- Unique Identifier—for every import, you must select a field that contains the unique identifier, a field with a primary key such as a Control Number or an ArtifactID, for the specific import. If you select an Overlay or Append/Overlay to run, Integration Points uses this field as the key to determine which records already exist in the Relativity workspace.
- Use Folder Path Information—use a metadata field to build the folder structure for the documents that you promote to the review workspace.
- Select Yes to use a metadata field to build the folder structure for the documents that you promote to the review workspace. Selecting Yes makes the Folder Path Information field required below.
- Select No if you don't want to build a folder structure based on metadata. In this case, Relativity loads all documents directly into the folder indicated by the promote destination, and you create no new folders in the destination workspace.
- You have the option of creating folders or re-foldering documents when you select Append/Overlay for the Overwrite field.
- You have the option of re-foldering documents for the Overwrite field through the Move Existing Documents field below.
- Folder Path Information—specify a metadata field to build the folder structure for the documents that you promote to the review workspace. For the purposes of ECA and Investigation, select the Processing Folder Path option.
- Move Existing Documents—re-folder documents that were previously imported into the destination workspace, but were only placed in the root case folder and not to any subfolders. This field is useful for situations in which you want to add new data to the destination workspace while overlaying existing data.
- Select Yes to move existing documents into the folders provided in the Folder Path Information field. For example, you previously imported custodian Sally Smith's files into the destination workspace's root folder; now, in addition to placing the documents from the saved search specified in this integration point in their subfolder, you also want to move those previously migrated documents into Sally Smith's subfolder, you'd select Yes.
- Select No if you don’t want to re-folder existing documents.
- Extracted Text—select the destination field that is mapped to a path to Extracted Text files. The content of these files will be read into the selected field. Note that only Long Text destination fields that are mapped will show up as options in the Extracted Text dropdown. You can select an encoding type for the extracted text files as well.
- Cell contains file location—select this option if your extracted text is in document-level text files, and your load file contains a path to those text files.
- Encoding for undetectable files—select an encoding for the text file.
- Overwrite—determines how the system overwrites records once you promote data to the review workspace. This field provides the following choices:
- Click Save to save the Integration Point.
Once you save the Integration Point, you can run the import job. For more information, see Running the import job.
Importing an image load file
To create an integration point specifically for importing an image load file, perform the following steps:
- Navigate to the Integration Points tab in your workspace and click New Integration Point.
- In the Setup layout, complete the following fields:
- Name—the name of your integration for reference purposes
- Type—select Import to designate the job as a data import. Selecting Import makes all of the possible import sources available for selection in the Source field below.
- Source—select Load File here, since you want to import a load file into a workspace. On the Connect to Source layout, you'll have the option of specifying whether your importing a document, image, or production load file.
- Destination—by default, this is set to Relativity and is uneditable when you select Import as the type, since you've already designated that you want to import into a Relativity workspace. You'll select the specific workspace on a subsequent layout.
- Transferred Object—select the specific Relativity Dynamic Object to which you want to import the data. Since you're importing the document object, select Document here.
- Profile—complete the remaining Integration Points settings based on the settings of a saved profile. This includes all of the fields in the Connect to Source layout, as well as field mappings. If no profiles exist in the workspace, you don't have the option of selecting them. To apply a profile that you've already created, select it from the drop-down list. For more information on profiles, see Integration Points profiles.
- Email Notification Recipients—enter the email addresses of those who should receive notifications of whether the integration point export succeeded or failed. Use semi colons between addresses.
- Log Errors—select Yes or No to denote whether Relativity tracks item level errors.
- If you select Yes, each job also logs any item level errors.
- If you select No, Relativity doesn't log these item level errors.
- Regardless of your selection, job-level errors are always recorded in Relativity.
- Enable Scheduler—gives you the option of scheduling additional imports. Selecting Yes makes the following fields available:
- Frequency—the interval at which Relativity syncs this integration point.
- Daily—select this option to sync once every day.
- Weekly—select this option to sync on a weekly basis. You can specify how often in the Reoccur field, in which you'll provide a number value in the Every # week(s) choice. You can then specify on which day of the week the sync will take place by checking any of the days of the week listed.
- Monthly—select the day of the month that you want this integration point to sync once every month.
- Reoccur—enter the number of month(s) in which this integration point recurrently syncs.
- Send On -
- Day _ the month—select the day of the month that you want this integration point to sync.
- The _ of the Month—select this option for this integration point to sync on the chosen day of every month. For example, "The Second Friday of the month."
- Start Date—the date that you want Integration Points to start syncing the data.
- End Date—(Optional) the date that you want Integration Points to stop syncing the data. Leaving the End Date blank causes the Integration Point to run indefinitely at the scheduled interval.
- Scheduled Time—the time at which this integration point syncs. This time is local to your PC, not to the server.
- Frequency—the interval at which Relativity syncs this integration point.
- Click Next to advance to the Connect to Source laMicrosoft Entra IDyout.
- In the Source Information layout complete the following fields.
- Import Type—select the type of load file you'd like to import to the workspace. Select Image Load File from the drop-down list.
- Workspace Destination Folder—select the specific folder within the destination workspace in which you want to place the documents you're importing. The folder tree you see when you click this drop-down menu is identical to the folder structure in the destination workspace.
- Import Source—click the down arrow and select a load file from the workspace's DataTransfer import location in the fileshare.
- These locations are hard-coded into Relativity and can't be changed. You can't load or export data to a different location than is listed here.
- For reference purposes, the folder(s) displayed in the Import Source field actually reside in the following generic path: Network\Server\Fileshare\EDDS{WorkspaceArtifactID}\DataTransfer\Import. Accordingly, when an admin adds data to the Import folder inside the DataTransfer folder inside the folder displaying the workspace's artifact ID, that data then becomes available for selection in the Import Source field.
- Start Line—select the line number in the load file where you want the import process to begin. The default value is 1, which results in loading the entire file.
- Numbering—determines the numbering scheme of the images you're importing.
- Use load file page IDs—select this to use the default setting to number the images, which is the control number.
- Auto-number pages—select this option if page IDs in the production or image load file are not unique. For example, you might import a set of TIFFs that share a page identifier for each record. The page identifiers are shared per document and are not unique. The Auto-number pages option appends the 01, .02, and so on to the page-level identifier, creating a unique number per page.
Note: Auto-numbering pages is useful if you are importing productions or image load files that use document-level numbering without page numbers, and include documents that contain multiple pages.
- Import Mode
- Append Only—select this to load only new records.
- Overlay Only—select this to update existing records only. When you select this, the required Overlay Identifier field appears below This field acts as a link indicating to Relativity where to import the data.
- Append/Overlay—select this to add new records and overlay data on existing records.
Note: Select append to import the extracted text and natives from a .dat file. Select overlay when overlaying production images onto the existing documents.
- Overlay Idenitifier—select a field that stores overlaid document-level Bates information on the document. This is only available if you selected Overlay Only for the import mode.
- Copy Files to Document Repository—determines whether or not Relativity will copy files from the location in the image load file field to a selected document repository.
- Yes—select this to copy files to a document repository that you select in the File Repository field below.
- No—select this if the native files already reside in their final location, which is accessible by Relativity.
- Notes: The No option isn't available for selection in RelativityOne because all files must be copied to a selected File Repository.
- File Repository—select the file repository to which you want to copy the files in the image load file. This field is only visible if you selected Yes for the Copy Files to Document Repository field above. Click Default to switch this value to the default file repository used by the workspace.
- Copy Files to Document Repository—determines whether or not Relativity will copy files from the location in the image load file field to a selected document repository.
- Yes—select this to copy files to a document repository that you select in the File Repository field below.
- No—select this if the native files already reside in their final location, which is accessible by Relativity.
Note: The No option is not available for selection in RelativityOne because all files must be copied to a selected File Repository.
- File Repository—select the file repository to which you want to copy the files in the image load file. This field is only visible if you selected Yes for the Copy Files to Document Repository field above. Click Default to switch this value to the default file repository used by the workspace.
- Load Extracted Text—determines whether or not Relativity will load new text for Production documents that may be revised based on redactions.
- The text files must have .txt extensions, be stored in the same directory as the TIFF files, and be named in the same as the TIFF files.
- This field is only available for image load files.
- When you select this, the required Encoding for undetectable files field appears below.
- Encoding for undetectable files—select an encoding for the new text file that Relativity loads, per your enabling of the Load Extracted Text field above.
Load File Settings
Import Settings—the following fields are only available if you selected Image or Production Load File for the Import Type field above.
Note: The fields in the drop-down menu are fixed-length fields with a manually-applied SQL index. Note that this is NOT the same as adding the field to the full-text index. Contact your SQL database administrator to apply an index to a field.
- Click Save to save the Integration Point.
Once you save the Integration Point, you can run the import job. For more information, see Running the import job.
Importing from Microsoft Entra ID
Note: As of October 2023, Microsoft renamed Azure Active Directory (Azure AD) to Microsoft Entra ID. This site has been updated to reflect the name change, where applicable. Refer to Microsoft documentation for more information.
You will need the following to complete the setup in Integration Points:
- Application ID from Microsoft Azure
- Application Secret from Microsoft Azure
- Domain address of Microsoft Azure instance
- Any filtering requirements that will be used to filter imported data
- Field Mappings to map fields between Relativity and Microsoft Entra ID
When creating an integration point, follow the steps below:
- Navigate to the Integration Points tab.
- Click New Integration Point.
- Complete the following fields in the Set Integration Details layout:
- Name—the name of your integration for reference purposes.
- Notes: Name the application in Integration Points the same as you did in Microsoft Entra ID for easy location of application when needing to make updates.
- Type—select Import to designate the job as a data import. Selecting Import makes all the possible import sources available for selection in the Source field below.
- Source—all possible third-party systems that you can import data from. Select Microsoft Entra ID.
- Destination—by default, this is set to Relativity and isn't editable when you select Import as the type, since you've already designated that you want to import into a Relativity workspace. You'll select the specific workspace on a subsequent layout.
- Transferred Object—the Relativity Dynamic Object (RDO) to which you want to import the data. Select the Entity object.
- Profile—complete the remaining Integration Points settings based on the settings of a saved profile. This includes all of the fields in the Connect to Source layout, as well as field mappings. If no profiles exist in the workspace, you don't have the option of selecting them. To apply a profile that you've already created, select it from the drop-down list.
- Email notifications—the email address(es) to which Integration Points sends a notification detailing whether the sync succeeded or failed. Use semicolons between addresses.
- Log errors—select Yes or No to denote whether Integration Points tracks item level errors.
- If you select Yes, each job also logs any item level errors. For example, a fixed length text field not being large enough to contain an imported value.
- If you select No, Integration Points doesn't log item level errors.
- Regardless of your selection, job-level errors are always recorded in Relativity.
- Enable Scheduler—gives you the option of scheduling additional imports. Selecting Yes makes the following fields available:
- Frequency—the interval at which Relativity syncs once every day.
- Daily—select this option to sync once every day.
- Weekly—select this option to sync on a weekly basis. You can specify how often in the Reoccur field, in which you'll provide a number value in Every # week(s) choice. You can then specify on which day of the week the sync will take place by checking any of the days of the week listed.
- Monthly—select the day of the month that you want this integration point to sync once every month.
- Reoccur—enter the number of months in which this integration point recurrently syncs.
- Send on
- Day _ the month—select the day of the month that you want this integration point to sync.
- The _ of the Month—select this option for this integration point to sync on the chosen day of every month. For example, The Second Friday of the month."
- Start Date—the date you want Integration Points to start syncing the data.
- End Date—(Optional) the date you want Integration Points to stop syncing the data. Leaving teh End Date blank causes the integration point to run indefinitely at the scheduled interval.
- Scheduled Time—the time at which this integration point syncs. This time is local to your PC, not the server.
- Frequency—the interval at which Relativity syncs once every day.
- Name—the name of your integration for reference purposes.
- Click Next to continue to the Connect to Source layout.
- Complete the following fields in the Connect to Source layout:
- Application ID—The ID of the application was created in the Azure Portal. For more information, see the Finding Azure credentials.
- Password—The associated password for the application that was created in the Azure Portal.
- Domain—The Microsoft Entra ID tenant domain the Azure application resides in.
- Filter By —You can limit the records imported by limiting import to specific users or groups.
- Filter—The filter condition used to identify Users or Groups that should be imported. Filters must be written using the Graph query syntax (e.g. department eq ‘Engineering’)
- MS-Graph Version—Determines which version of the Graph API Integration Points will use when interfacing with Microsoft Entra ID. Defaults to version 1.0 of the Graph API if left blank. Another available option is Beta.
- Click Next to continue to the Map Fields layout.
- Notes: A warning message appears at top of page if not validated. Can’t move to next step until error is resolved.
- Map the fields from the Destination (workspace) to the Source (load file) so that Integration Points imports the targeted data into specific Relativity fields. Microsoft Entra ID software integration contains the following default Source mapped fields. The Destination fields are dependent on what fields currently exist in your workspace.
- Notes: If Relativity can't locate fields in your workspace for the default mapping, Relativity moves these fields to the bottom of the Source list. You can either map these fields to other workspace fields, or remove them from the list.
- (Optional) Add or remove any fields from the field mapping based on your preferences. Click Map Fields to map default selections.
- Notes: Rename Relativity fields to match Microsoft to increase the number of auto-mapped fields. You still may have to manually update fields after auto-mapping.
- Complete the following fields in the Settings card:
- Overwrite—includes options to Append Only, Overlay Only, or Append/Overlay. By default, the application selects Append Only.
- Multi-Select Field Overlay Behavior—only available if Overlay Only or Append/Overlay are selected in the Overwrite field. This field determines how the system will overlay records when you push documents to the review workspace. This field provides the following choices:
Merge Values—merges all values for multi-choice and multi-object fields in the source data with corresponding multi-choice and multi-option fields in the workspace, regardless of the overlay behavior settings in the environment.
- Replace Values—replaces all values for multi-choice and multi-object fields in the source data with corresponding multi-choice and multi-option fields in the workspace, regardless of the overlay behavior settings in the environment.
Use Field Settings—merges or replaces all values for multi-choice and multi-object fields in the source data with corresponding multi-choice and multi-option fields in the workspace according to the overlay behavior settings in the environment.
- Unique Identifier—includes the options from the mapped fields. Use the default UniqueID option. In Microsoft Entra ID, map the UniqueID to the ID field to guarantee future custodian updates.
- Entity Manager Contains Link—this Yes/No field is only visible when you select the Entity RDO from the LDAP source provider, and lets you indicate if Legal Hold should expect a linked value in the manager field from LDAP.
- Click Save.
Once all of the settings have been entered the Integration Points job will run according to the schedule that was set. If you would like to run the job ahead of that time. Please follow the instructions at this link.
Reporting
Reporting on Microsoft Entra ID imports can be done in Integration Points. For more information, see Monitoring job history and errors.
Importing a production load file
To create an integration point specifically for importing a production load file, perform the following steps:
- Navigate to the Integration Points tab in your workspace and click New Integration Point.
- In the Setup layout, complete the following fields:
- Name—the name of your integration for reference purposes
- Type—select Import to designate the job as a data import. Selecting Import makes all of the possible import sources available for selection in the Source field below.
- Source—select Load File here, since you want to import a load file into a workspace. On the Connect to Source layout, you'll have the option of specifying whether your importing a document, image, or production load file.
- Destination—by default, this is set to Relativity and is uneditable when you select Import as the type, since you've already designated that you want to import into a Relativity workspace. You'll select the specific workspace on a subsequent layout.
- Transferred Object—select the specific Relativity Dynamic Object to which you want to import the data. Since you're importing the document object, select Document here.
- Profile—complete the remaining Integration Points settings based on the settings of a saved profile. This includes all of the fields in the Connect to Source layout, as well as field mappings. If no profiles exist in the workspace, you don't have the option of selecting them. To apply a profile that you've already created, select it from the drop-down list. For more information on profiles, see Integration Points profiles.
- Email Notification Recipients—enter the email addresses of those who should receive notifications of whether the integration point export succeeded or failed. Use semi colons between addresses.
- Log Errors—select Yes or No to denote whether Relativity tracks item level errors.
- If you select Yes, each job also logs any item level errors.
- If you select No, Relativity doesn't log these item level errors.
- Regardless of your selection, job-level errors are always recorded in Relativity.
- Enable Scheduler—gives you the option of scheduling additional imports. Selecting Yes makes the following fields available:
- Frequency—the interval at which Relativity syncs this integration point.
- Daily—select this option to sync once every day.
- Weekly—select this option to sync on a weekly basis. You can specify how often in the Reoccur field, in which you'll provide a number value in the Every # week(s) choice. You can then specify on which day of the week the sync will take place by checking any of the days of the week listed.
- Monthly—select the day of the month that you want this integration point to sync once every month.
- Reoccur—enter the number of month(s) in which this integration point recurrently syncs.
- Send On -
- Day _ the month—select the day of the month that you want this integration point to sync.
- The _ of the Month—select this option for this integration point to sync on the chosen day of every month. For example, "The Second Friday of the month."
- Start Date—the date that you want Integration Points to start syncing the data.
- End Date—(Optional) the date that you want Integration Points to stop syncing the data. Leaving the End Date blank causes the Integration Point to run indefinitely at the scheduled interval.
- Scheduled Time—the time at which this integration point syncs. This time is local to your PC, not to the server.
- Frequency—the interval at which Relativity syncs this integration point.
- Click Next to advance to the Connect to Source layout.
- In the Source Information layout complete the following fields.
- Import Type—select the type of load file you'd like to import to the workspace. Select Production Load File from the drop-down list.
- Workspace Destination Folder—select the specific folder within the destination workspace in which you want to place the documents you're importing. The folder tree you see when you click this drop-down menu is identical to the folder structure in the destination workspace.
- Import Source—click the down arrow and select a load file from the workspace's DataTransfer import location in the fileshare.
- These locations are hard-coded into Relativity and can't be changed. You can't load or export data to a different location than is listed here.
- For reference purposes, the folder(s) displayed in the Import Source field actually reside in the following generic path: Network\Server\Fileshare\EDDS{WorkspaceArtifactID}\DataTransfer\Import. Accordingly, when an admin adds data to the Import folder inside the DataTransfer folder inside the folder displaying the workspace's artifact ID, that data then becomes available for selection in the Import Source field.
- Start Line—select the line number in the load file where you want the import process to begin. The default value is 1, which results in loading the entire file.
- Numbering—determines the numbering scheme of the production you're importing.
- Use load file page IDs—select this to use the default setting to number the production, which is the control number.
- Auto-number pages—select this option if page IDs in the production or image load file are not unique. For example, you might import a set of TIFFs that share a page identifier for each record. The page identifiers are shared per document and are not unique. The Auto-number pages option appends the 01, .02, and so on to the page-level identifier, creating a unique number per page.
Note: Auto-numbering pages is useful if you are importing productions or image load files that use document-level numbering without page numbers, and include documents that contain multiple pages.
- Import Mode
- Append Only—select this to load only new records.
- Overlay Only—select this to update existing records only. When you select this, the required Overlay Identifier field appears below This field acts as a link indicating to Relativity where to import the data.
- Append/Overlay—select this to add new records and overlay data on existing records.
Note: Select append to import the extracted text and natives from a .dat file. Select overlay when overlaying production images onto the existing documents.
- Overlay Idenitifier—select a field that stores overlaid document-level Bates information on the document. This is only available if you selected Overlay Only for the import mode.
- Copy Files to Document Repository—determines whether or not Relativity will copy files from the location in the image load file field to a selected document repository.
- Yes—select this to copy files to a document repository that you select in the File Repository field below.
- No—select this if the native files already reside in their final location, which is accessible by Relativity.
- File Repository—select the file repository to which you want to copy the files in the image load file. This field is only visible if you selected Yes for the Copy Files to Document Repository field above. Click Default to switch this value to the default file repository used by the workspace.
- Production—select a Relativity production that you want to upload images to. Only new production sets without a production source appear in this list.
Load File Settings
Import Settings—the following fields are only available if you selected Image or Production Load File for the Import Type field above.
Note: The fields in the drop-down menu are fixed-length fields with a manually-applied SQL index. Note that this is NOT the same as adding the field to the full-text index. Contact your SQL database administrator to apply an index to a field.
- Click Save to save the Integration Point.
Once you save the Integration Point, you can run the import job. For more information, see Running the import job.
Running the import job
Once you've created an Integration Point, you can manually run an integration point by selecting the Integration Point, and clicking Run from the console. This lets you run an integration point instantly, as opposed to scheduling an integration point to run.
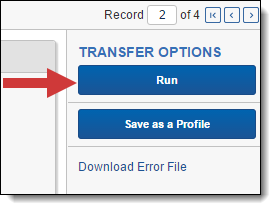
Click OK on the run confirmation message.
The Run button turns to red and gives you the option of stopping the job you just kicked off, as long as that job has a status of Pending or Processing. For more information, see Importing data through Integration Points.
If necessary, monitor the progress of the promote job by viewing the Status field in the Status view at the bottom of the layout. You'll see any of the following status values:
- Pending - the job has yet to be picked up by an agent.
- Processing - the agent has picked up the job and is in the process of completing it.
- Completed - the job is complete, and no errors occurred.
- Completed with errors - the job is complete and errors have occurred.
- Error - job failed - a job-level error occurred and the job didn't complete because it failed.
- Stopping - you clicked the Stop button, and the stop job has yet to be picked up by an agent.
- Stopped - the job has been stopped.
Downloading the error file
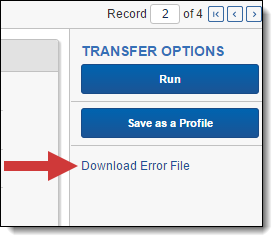
If your integration point encounters any errors during its run, the Download Error File link on the Transfer Options console is activated. This gives you the option of downloading an Excel file containing all the errors found in the integration point. Note that this option is available for load file imports only and isn't visible for other providers.
To download this file, click the Download Error File link in the Transfer Options console.
Then open the downloaded file in the bottom left corner of your screen.
(Click to expand)
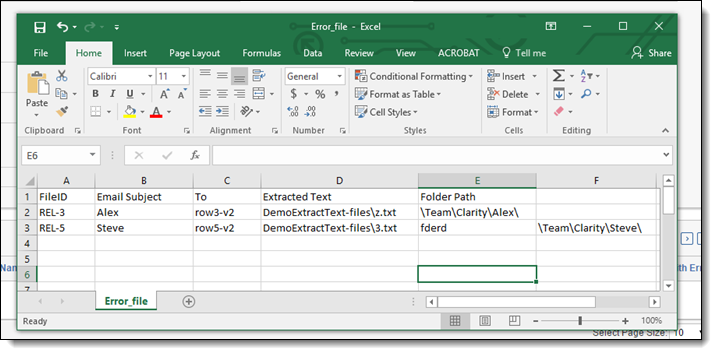
You now have the option of manually fixing the errors, saving the modified file in your DataTransfer\Import folder, and creating a new integration point to import those fixed files, seeing that they didn't make it in with the original import. When doing this, simply ensure that the Import Source field of the new integration point refers to the file you just added.
Integration point agent considerations
When you have one agent enabled, a scheduled integration points job is always queued and is always run. When you have more than one agent, however, the scheduled job may get queued or it may result in an error, after which that job is rescheduled. In other words, there is mixed behavior when you have enabled more than one agent.
The following table provides a breakdown of this behavior:
| If | Then |
|---|---|
|
|
|
|
|
|
|
|
Disabling an Integration Point sync
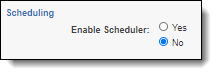
To disable an integration point sync, simply turn off the scheduler.
- From the Integration Points landing page, click the Integration Point Name that you wish to disable.
- Click Edit.
- From the Import Scheduling section under Enable Scheduler, select No.This disables the scheduling mechanism for that integration point.
Scheduler date format considerations
The integration points scheduler accepts non-U.S. date formats to further accommodate, for example, users in Australia.
In this case, the default language in your browser settings is set to English (Australian) or any other language that would display a non-U.S. date format of day/month/year instead of /month/day/year.
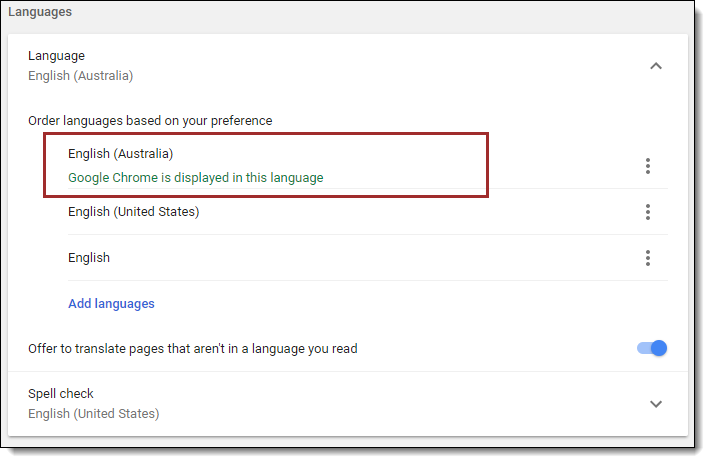
Relativity then properly displays the date when you select it for the Start and End Date fields in the Scheduling category.
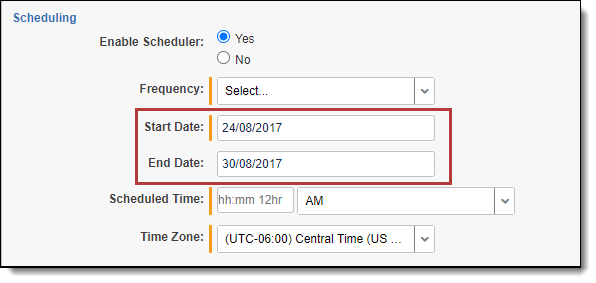
This date format will also appear anywhere else in Relativity where a date is displayed, such as on the saved Integration Point Details layout and the Date Last Modified field on the Document list.