Microsoft Entra ID provider
Note: As of October 2023, Microsoft renamed Azure Active Directory (Azure AD) to Microsoft Entra ID. This site has been updated to reflect the name change, where applicable. Refer to Microsoft documentation for more information.
The next step is to set up an application in Microsoft Azure which can be used to configure an Integration Point in Relativity. Only an Application Administrator with access can create an application, find credentials, and delete an application. If you don’t have permissions, contact your admin. For more information on Application Administrators, see Microsoft’s documentation.
The final step is to import Microsoft Entra ID into Relativity.
Registering an Azure application and credentials
To create your application ID and secret, you must have Application Administrator privileges to log into your Azure Portal and register an app.
Start registering your app by following the steps below:
Note: This needs to be done on the client side by an Azure user with sufficient rights.
- Open your Azure Portal.
- Click More Services.
- Search for and select Azure Active Directory.
- In the left-navigation menu, click App registrations.
- Click New Registration.
This will open the Register an application page. - Enter an application name in the Name field.
- Select Accounts in this organizational directory only as the supported account type.
-
Enter the redirect URL, http://localhost/, as the sign-on URL.
- Click Register.
From the app's page, add permissions to the web API. To add permissions, follow the steps below:
- Click API Permissions.
- Click Add a permission.
- Click Microsoft Graph.
- Select Application Permissions.
- Select the following options from the Application Permissions section:
Directory – Directory.Read.All
Group – Group.Read.All
- User – User.Read.All
- Notes: Note: This permission is required if Filter by Group functionality is used.
-
Click Add Permission.
-
Click Grant Permission.
Finally, grant Admin consent for the API by following the steps below:
- Click the API Permissions tab.
- Click Grant admin consent for [tenant].
- In the pop-up window, click Accept.
Finding Azure credentials
If an application is already created and you need to find the application information to complete the Source Connection step, follow the steps below:
In the Azure Portal,
- Click Azure Active Directory.
- In the left-navigation menu, click Enterprise applications.
- In the list of applications, locate your application by filtering or sorting.
- Click your application.
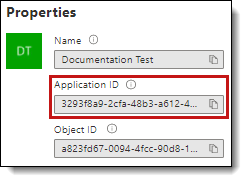
This will open the application page. - In the left-navigation menu, click Properties.
- Copy the Application ID.
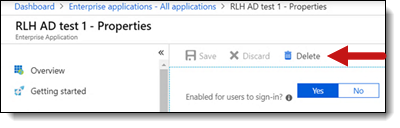
Removing application access
Removing access to an application can be done outside of Relativity in Microsoft Entra ID. To remove access, you need to log into Microsoft Entra ID. Locate and open the application. In the application, click Delete.