


You can use objects in Case Dynamics to store information related to your case. Object types include:
- Entities - functions as the central location for people, companies, organization groups, and their metadata. Case Dynamics, Legal Hold, Processing, and Analytics all leverage the Entity object.
- Facts - statements that can be shown to be real or true. You can link other objects and documents to your facts to help build out your case.
- Issues - disputed topics within the case. You can link other objects and documents to your issues to help build out your case.
- Interview Questions - compose questions and link them to facts and documents in preparation of depositions.
- Outlines - a rich text editor where you can build case narratives, create free-form outlines, and link to existing or create new Case Dynamics objects and documents.
The following tabs can also be used to store information related to your case:
- Printing Profiles - allows you to specify what Case Dynamics information you would like to print. You can print facts, issues, interview questions, and outlines along with associated information, such as documents and excerpts.
- Report Set - enables you to view Case Dynamics objects without internet access or export Case Dynamics views into an Excel document.
- Timeline Builder - displays the facts of a case in chronological order.
Importing Case Dynamics objects
You can import an Excel file with Facts, Key People, or Issues with assigned numeric order and color coding to the corresponding Case Dynamics object. For example, you might import a contact list to the Key People object or a list of issues to the Issues object. The example below uses Issues to show how each issue and sub-issue corresponds to the import file.
(Click to expand image)
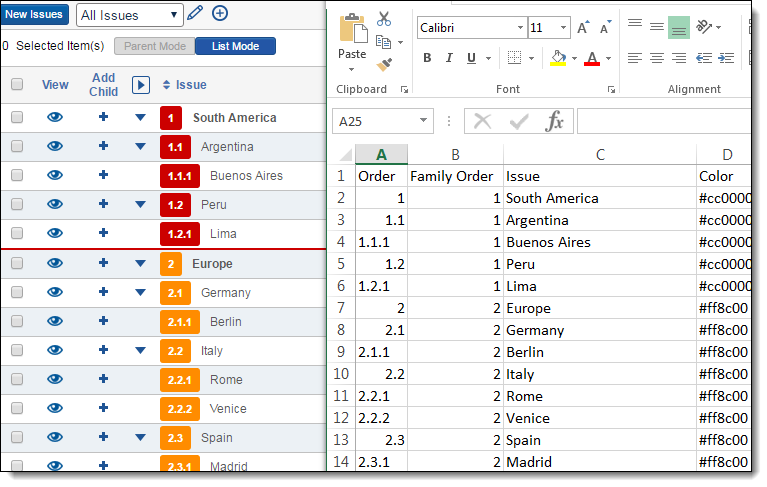
Use the hexadecimal values listed in the table to customize your Issues import.
| Hexadecimal value | |
|---|---|
| Light Gray | #e0e0e0 |
| Dark Gray | #807e7e |
| Pink | #ffd0d8 |
| Red | #cc0000 |
| Yellow | #ffe060 |
| Orange | #ff8c00 |
| Light Blue | #a4d9f3 |
| Dark Blue | #1d5ab8 |
| Light Green | #addfae |
| Dark Green | #339933 |
To import issues into Case Dynamics using the Relativity Desktop Client (RDC).
- Ensure that you have formatted the Excel import file correctly.
- Open the RDC, and select the Case Dynamics workspace to which you are importing issues.
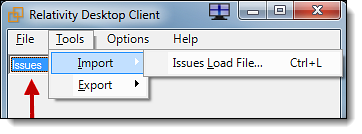
- Select the item you want to import to, then click Tools > Import > [Item] Load File...
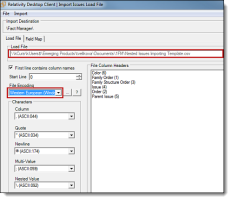
- Ensure the following settings are selected.
(Click to expand image)
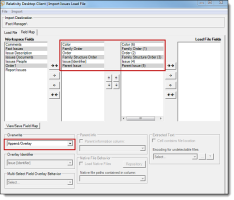
- Map the appropriate fields and ensure Append/Overlay is selected before import.
(Click to expand image)
- Click Import > Import File.


Viewing a Case Dynamics object
Note: The following illustrates screen content based on the Facts sub-tab. The data entry screens and practices for other objects are similar.
To view a Fact:
- Click the Case Dynamics tab.
- Click the Facts tab.
- To view additional details, click
 .
.
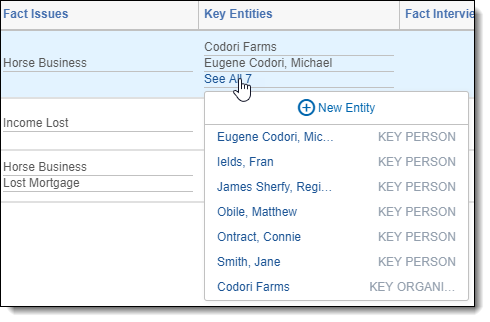
To streamline the inline coding process, Case Dynamics caps how many linked objects display in a field in inline views. If you hover over the number below the last linked object for a field, a pop-up dialog box displays the additional linked objects. You can click on an object's name to see the object's info in a pop-up window. You can also create new issues, entities, and interview questions, or link facts and documents from the pop-up dialog box.
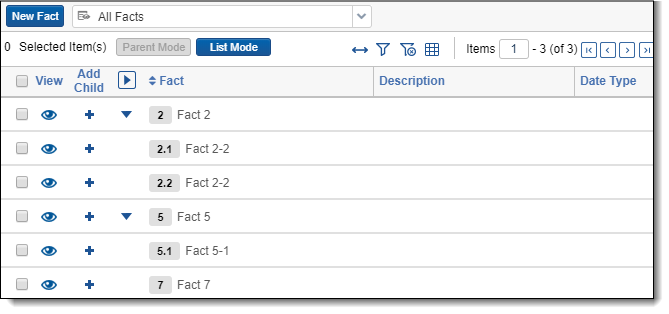
Setting a default viewing mode
Click Parent Mode or List Mode to set the default inline view.

Inline view considerations:
- You can add reflective fields to inline views.
- To streamline the inline coding process, Case Dynamics caps how many linked objects display in a field in inline views.
Adding and editing a fact
To add a new fact, use one of the following methods:
- Keyboard shortcut Ctrl + A
- Click New Fact.
Add or edit fact information from the Fact Detail screen. See Working with Case Dynamics objects.
In the Fact field, type the "@" symbol followed by one or more letters to bring up the type ahead feature. Case Dynamics presents a pop-up list of Entities based on the letters you type. Click the name of the Key Person or Key Organization to add them to the details of your Fact. You can use the type ahead feature on the Facts tab, the Timeline Builder, and the Case Dynamics coding pane.
If an existing entity option displays  , go to the Entities tab, and edit the entity with the warning icon. Be sure to fill out all required fields.
Click the X to the right of a key entity to remove an auto-filled key person or key organization from your fact.
To edit an existing fact, use one of the following methods:
- Click a row.
- Click , then click Edit.
To save a fact, use one of the following methods:
- From a layout, click Save.
- From a row, use the keyboard shortcut, Ctrl + S.
To browse between facts on the Fact Detail layout, use the navigation bar in the top right corner. Click the arrows to go to the first, previous, next, or last fact.

Note: Facts are referred to as records in the navigation bar.
Adding and editing an issue
To add a new issue, use one of the following methods:
- Keyboard shortcut Ctrl + A
- Click New Issue.
- Click
 in the inline view pop-up dialog box.
To edit an existing issue, use one of the following methods:
- Click a row.
- Click , then click Edit.
- Click an issue from the pop-up dialog box, then click Edit in the pop-up window.
To save an issue, use one of the following methods:
- From a layout, click Save.
- From a row, use the keyboard shortcut, Ctrl + S.
Adding a Child
You can nest or add a Child Fact to Facts, Issues, and Interview Questions.
To add a Child:
- Click
 next to the Parent Fact name in the row.
 - Save the child using shortcut keys Ctrl + S once you populate the fields.
- Once you've created a Child Fact, the
 icon appears next to the Parent Fact. Click the arrow to collapse or expand the Child Facts.
Issues views
By default, the Case Dynamics Issue view is configured to correctly display Issues. If creating a new Issue view, ensure that the following Set Sort fields are in this order:
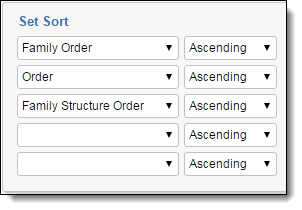
- Family Order - This whole number field contains the numeric value of parent issues only.
- Order - This fixed-length text field contains the numeric values for parent and child issues.
- Family Structure Order - This whole number field helps create the outline structure of all the issues.
Attaching supporting documents to an object
When viewing an object, you can use the Attachments field to attach documents directly from your desktop without importing them into Relativity via the RDC or Web Import.
Note: Custom fields of type File, Currency, Decimal, and User are not supported in Inline Edit lists.
To attach a document to an object:
- Click the object's tab, for example, the Facts tab.
- Select a Fact and click the View icon. The Fact Basic layout appears.
- In the Attachments field, click New.
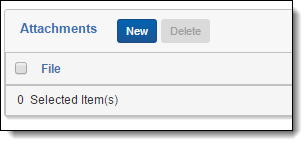
- The Fact Attachment Layout appears. Click Choose File.
- Navigate to and select the file you want to upload.
- Click Save. The document appears in the Attachments field.
To delete an attached document:
- Click the object's tab, for example, the Facts tab.
- Select a Fact and click the View icon. The Fact Basic Layout appears.
- In the Attachments field, select the checkbox next to the appropriate documents and click Delete.
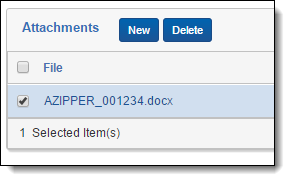
- A pop-up confirmation appears. Click Delete again.
Linking a document to an object
To link a document to an object from the inline list:
- Click in the inline view document pop-up dialog box.
- In the pop-up window, select the document(s) you would like to link.
- Click Set.
If there are no documents linked to the object, you will see  . Click and select the documents you would like to link from the pop-up window.
Once the document is linked, you can click on the document name, and the Standalone Document Viewer will appear.
Inline coding keyboard shortcuts and icons
Use the following shortcuts and icons when inline coding.
| Keyboard shortcut | Action |
|---|---|
| Ctrl + S | Save |
| Ctrl + A | New fact |
| Esc | Cancel |
|
|
Add Child. See Working with Case Dynamics objects. |
|
|
View full details of object |
|
|
Expand/ Collapse |
|
|
Shows nested relationships |
|
|
Removes nesting |

