


You can create two types of reports with Case Dynamics:
- Offline report - view Case Dynamics objects without internet access.
- Master report - export Case Dynamics views into an Excel document.
Offline report
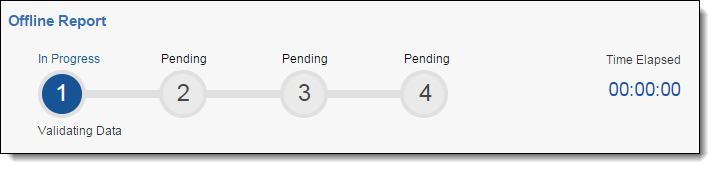
Offline reports allow you to view Facts, Issues, Key People, Interview Questions, and Related Documents without Internet access. This is a convenient feature for reviewing case information while preparing for and during interviews, depositions, and trial. Offline reports cannot be customized. The aggregate file size limit for an offline report is 2 GB.
Facts are sorted in the report by date in ascending order (oldest to most recent). Issues, Key People, and Interview Questions are sorted by name in alphabetical order.
Note: If you would like dates in the offline report to appear with UK date formatting, change your language settings in your browser to English (United Kingdom).
To create an Offline Fact report:
- Navigate to the Report Set tab.
- Click on New Report Set.
- Enter information in the Report Set fields. See Report Set fields.
- From the Report set type drop-down menu, select Offline Report. The Offline Report Setting options display.
Note: The Include document files in offline reports field is set to Yes by default. If you don't want to include documents in the report, select No and proceed to step 7.
- Enter information in the Offline Report Settings fields. See Offline Report Settings fields.
- Click Save when finished.
Note: The order numbers that appear next to the selected productions in the Production precedence field are not a part of the actual production set name. These numbers are only applied to reflect the order precedence for this report.
- Select Link to include any facts, issues, people, or questions.
- Select the check boxes next to the fact(s), issue(s), people, or question(s).
- Click Add, then click Set. Once linked, the facts, issues, people, or questions appear under the Fact (Report Facts) or the issues (Report issues) sections.
To run the report:
- From the Report Set Console, click Generate Report. A .ZIP dialog displays.
- Save this to a desired location.
- Open and extract the .ZIP file to view the fact, issues, people, or question files.
- In the .HTML report page, click the hyperlinks to view the applicable document in the desired original format.
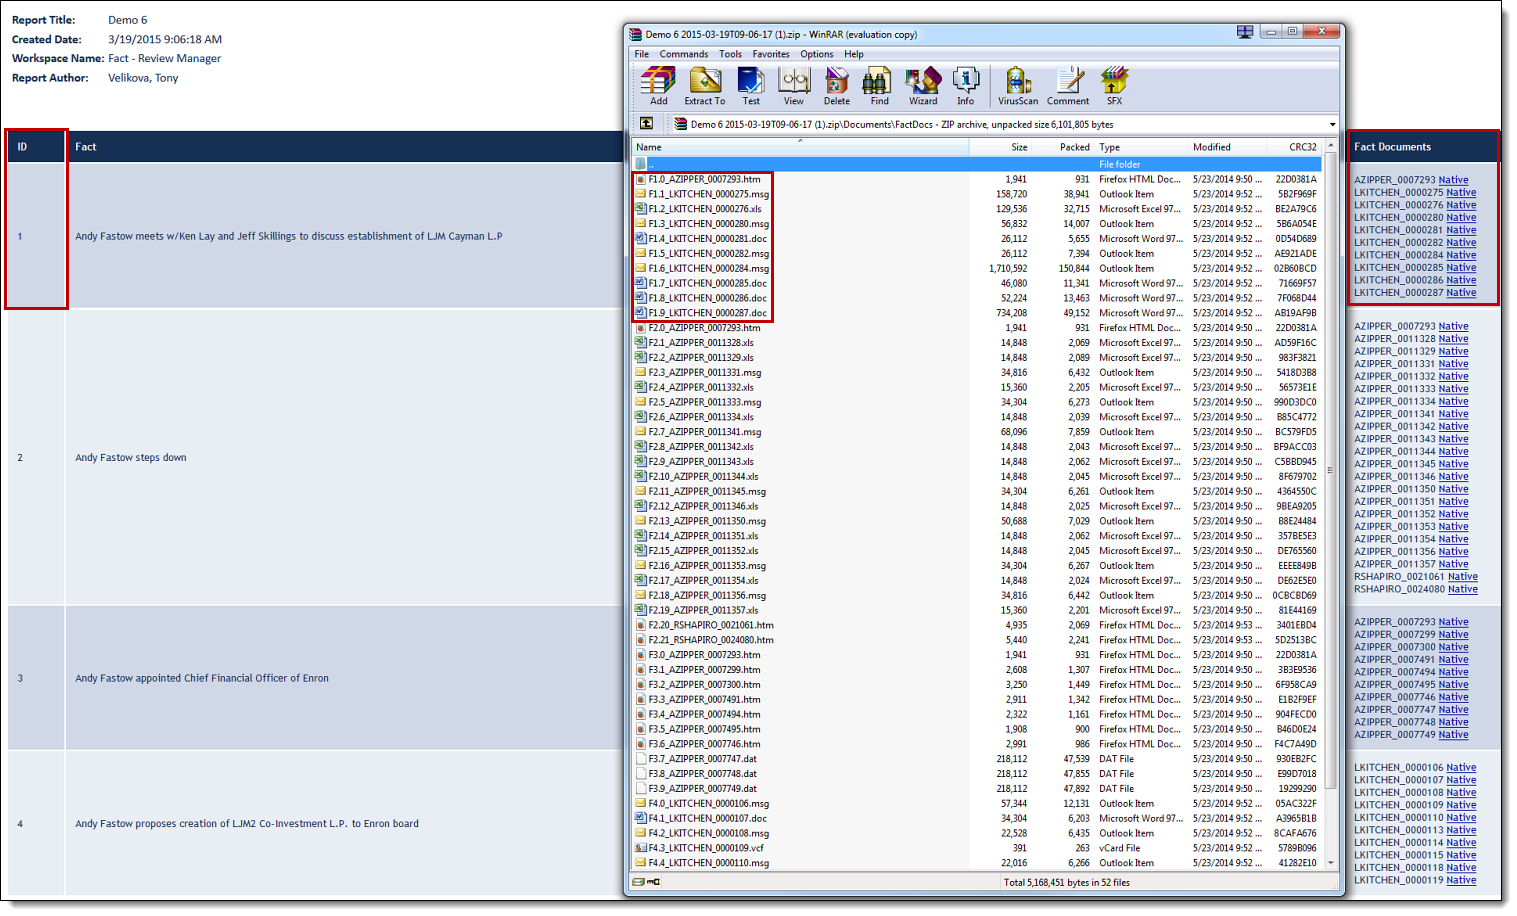
The Documents folder in the .ZIP file is contains sub document fact, issue, people, or question folders, depending on the object type selected in the Offline report settings. In the Documents folder, you can associate documents to the applicable facts, issues, people, or question files.
For example, if you opened the Facts sub folder, you'd see a document numbering convention starting with F1.0_AZipper_0007293.htm. On the .html report page, you can use the ID column to match up all of the F1 documents to the files listed on the .html report.
(Click to expand image)
Report Set fields
The Report Set layout contains the following fields:

- Name - the report file name in Case Dynamics.
- Report title - the report title that appears on the offline report.
- Show report title - select yes or no to include the report title on the final report.
- Report set type - select Offline Report or Master Report. See Master report.
Offline Report Settings fields
The Offline Report Settings layout appears when you select Offline Report from the Report set type drop-down menu and contains the following fields:
(Click to expand image)
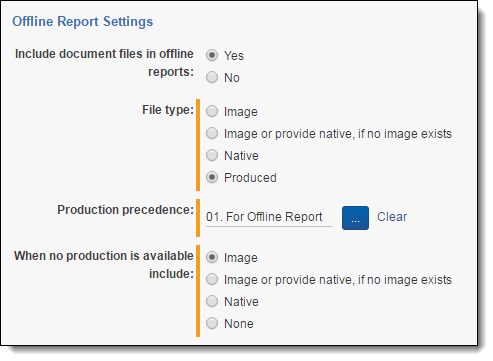
- Include document files in offline reports - determine whether to include documents in the offline report. The field is set to Yes by default and contains additional file type options below.
- File type - the document version included in the Offline report.
- Image - this option only includes the imaged version of the documents. If an image doesn't exist, a document won't be included.
- Image or provide native, if no image exists - this option tells Case Dynamics to first look for an imaged version of a document, and if found the image is included in the report. If no image exists, Case Dynamics looks for a native and if a native exists, the native is included in the report.
- Native - this option only includes the native version of the documents linked to Facts or Issues.
- Produced - this option is used to set a production precedence.
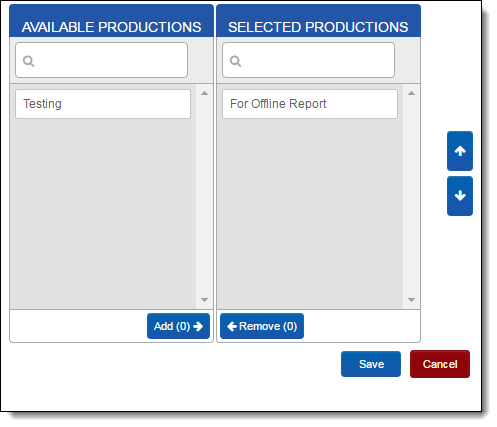
- Production precedence - click
 to select the desired production(s) in the workspace.
(Click to expand image)
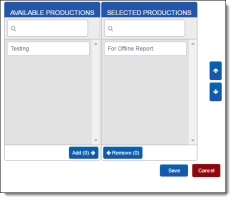
- Click Add, then use the up or down arrows to set a production order precedence.
- Click Save.
- When no production is available include - the document version included in the Offline report. Use these options in conjunction with the Production precedence field.
- Image - this option tells Case Dynamics to look for documents to be a part of the previously selected production sets. If the document is not in any of the production sets, then Case Dynamics looks for an imaged version of the document. If the image exists, it is included in the report. If no image exists, no document is included in the report.
- Image or provide native, if no image exists - this option tells Case Dynamics to look for an imaged version of a document, and if found the image is included in the report. If no image exists, Case Dynamics looks for a native and if a native exists, the native is included in the report.
- Native - this option only includes the native version of the documents linked to Facts or Issues.
- None - this option tells Case Dynamics to only include produced documents. If a Fact or an Issue is linked to a document that is not produced, the document is not included in the report; only a control number displays.
Master report
You can select views for exporting with the master report. With this report you can select all Case Dynamics views, including user created views, in one operation. This report can come in handy when archiving a case or if you need to review all the objects in Case Dynamics. When generating this report, the output is an Excel document with workbook tabs for each selected view.
To create a master report:
- Navigate to the Report Set tab.
- Click New Report Set and select Master Report from the Report Set Type drop-down menu.
- Click Save.
- Check the Views for exporting.
- Click Generate Report.
- The generated report appears in the Report File section.