


Feedback
Creating and running a Restore job
The restore function restores a fresh workspace in the target installation of Relativity using an archive created with ARM or a SQL restored database. This function is dependent upon the archive function. You can use this function to restore an existing workspace on a different server.
-
The default value of the TreatArmRestoreJobFailureAsWarning instance setting, which you must manually add to your instance, is now True. This means that, by default, ARM restore jobs will skip analytics indexes and structured analytics sets that have failed. If you'd like to revert to the previous behavior of ARM erroring when an index or set fails, set this instance setting to false.
- You cannot restore a workspace to any previous versions of Relativity, but you can restore to newer versions. For example, you can restore an archived Relativity 9.1.137.12 workspace to Relativity 9.1.172.5 or 9.3.549.1, but you cannot restore an archived Relativity 9.1.137.12 workspace to Relativity 9.1.112.9 or Relativity 8.2.601.84.
- For Relativity Server you can only restore a workspace to the same version of SQL Server or a higher version. This rule applies to both major and minor SQL version differences. SQL versioning is not an issue in RelativityOne. Customers can restore any workspace from Server to RelativityOne.
- If you are moving to RelativityOne, you must migrate from a Relativity Server version 9.5.196.102 or above if you want to include Analytics data. If you do not need to restore the underlying Analytics Engine data, you can restore from older versions.
- You can restore an archive from a version before 9.5.196.102, but the Analytics Engine data is not restored. You will need to rebuild your indexes or repopulate your structured staging areas and indexes from scratch.
- You cannot archive a workspace from RelativityOne to Relativity Server.
- If your archived workspace contains Analytics archives, an Analytics server must exist in the target workspace resource pool.
- If your archived workspace contains dtSearch archives, the target workspace must have a dtSearch index.
- If the archived workspace uses RAR, the RAR Manager agent may need to be restarted after the restore job completes before RAR can be used in the restored workspace.
- If you are restoring Legal Hold data, the PortalURL field in Legal Hold should be re-entered immediately after performing a restore.
- When you ARM restore to RelativityOne, extracted text is automatically stored in Data Grid.
- You must manually redeploy any Event Handlers created with the Event Handler Express application when you use ARM to restore a workspace that contains the application. See Using Event Handler Express and Build an event handler for more information.
When an archive is restored, all repository file references will be updated to reflect the destination file repository that is selected during restore job creation. If files are included in the archive, these will be copied automatically into the destination repository. If files are not included in the archive, these must be copied manually into the repository location. To override this behavior, ARM provides an advanced option to skip the file reference update. This grants additional flexibility for workflows in which repository files are not moved.
When ARMing a workspace in repository mode, you need to select the Include Extended Workspace Data option for the ARM archive.
Creating and running a Restore job
To create a new restore job, click New Restore Job at the top of the ARM Jobs page. The New Restore Job page appears.
- Application mapping is not available during a BAK-only restore.
- The BAK-only restore process is not available in RelativityOne.
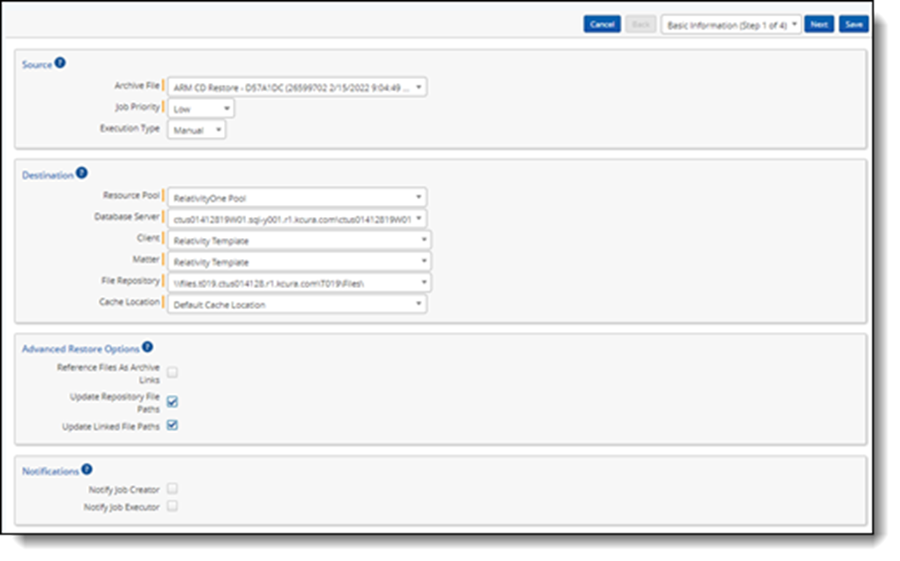
Configure the following settings in each section on the New Restore Job page:
Source
- Archive File—select the filepath to the archive directory from the drop-down list. This drop-down list includes all the archives from the configured archive location(s) and displays them as [Workspace Name] (Case ID - Date Archived).
- Existing Target Database—choose the existing restored database. This setting only appears for archives without database backup, see BAK-only and BAK-less ARM Restore Procedure for more information.
- Job Priority—select a priority of High, Medium, or Low for the job from the drop-down list.
- Execution Type—select from the following options:
- Manual—run the job manually from the Job List page.
- Scheduled—run the job automatically at a specified date and time. When you select this option, the Scheduled Start Time field appears. Click inside the field, then select a date and time from the calendar. You can schedule multiple jobs to run at the same time.
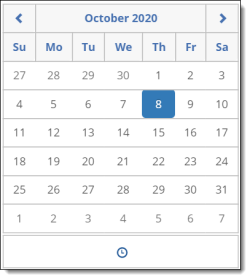
You do not need to click Run job, the system will run it automatically. Clicking Run job before the specified date and time will instantly start the job.
Destination
- Resource Pool—select the resource pool in which the restored workspace will reside.
- Database Server—select the database server that will be used by the restored workspace. All database servers in the environment are listed.
- Client—select the client that the restored workspace will use, or enter a client name in the search box that is displayed. You can also enter a few letters from a client name, and the list will filter based on your input. This field ensures client domains in the target Relativity environment are respected.
- Matter—select the matter that the restored workspace will use, or enter a matter name in the search box that is displayed. You can also enter a few letters from a matter name, and the list will filter based on your input. This field ensures client domains in the target Relativity environment are respected.
- As of ARM 10, all new archives will contain the client and matter of the archived workspace.
- As of ARM 10, when you select an archive with existing client and matter information the client and matter will automatically be selected. The matter name needs to be identical, and the existing matter must be associated with a client of the correct name. Additionally, if an older archive is selected that does not have this information, the default value will be selected.
- If a matching client is not detected but the selected archive has client information, ARM will add a new option to the list of available clients reflecting the archived client. This option will be displayed on the page with (New) at the end to distinguish it from existing objects. Creating the restore job will also create this client object.
- If a matching matter is not detected but the selected archive has matter information, ARM will add a new option to the list of available matters reflecting the archived matter. This option will be displayed on the page with (New) at the end to distinguish it from existing objects. Creating the restore job will also create this matter object.
- File Repository—select the file repository that the restored workspace will use. All files in the archive will be placed in this repository.
- Cache Location—select the cache location that the restored workspace will use.
- Structured Analytics Server—select which Structured Analytics server to restore. All Analytics servers in the selected resource pool will be available for selection when the selected archive contains Analytics.
- Conceptual Analytics Server—select which Conceptual Analytics server to restore. All Analytics servers in the selected resource pool will be available for selection when the selected archive contains Analytics.
- Dt Search Location—select which dtSearch location in the archive to restore. All dtSearch locations in the selected resource pool will be available for selection when the selected archive contains dtSearch data.
Advanced Restore Options
These options will only be displayed if the
- Reference Files As Archive Links—select this checkbox on a Restore job to keep the workspace's files in the corresponding archive. ARM will not copy any files from archive location (folders "NonRepositoryFiles" and "RepositoryFiles") to selected File Repository.
ARM will update the file table to reference the ARM Archive Location as the file share. If using this option, the ARM Archive Location must exist as a Fileshare Server with appropriate credentials associated to it. If you remove this Archive, links will be broken, and files will not be visible in the viewer.
- Update Repository File Paths—select this checkbox to specify that the Location column within the file table will be updated using the destination file repository. When you uncheck this option, all file paths in File table will be untouched and point directory from original workspace. This setting only applies to "InRepository" files. This is checked by default.
- Update Linked File Paths—when Reference Files As Archive Links is selected for the job, you can select this checkbox to update non-repository file paths to reference non-repository files that were archived. Non-repository files will be copied to Fileshare Server associated with the restored workspace. When you uncheck this option, all file paths in File table will be untouched and point directory from original workspace. This is checked by default.
ARM will update files marked as InRepository = 1
ARM will update files marked as InRepository = 0 Update Linked File Paths—The destination file repository will be set as the location of all non-repository records in the File table. Records that are flagged as in-repository will not be affected. This setting cannot be used when "Reference Files as Archive Links" is enabled.
Notifications
- Notify Job Creator—select this checkbox to notify the job creator by email when the job is started, paused, or canceled, or when the job completes successfully or fails in error.
- Notify Job Executor—select this checkbox to notify the job executor by email when the job completes successfully or fails in error.
Specific email notification settings can be configured on the Configuration page; however, selecting these two options will register the Job Creator or Job Executor for all of them. You will not receive redundant alerts (e.g., if you are the job executor, you will not receive the Job Started notification).
Once you’ve configured settings, click Next at the top of the screen. The Map Groups page appears.
Mapping groups
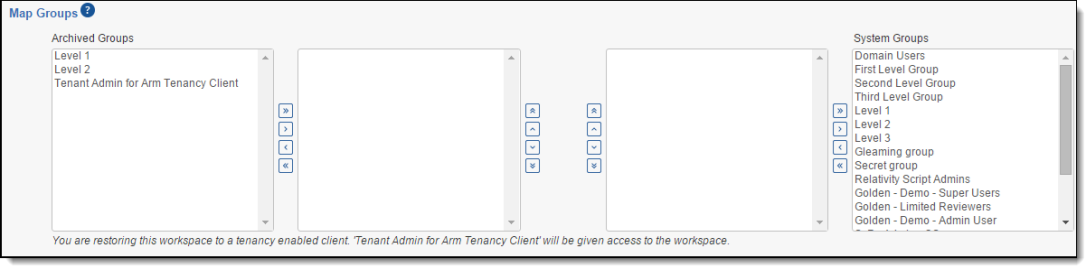
The Map Groups page displays a list of groups from the archive in the Archived Groups section and a list of groups that exist in the system in the System Groups section. You can use the search bar to look for specific groups and the arrow buttons to sort from A-Z or Z-A. If you would like to add a new system group, you can go to the Relativity Groups tab.
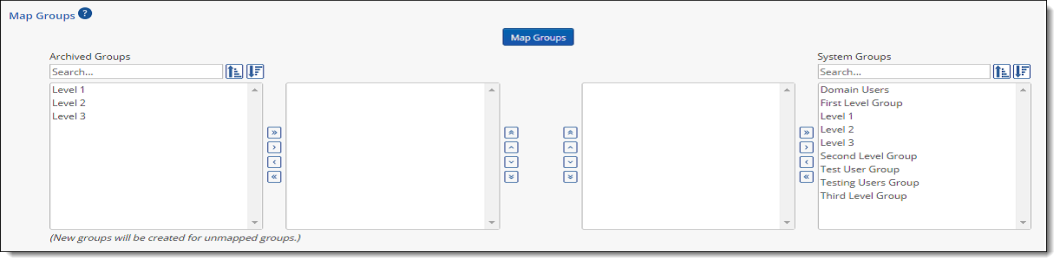
ARM automatically maps the groups from the archive to matching groups in the system. Click Map Groups to perform the automatic mapping. The following image shows the groups from the Archived Groups section mapped to matching groups from the System Groups section.
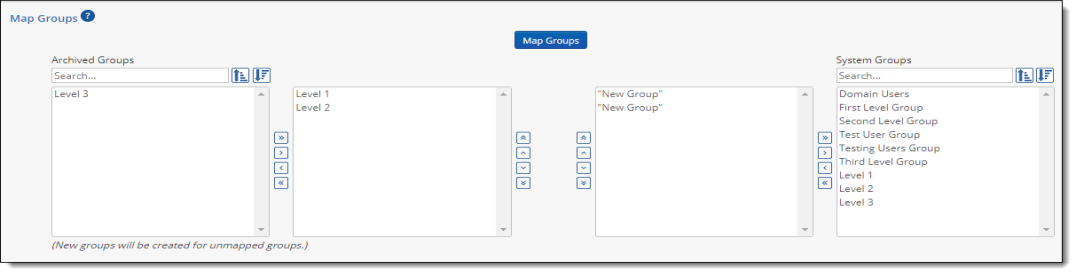
Every group must be mapped to perform the restore. If a group is not mapped, or if there are more Archived Groups in the archived workspace than System Groups in the target workspace, a new group is automatically created and mapped to during the restore. If you create a new group with the same name as an existing group, the new group name is appended with a note indicating that it was created by ARM. For example, new groups will be created for Level 1 and Level 2. Since these groups already exist in the system, the new names for the created groups will be Level 1 (0) and Level 2 (0). If Level 1 (0) and Level 2 (0) also already exist, they will be renamed as Level 1 (1) and Level 2 (1).
Confirm that all group names are in the proper position to be mapped correctly, and then click Save to save the new Restore job, or click Next to map users from the archive to the users that exist in the system.
Restoring to a client domains (tenancy) enabled client
When you attempt to restore a workspace to a client domains (tenancy)-enabled client (which is determined by the selected matter), a message appears on the Map Groups page indicating that the client domain (tenant)admin account for the associated client will be given access to the workspace.
Mapping users
The Map Users page displays a list of users from the archive in the Archived Users section and a list of users that exist in the target workspace in the System Users section. ARM can automatically map users from the archive to matching users in the target workspace.
Users must already exist in the target workspace (archive) to be available for automatic mapping. If you have archived users that you want to map, but the matching users haven't yet been created in the target workspace, you must create the users in the target workspace before they can be mapped. Once the users have been created in the target workspace, they will appear in the System Users section.
ARM user mapping does not associate users to groups. It only maps users for audit purposes and for private saved searches. Linking users to groups must be done outside of ARM.
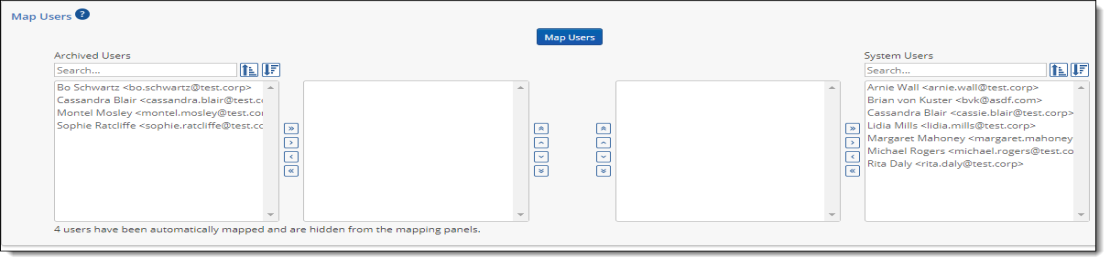
Click Map Users to perform the automatic mapping. The following image shows the users from the Archived Users section mapped to matching users from the System Users section.
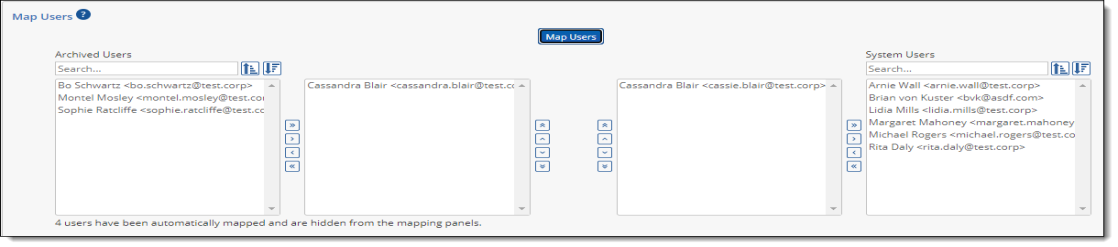
Confirm that all users names are in the proper position to be mapped correctly, and then click Next to select Application Restore options, if Include Extended Workspace Data was selected for the ARM archive. Alternately, click Save to proceed directly to the Restore Job Details page.
Selecting applications to restore
The Select Applications screen lets you see the applications that will be restored to the new workspace and upgraded to match the version found in the application library. If the checkbox for Restore is selected, the application will be restored in the new workspace.
Required and system applications will always be installed/upgraded as part of the workspace upgrade. Additionally, if the environment you're restoring to has the same version or higher version of the application than what was archived, it will also automatically be installed/upgraded to the latest version. The Restore option will be automatically checked and grayed out in these scenarios.
You may also click Install All to select all the listed applications to restore them or click Skip All to de-select all the listed applications to specify that they will not be restored.
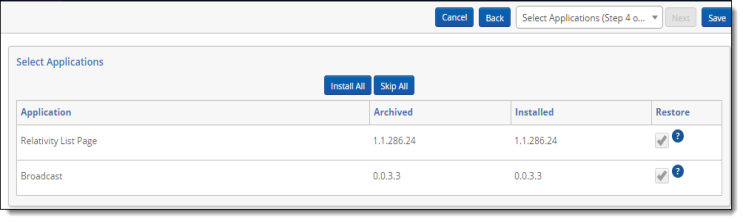
Click Save to save all your changes to the new Restore job and launch the Restore Job Details page.
The Restore Job Details page appears with a console on the right side of the page.
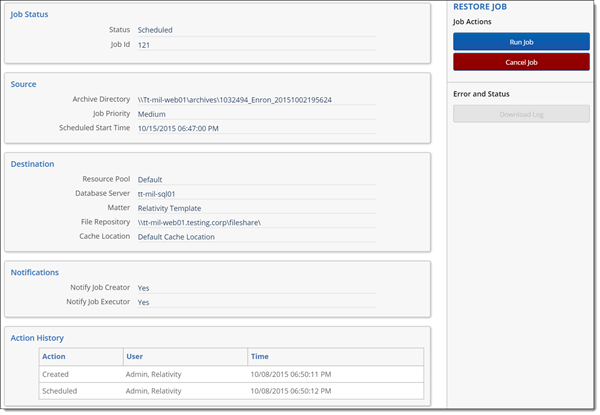
From this console, you can:
- Click Run Job to run the job manually. See Job statuses and options.
- Click Cancel Job to cancel the job.
- Click the ARM Jobs tab to navigate back to the Job list and view the newly created Restore job.