Setting instance permissions
- Click the Relativity logo in the upper left corner or navigate to Home with the user drop-down menu.
- Click the Instance Details tab.
- Click Manage Permissions.
- Click Edit Permissions next to the group whose permissions you want to manage.
From here you can edit the admin permissions of groups.
Group Management tab
The Group Management tab displays all groups that have admin security privileges.
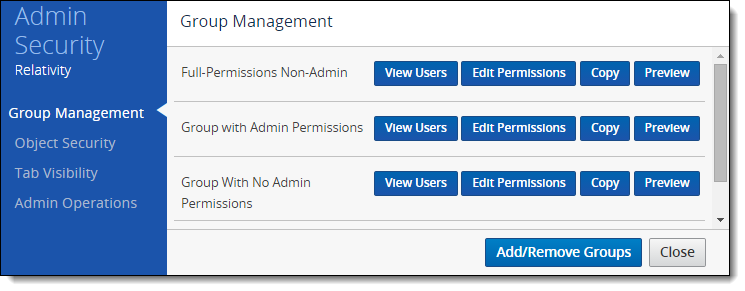
- View Users - displays a list of users in a group.
- Edit Permissions - opens the Object Security tab for editing the admin permissions of a group.
- Copy - opens a list of groups whose permission settings you can transfer to the group.

Click Copy Permissions at the bottom of the list to complete the transfer.
- Preview - preview currently applied security settings for a group. See Preview Security for more information.
- Add/Remove Groups - opens the Add/Remove Groups dialog to grant admin access to groups. See Add/Remove Groups for more information.
Note: A system admin is the only user able to grant other users membership into the System Administrators group. Any user who is not a member of the System Administrators group is unable to add themselves to any group.
Add/Remove Groups
Click the Add/Remove Groups button on the Group Management tab of the Admin Security window to access the Add/Remove Groups window. The Group Management page displays all groups that exist in your Relativity environment.
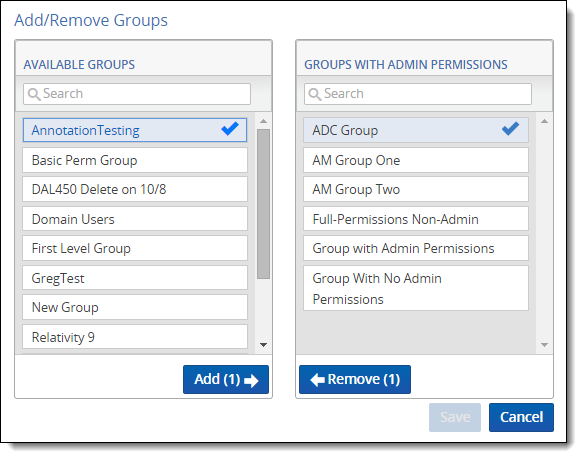
The Add/Remove Groups window displays the following lists:
- Available Groups - lists groups in your Relativity environment not yet granted access to the workspace.
- Groups with Admin Permissions - lists groups granted access to admin permissions.
You must add a group to the Groups with Admin Permissions column to grant the group admin security privileges.
Adding groups to the Groups with Admin Permissions column
To add admin permissions to a group, follow these steps:
- Click the Instance Details tab.
- Click Manage Permissions.
- Click Add/Remove Groups.
- Scroll through the Available Groups list or search for a specific group using the search bar.
- Select one or more groups from the Available Groups list in any order.
- Click Add.
- Click Save.
Removing groups from the Groups with Admin Permissions column
To remove admin permissions from a group, follow these steps:
- Click the Instance Details tab.
- Click Manage Permissions.
- Click Add/Remove Groups.
- Scroll through the Groups with Admin Permissions list or search for a specific group using the search bar.
- Select one or more groups from the Groups with Admin Permissions list in any order.
- Click Remove.
- Click Save.
Object Security tab
With the Object Security tab you can grant admin permissions to Relativity objects.

You can apply the following group permission settings to any Relativity object in the Object Security window:
- None
 —denies users access to the object.
 - View
 —view the object. This is the lowest level object permission.
 - Edit
 —edit and view the object.
 - Delete
 —delete, edit, and view the object.
 - Add
 —add new objects. This icon turns blue when the setting is unsaved; once you click Save, the blue icon becomes grey. This icon turns green when you give users this permission both when the setting is unsaved and saved.
 - Edit Security
 —grants users the ability to edit the security of objects. This icon turns blue if you click twice indicating a not applicable status.
See Relativity object security for a complete list of objects and the impact of each assignable security permission.
Tab Visibility tab
With the Tab Visibility tab you can grant a group permission to view admin tabs.
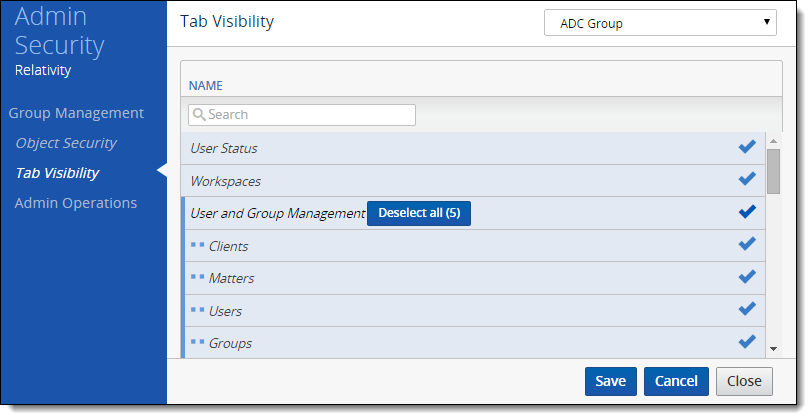
You must grant tab visibility independent of permission settings for users in a group to access a permitted tab. You can make any tab visible by selecting the checkbox in the list. You can also opt to make all sub tabs visible by clicking on the parent tab and clicking Select all (X).
Note: Do not use tab visibility as a sole method of preventing security permissions.
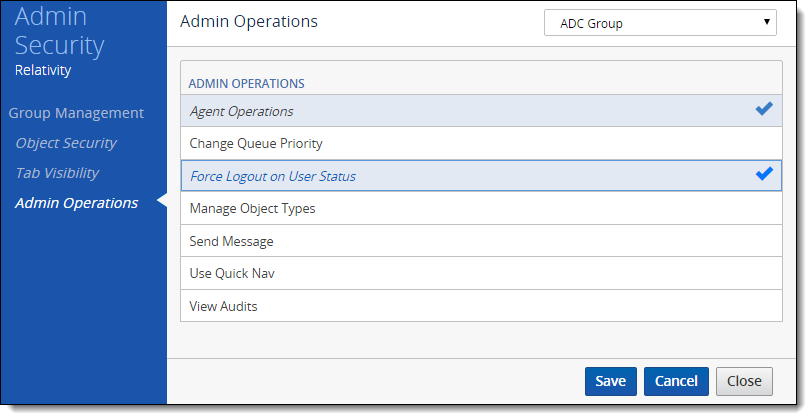
Admin Operations tab
With the Admin Operations tab you can grant admin action permissions to particular groups. See Admin Operations tab for a complete list of actions you can grant through this tab.