OCR on redacted production documents
Preparing redacted documents for production in an efficient manner is a common challenge in eDiscovery. This topic provides details on completing OCR on redacted documents and exporting the text.
Running the OCR job
To run OCR on your production, perform the following steps. You should do so after you run the production but before you perform the final export.
- Create an OCR profile with your preferred settings. You must have an OCR profile before you can save an OCR Set.
- Create a long text field to hold your OCR results. You can't OCR directly into the Extracted Text field.
- Create an OCR Set.
- Point the OCR Set to the completed Production. If you only want to OCR redacted documents for the production, select Yes next to Only OCR Production Documents Containing Redactions.
- Click Save on the OCR Set.
- On the OCR console, click OCR Documents to start the job.
-
When the OCR job is complete, the text becomes ready to export.
Exporting the production
Now you can export the production using text precedence. To only produce non-redacted text when exporting a production, you must use the Text Precedence feature. When you export a production through the RDC, don't add the Extracted Text field to the exported field list. This results in producing redacted text. In order to preserve the integrity of your redactions, don't add the Extracted Text field to the selected columns tab.
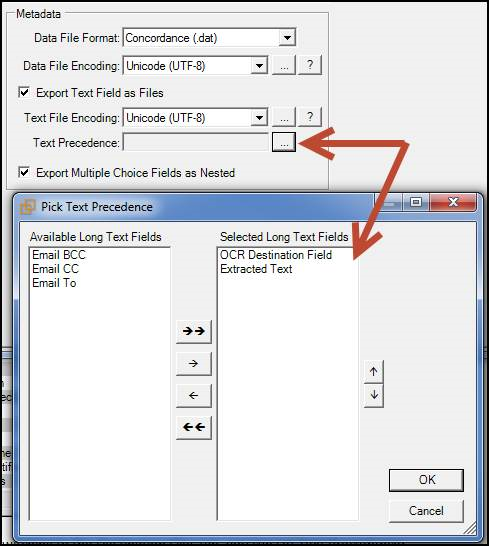
When you switch to the Destination Files tab, you can set Text Precedence in the Metadata section. To set Text Precedence:
- Set the File Format, Encoding, and Export Files options to meet your needs.
- Click the ellipsis next to Text Precedence. The Pick Text Precedence window appears.
- Based on the screen shot below, the RDC first checks to see if there is OCR'd text available in the OCR Destination Field. If this field isn't set, the RDC exports the Extracted Text.
- Export your production set documents.