Send to CaseMap
You can use the Send to CaseMap feature to bulk-send items to your CaseMap database, versions 7 and above. To perform the bulk send, you must have CaseMap installed
Note: You can't use mass operations on Data Grid-enabled fields.
To perform a send to CaseMap operation, perform the following steps:
- Choose whether to export Checked items or All items in the current returned set.
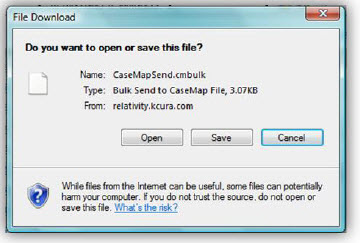
- Select Send to CaseMap in the drop-down menu, and then click Go. You may be prompted to open or save a file, CaseMapSend.cmbulk. If so, click Open. This launches the Bulk Send to CaseMap wizard.
- Click Next on the main screen. If you don't have CaseMap open, you're prompted to launch the application. Once CaseMap is open, the wizard prompts you to switch to the application.
- Click the Switch to CaseMap button, and then click Next. The wizard asks you to confirm that the case workspace you have open is the correct target workspace.
- Click Next if the workspace listed is the correct target.
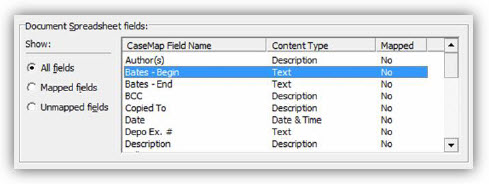
The View/Edit Field Mappings section displays, where you can map the Relativity fields (set in the CaseMap fields view) to CaseMap fields. The first time you go through this process, you need to map the fields. CaseMap should automatically populate the matches on subsequent bulk sends.
- Click Modify to bring up the field mapping section of the wizard.
- Go to the Document Spreadsheets field and double-click on the field you’d like to map to open the New Item box.
- Select the Relativity field from the Select a source Data field box, and then click OK.
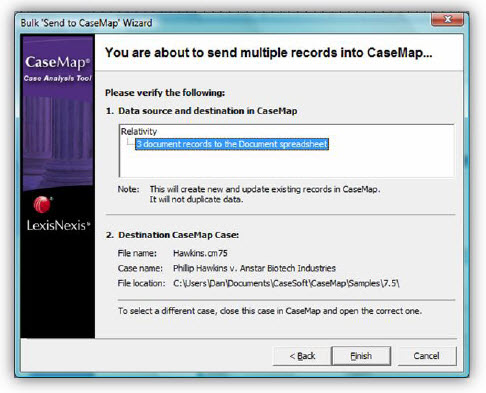
- Repeat the above for all fields you'd like to map, and then click OK in the Bulk Send to CaseMap wizard. Clicking OK brings you back to the second screen of the wizard. Review the matches, and then click Next. A final confirmation screen displays.
- Click Finish to complete the send.

Note: The full range of Unicode characters is not supported by CaseMap.