


Backing up Relativity Data Grid
Data Grid stores text data in your file share. There is no automatic redundant storage of document text. Because Data Grid text data is stored in your file share, you may need to adjust your file system data backup frequency to meet the requirements of your Service Level Agreements (SLAs) and disaster recovery plans.
Backing up Elasticsearch
We recommend routinely backing up your data. Elasticsearch replicas provide high availability during run time, allowing toleration of sporadic node loss without interruption of service, but replicas don't provide protection against catastrophic failures. Create a complete backup of the entire cluster to protect your data if something goes wrong.
You can use the snapshot API to create a backup of the cluster. The snapshot API saves the current state of all data in your cluster to a shared repository. The first snapshot you create is a complete copy of all data on the cluster.
Each subsequent snapshot compares the current state of the data in the cluster to the data stored in the repository and only modifies the differences between the two.
The snapshot API incrementally edits the repository each time you create a new snapshot, so subsequent backups are significantly faster since they require less data transmission. This page explains all steps necessary to back up and restore Elasticsearch.
Note: Data Grid supports Windows servers only.
Creating a repository
Before implementing this backup method, you must create a repository that can store snapshots. You can use any of the following four repository types:
- Shared file system, such as a NAS
- Amazon S3
- Hadoop Distributed File System (HDFS)
- Azure/Entra Cloud
Use the following steps to create and share a folder:
- Create a folder named ElasticBackup to store snapshots. (//COMPUTER_NAME.business.corp/ElasticBackup).
- Right-click on the folder, and then click Properties.
- Select the Sharing tab, and then click Share.
-
Enter the user that runs the Elasticsearch Windows service (domain\account), and then click Add.

- Select the user on the share list and set the Permission Level to Co-owner.
- Click Share.
- When the share completes, click Done.
- On the Document Properties dialog, select the Security tab.
- Verify that the user that runs the Elasticsearch Windows service has Full Control security permissions to the folder.
Use the following steps to link Elasticsearch to the repository folder:
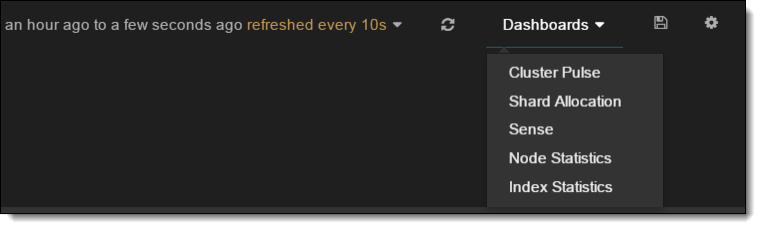
- Launch Marvel from within a browser to connect to one of the nodes in your cluster.
- Launch Sense from the Dashboards drop-down near the top right.
- Edit the location value and run the following to set up a shared file system repository:
PUT /_snapshot/my_backup { "type": "fs", "settings": { "location": "//COMPUTER_NAME.business.corp/Shared/ElasticBackup", "compress": true } } - Verify your snapshot settings exist by performing the following call:
GET /_snapshot/
Creating snapshots
There are two ways to create snapshots:
- Creating snapshots manually from within Sense
- Scheduling a Windows task using Curator
Creating snapshots manually from within Sense
Run the following to back up all open indexes into a snapshot named "snapshot_1".
PUT /_snapshot/ElasticBackup/snapshot_1
Note: Increment the name of the snapshot for best results (e.g., snapshot_1, snapshot_2, snapshot_3, etc.). All alphabetical characters in the snapshot name must be lowercase.
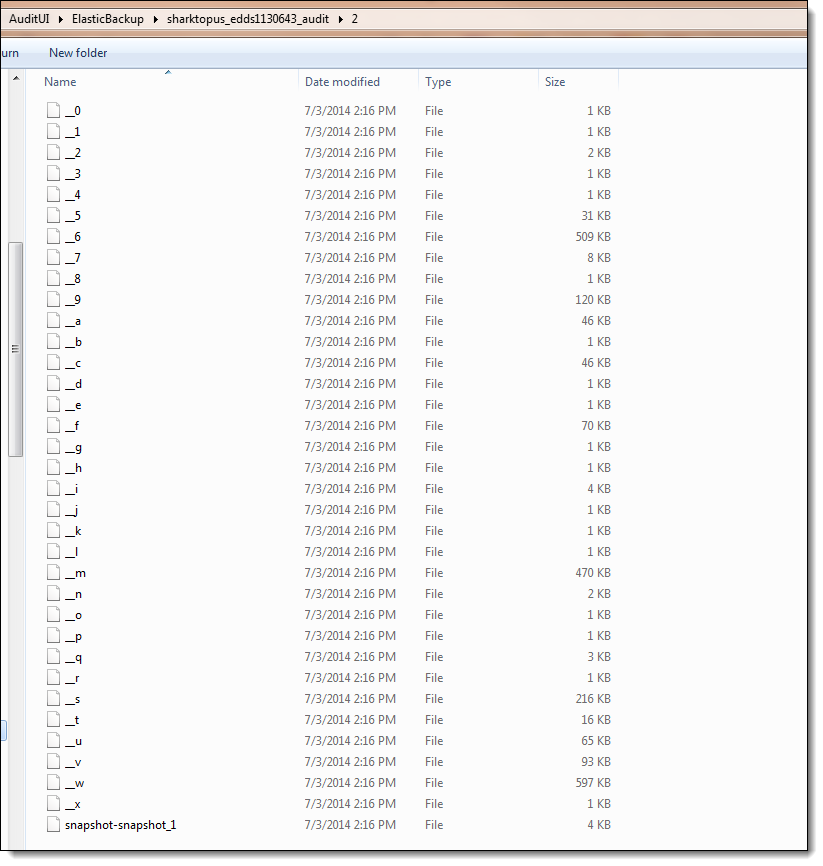
Verify that this process created a backup by navigating to the following location:
//COMPUTER_NAME.business.corp/Shared/ElasticBackup
Your backup should look similar to the following image:
For more information on snapshot commands, including the ability to snapshot specific indexes, see Backing up your cluster on the Elasticsearch website for your version of Elasticsearch.
Scheduling a Windows task using Curator
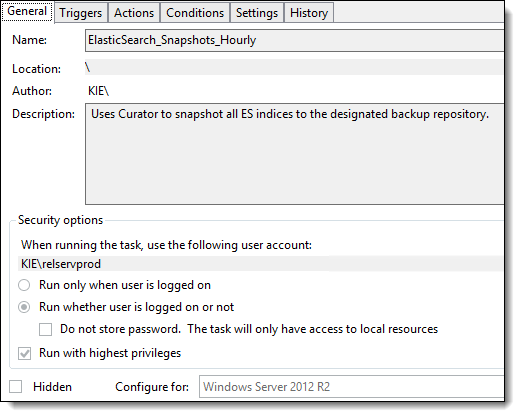
The best way to schedule automatic backups of your data is to use Curator, which you can combine with scheduled tasks to automatically invoke the desired behavior.
The Curator Python API can be used to manage indexes and snapshots with the following features:
- Iterative methods - allow you to retrieve data across the cluster within specified parameters.
- Non-iterative methods - allow you to retrieve data within a single index or snapshot.
- Helper methods - allow you to retrieve values required to complete iterative and non-iterative methods.
For more information on Curator and snapshot capabilities, see Snapshot on Github.
Installing Curator 4
Before setting up Curator, you must complete the following:
- Download and run the Curator installer from Elastic.
- Download and install the Microsoft C++ redistributable.
Running Curator
Once you install Curator, you can use it to run “actions” which are created in the action.yml file. Use the following command to run an operation in the action.yml file:
Note: This command runs a dry-run where Curator simulates the action(s) in the file without making any changes. To actually run the operation, remove the --dry-run flag.
curator [--config CONFIG.YML] [--dry-run] ACTION_FILE.YML
This command references both a configuration and action file. You can run PowerShell scripts to automatically create the files needed to run Curator.
Running Curator from PowerShell
The following PowerShell scripts automatically create the PS1 and YML files needed to run Curator. It also sets up three Windows tasks: backup, backup cleanup, and Marvel cleanup.
Run the following in Powershell:
<##>
Param(
$probHostName = "masternodename",
$marvelHostName = "marvelnodename",
$repositoryName = "datagridbackup",
[string]$esUsername = "esadmin",
[string]$esPassword = "esadmin",
[string]$marvelUsername = "marvel",
[string]$marvelPassword = "marvel",
$curatorMsiPath = "C:\Curator\elasticsearch-curator-4.2.6-win32.msi",
$curatorPath = "C:\Curator",
$useSSL = "False"
)

$httpAuth = [system.Text.Encoding]::ASCII
$httpAuth = "$esUsername`:$esPassword"
$httpAuthMarvel = [system.Text.Encoding]::ASCII
$httpAuthMarvel = "$marvelUsername`:$marvelPassword"
$powerShellPath = (Resolve-Path /Windows/System32/WindowsPowerShell/v1.0/).Path

function IsCuratorInstalled {
    $isInstalled = ((Get-ChildItem "HKLM:\Software\Microsoft\Windows\CurrentVersion\Uninstall") | Where-Object { $_.GetValue( "DisplayName" ) -eq "elasticsearch-curator" } )

    If (!$isInstalled) {
        Try{
            Write-Host "Installing Curator 4.2.6" -ForegroundColor Green
            Start-Process msiexec.exe -Wait -ArgumentList "/I $curatorMsiPath /quiet" -ErrorAction Stop
            Write-Host "Installation Complete."
        }Catch{
            $ErrorMessage = $_.Exception.Message; Break
        }
    }else{
    Write-Host "Curator is already installed." -ForegroundColor Green
    }
}
IsCuratorInstalled

function MakeFiles
{
function MakeProdConfigYML
{
$prodConfigYml = @"
---
# Remember, leave a key empty if there is no value.  None will be a string,
# not a Python "NoneType"
client:
  hosts:
  - $probHostName
  port: 9200
  url_prefix:
  use_ssl: $useSSL
  certificate:
  client_cert:
  client_key:
  ssl_no_validate: True
  http_auth: $httpAuth
  timeout: 30
  master_only: False

logging:
  loglevel: INFO
  logfile:
  logformat: default
  blacklist: ['elasticsearch', 'urllib3']
"@

$prodConfigYml | Out-File .\prodConfig.yml -Encoding ascii
}
MakeProdConfigYML

function MakeBackupActionYML
{
$prodBackupYml = @"
# Remember, leave a key empty if there is no value.  None will be a string,
# not a Python "NoneType"
#
# Also remember that all examples have 'disable_action' set to True.  If you
# want to use this action as a template, be sure to set this to False after
# copying it.
# Leaving name blank will result in the default 'curator-%Y%m%d%H%M%S'
actions:
  1:
    action: snapshot
    description: "Created snapshots for all indexes."
    options:
      repository: $repositoryName
      name:
      ignore_unavailable: False
      include_global_state: True
      partial: False
      wait_for_completion: True
      skip_repo_fs_check: False
      timeout_override:
      continue_if_exception: False
      disable_action: False
    filters:
    -  filtertype: none
"@

$prodBackupYml | Out-File .\prodBackup.yml -Encoding ascii
}
MakeBackupActionYML

function MakeCleanUpActionYML
{
$prodCleanUpYml = @"
# Remember, leave a key empty if there is no value.  None will be a string,
# not a Python "NoneType"
#
# Also remember that all examples have 'disable_action' set to True.  If you
# want to use this action as a template, be sure to set this to False after
# copying it.
# Leaving name blank will result in the default 'curator-%Y%m%d%H%M%S'
actions:
  1:
    action: delete_snapshots
    description: "Deletes snapshots older than 14 days."
    options:
      repository: $repositoryName
      retry_interval:
      retry_count:
      timeout_override:
      continue_if_exception: False
      disable_action: False
    filters:
    -  filtertype: pattern
       kind: prefix
       value: curator-
       exclude:
    -  filtertype: age
       source: creation_date
       direction: older
       unit: days
       unit_count: 14
       exclude:
"@

$prodCleanUpYml | Out-File .\prodCleanUp.yml -Encoding ascii
}
MakeCleanUpActionYML

function MakeMarvelConfigYML
{
$marvelConfigYml = @"
---
# Remember, leave a key empty if there is no value.  None will be a string,
# not a Python "NoneType"
client:
  hosts:
  - $marvelHostName
  port: 9200
  url_prefix:
  use_ssl: False
  certificate:
  client_cert:
  client_key:
  ssl_no_validate: False
  http_auth: $httpAuthMarvel
  timeout: 30
  master_only: False

logging:
  loglevel: INFO
  logfile:
  logformat: default
  blacklist: ['elasticsearch', 'urllib3']
"@

$marvelConfigYml | Out-File .\marvelConfig.yml -Encoding ascii
}
MakeMarvelConfigYML

function MakeMarvelCleanUpYML
{
$marvelCleanUpYml = @"
# Remember, leave a key empty if there is no value.  None will be a string,
# not a Python "NoneType"
#
# Also remember that all examples have 'disable_action' set to True.  If you
# want to use this action as a template, be sure to set this to False after
# copying it.
# Leaving name blank will result in the default 'curator-%Y%m%d%H%M%S'
actions:
  1:
    action: delete_indices
    description: "Deletes old marvel indexes"
    options:
      timeout_override:
      continue_if_exception: False
      disable_action: False
    filters:
    -  filtertype: pattern
       kind: regex
       value: .marvel-es-
       exclude:
    -  filtertype: age
       source: creation_date
       direction: older
       unit: days
       unit_count: 30
       exclude:
"@

$marvelCleanUpYml | Out-File .\marvelCleanUp.yml -Encoding ascii
}
MakeMarvelCleanUpYML

function MakeBackupActions
{
$prodBackUp = @"
cd\
cd ".\Program Files\elasticsearch-curator"
.\curator --config $curatorPath\prodConfig.yml $curatorPath\prodBackUp.yml
"@

$prodBackUp | Out-File .\prodBackup.ps1
}
MakeBackupActions

function MakeCleanUpActionProd
{
$prodCleanUpPs = @"
cd\
cd ".\Program Files\elasticsearch-curator"
.\curator --config $curatorPath\prodConfig.yml $curatorPath\prodCleanUp.yml
"@

$prodCleanUpPs | Out-File .\prodCleanup.ps1
}
MakeCleanUpActionProd

function MakeCleanUpActionMarvel
{
$marvelCleanUp = @"
cd\
cd ".\Program Files\elasticsearch-curator"
.\curator --config $curatorPath\marvelConfig.yml $curatorPath\marvelCleanUp.yml
"@

$marvelCleanUp | Out-File .\marvelCleanup.ps1
}
MakeCleanUpActionMarvel
}
MakeFiles

<#
    Make scheduled tasks.
#>

function MakeScheduledTaskDataGridBackup
{
$action = New-ScheduledTaskAction -Execute ("$powerShellPath" + "powershell.exe") -WorkingDirectory $curatorPath -Argument ".\prodBackUp.ps1"
$trigger = New-JobTrigger -Once -At (Get-Date).date -RepeatIndefinitely -RepetitionInterval (New-TimeSpan -Hours 6)
$settings = New-ScheduledTaskSettingsSet -AllowStartIfOnBatteries -DontStopIfGoingOnBatteries -WakeToRun
Register-ScheduledTask -Action $action -Trigger $trigger -RunLevel Highest -TaskName "Data Grid Backup" -Description "Scheduled snapshot of the Production Data Grid cluster." -Settings $settings
}

MakeScheduledTaskDataGridBackup


function MakeScheduledTaskDataGridBackupCleanup
{
$action = New-ScheduledTaskAction -Execute ("$powerShellPath" + "powershell.exe") -WorkingDirectory $curatorPath -Argument ".\prodCleanUp.ps1"
$trigger = New-JobTrigger -Once -At (Get-Date).date -RepeatIndefinitely -RepetitionInterval (New-TimeSpan -Hours 24)
$settings = New-ScheduledTaskSettingsSet -AllowStartIfOnBatteries -DontStopIfGoingOnBatteries -WakeToRun
Register-ScheduledTask -Action $action -Trigger $trigger -RunLevel Highest -TaskName "Data Grid Backup Cleanup" -Description "Scheduled clean up job for the Production Data Grid cluster."
}

MakeScheduledTaskDataGridBackupCleanup

function MakeScheduledTaskMarvelCleanup
{
$action = New-ScheduledTaskAction -Execute ("$powerShellPath" + "powershell.exe") -WorkingDirectory $curatorPath -Argument ".\marvelCleanUp.ps1"
$trigger = New-JobTrigger -Once -At (Get-Date).date -RepeatIndefinitely -RepetitionInterval (New-TimeSpan -Hours 24)
$settings = New-ScheduledTaskSettingsSet -AllowStartIfOnBatteries -DontStopIfGoingOnBatteries -WakeToRun
Register-ScheduledTask -Action $action -Trigger $trigger -TaskName "Marvel CleanUp" -Description "Deletes indexes on the marvel cluster older than 30 days."
}

MakeScheduledTaskMarvelCleanup
Run the following in Powershell:
<##>
Param(
$probHostName = "dg-ramp-01",
$marvelHostName = "dg-ramp-agt",
$repositoryName = "datagridbackup",
[string]$esUsername = "esadmin",
[string]$esPassword = "esadmin",
[string]$marvelUsername = "marvel",
[string]$marvelPassword = "marvel",
$curatorMsiPath = "C:\Curator\elasticsearch-curator-4.2.6-win32.msi",
$curatorPath = "C:\Curator",
$useSSL = "True"
)

$httpAuth = [system.Text.Encoding]::ASCII
$httpAuth = "$esUsername`:$esPassword"
$httpAuthMarvel = [system.Text.Encoding]::ASCII
$httpAuthMarvel = "$marvelUsername`:$marvelPassword"
$powerShellPath = (Resolve-Path /Windows/System32/WindowsPowerShell/v1.0/).Path

function IsCuratorInstalled {
    $isInstalled = ((Get-ChildItem "HKLM:\Software\Microsoft\Windows\CurrentVersion\Uninstall") | Where-Object { $_.GetValue( "DisplayName" ) -eq "elasticsearch-curator" } )

    If (!$isInstalled) {
        Try{
            Write-Host "Installing Curator 4.2.6" -ForegroundColor Green
            Start-Process msiexec.exe -Wait -ArgumentList "/I $curatorMsiPath /quiet" -ErrorAction Stop
            Write_host "Installation Complete."
        }Catch{
            $ErrorMessage = $_.Exception.Message; Break
        }
    }else{
    Write-Host "Curator is already installed." -ForegroundColor Green
    }
}
IsCuratorInstalled

function MakeFiles
{
function MakeProdConfigYML
{
$prodConfigYml = @"
---
# Remember, leave a key empty if there is no value.  None will be a string,
# not a Python "NoneType"
client:
  hosts:
  - $probHostName
  port: 9200
  url_prefix:
  use_ssl: $useSSL
  certificate:
  client_cert:
  client_key:
  ssl_no_validate: True
  http_auth: $httpAuth
  timeout: 30
  master_only: False

logging:
  loglevel: INFO
  logfile:
  logformat: default
  blacklist: ['elasticsearch', 'urllib3']
"@

$prodConfigYml | Out-File .\prodConfig.yml -Encoding ascii
}
MakeProdConfigYML

function MakeBackupActionYML
{
$prodBackupYml = @"
# Remember, leave a key empty if there is no value.  None will be a string,
# not a Python "NoneType"
#
# Also remember that all examples have 'disable_action' set to True.  If you
# want to use this action as a template, be sure to set this to False after
# copying it.
# Leaving name blank will result in the default 'curator-%Y%m%d%H%M%S'
actions:
  1:
    action: snapshot
    description: "Created snapshots for all indexes."
    options:
      repository: $repositoryName
      name:
      ignore_unavailable: False
      include_global_state: True
      partial: False
      wait_for_completion: True
      skip_repo_fs_check: False
      timeout_override:
      continue_if_exception: False
      disable_action: False
    filters:
    -  filtertype: none
"@

$prodBackupYml | Out-File .\prodBackup.yml -Encoding ascii
}
MakeBackupActionYML

function MakeCleanUpActionYML
{
$prodCleanUpYml = @"
# Remember, leave a key empty if there is no value.  None will be a string,
# not a Python "NoneType"
#
# Also remember that all examples have 'disable_action' set to True.  If you
# want to use this action as a template, be sure to set this to False after
# copying it.
# Leaving name blank will result in the default 'curator-%Y%m%d%H%M%S'
actions:
  1:
    action: delete_snapshots
    description: "Deletes snapshots older than 14 days."
    options:
      repository: $repositoryName
      retry_interval:
      retry_count:
      timeout_override:
      continue_if_exception: False
      disable_action: False
    filters:
    -  filtertype: pattern
       kind: prefix
       value: curator-
       exclude:
    -  filtertype: age
       source: creation_date
       direction: older
       unit: days
       unit_count: 14
       exclude:
"@

$prodCleanUpYml | Out-File .\prodCleanUp.yml -Encoding ascii
}
MakeCleanUpActionYML

function MakeMarvelConfigYML
{
$marvelConfigYml = @"
---
# Remember, leave a key empty if there is no value.  None will be a string,
# not a Python "NoneType"
client:
  hosts:
  - $marvelHostName
  port: 9200
  url_prefix:
  use_ssl: False
  certificate:
  client_cert:
  client_key:
  ssl_no_validate: False
  http_auth: $httpAuthMarvel
  timeout: 30
  master_only: False

logging:
  loglevel: INFO
  logfile:
  logformat: default
  blacklist: ['elasticsearch', 'urllib3']
"@

$marvelConfigYml | Out-File .\marvelConfig.yml -Encoding ascii
}
MakeMarvelConfigYML

function MakeMarvelCleanUpYML
{
$marvelCleanUpYml = @"
# Remember, leave a key empty if there is no value.  None will be a string,
# not a Python "NoneType"
#
# Also remember that all examples have 'disable_action' set to True.  If you
# want to use this action as a template, be sure to set this to False after
# copying it.
# Leaving name blank will result in the default 'curator-%Y%m%d%H%M%S'
actions:
  1:
    action: delete_indices
    description: "Deletes old marvel indexes"
    options:
      timeout_override:
      continue_if_exception: False
      disable_action: False
    filters:
    -  filtertype: pattern
       kind: regex
       value: .marvel-es-
       exclude:
    -  filtertype: age
       source: creation_date
       direction: older
       unit: days
       unit_count: 30
       exclude:
"@

$marvelCleanUpYml | Out-File .\marvelCleanUp.yml -Encoding ascii
}
MakeMarvelCleanUpYML

function MakeBackupActions
{
$prodBackUp = @"
cd\
cd ".\Program Files\elasticsearch-curator"
.\curator --config $curatorPath\prodConfig.yml $curatorPath\prodBackUp.yml
"@

$prodBackUp | Out-File .\prodBackup.ps1
}
MakeBackupActions

function MakeCleanUpActionProd
{
$prodCleanUpPs = @"
cd\
cd ".\Program Files\elasticsearch-curator"
.\curator --config $curatorPath\prodConfig.yml $curatorPath\prodCleanUp.yml
"@

$prodCleanUpPs | Out-File .\prodCleanup.ps1
}
MakeCleanUpActionProd

function MakeCleanUpActionMarvel
{
$marvelCleanUp = @"
cd\
cd ".\Program Files\elasticsearch-curator"
.\curator --config $curatorPath\marvelConfig.yml $curatorPath\marvelCleanUp.yml
"@

$marvelCleanUp | Out-File .\marvelCleanup.ps1
}
MakeCleanUpActionMarvel
}
MakeFiles

<#
    Make scheduled tasks.
#>

function MakeScheduledTaskDataGridBackup
{
$action = New-ScheduledTaskAction -Execute ("$powerShellPath" + "powershell.exe") -WorkingDirectory $curatorPath -Argument ".\prodBackUp.ps1"
$trigger = New-JobTrigger -Once -At (Get-Date).date -RepeatIndefinitely -RepetitionInterval (New-TimeSpan -Hours 6)
$settings = New-ScheduledTaskSettingsSet -AllowStartIfOnBatteries -DontStopIfGoingOnBatteries -WakeToRun
Register-ScheduledTask -Action $action -Trigger $trigger -RunLevel Highest -TaskName "Data Grid Backup" -Description "Scheduled snapshot of the Production Data Grid cluster." -Settings $settings
}

MakeScheduledTaskDataGridBackup


function MakeScheduledTaskDataGridBackupCleanup
{
$action = New-ScheduledTaskAction -Execute ("$powerShellPath" + "powershell.exe") -WorkingDirectory $curatorPath -Argument ".\prodCleanUp.ps1"
$trigger = New-JobTrigger -Once -At (Get-Date).date -RepeatIndefinitely -RepetitionInterval (New-TimeSpan -Hours 24)
$settings = New-ScheduledTaskSettingsSet -AllowStartIfOnBatteries -DontStopIfGoingOnBatteries -WakeToRun
Register-ScheduledTask -Action $action -Trigger $trigger -RunLevel Highest -TaskName "Data Grid Backup Cleanup" -Description "Scheduled clean up job for the Production Data Grid cluster."
}

MakeScheduledTaskDataGridBackupCleanup

function MakeScheduledTaskMarvelCleanup
{
$action = New-ScheduledTaskAction -Execute ("$powerShellPath" + "powershell.exe") -WorkingDirectory $curatorPath -Argument ".\marvelCleanUp.ps1"
$trigger = New-JobTrigger -Once -At (Get-Date).date -RepeatIndefinitely -RepetitionInterval (New-TimeSpan -Hours 24)
$settings = New-ScheduledTaskSettingsSet -AllowStartIfOnBatteries -DontStopIfGoingOnBatteries -WakeToRun
Register-ScheduledTask -Action $action -Trigger $trigger -TaskName "Marvel CleanUp" -Description "Deletes indexes on the marvel cluster older than 30 days."
}

MakeScheduledTaskMarvelCleanup
Running Curator manually
The following sections contain examples of the different action files you can create manually to run in Curator. You can save these YML files anywhere. Ensure you use a full path to the files when executing the command.
Sample configuration file
---
# Remember, leave a key empty if there is no value.  None will be a string,
# not a Python "NoneType"
client:
  hosts:
  - cs-mv1-agtfs
  port: 9200
  url_prefix:
  use_ssl: False
  certificate:
  client_cert:
  client_key:
  ssl_no_validate: False
  http_auth:
  timeout: 30
  master_only: False

logging:
  loglevel: INFO
  logfile:
  logformat: default
  blacklist: ['elasticsearch', 'urllib3']
Sample backup action file
# Remember, leave a key empty if there is no value.  None will be a string,
# not a Python "NoneType"
#
# Also remember that all examples have 'disable_action' set to True.  If you
# want to use this action as a template, be sure to set this to False after
# copying it.
# Leaving name blank will result in the default 'curator-%Y%m%d%H%M%S'
actions:
  1:
    action: snapshot
    description: "description"
    options:
      repository: datagridbackup
      name:
      ignore_unavailable: False
      include_global_state: True
      partial: False
      wait_for_completion: True
      skip_repo_fs_check: False
      timeout_override:
      continue_if_exception: False
      disable_action: False
    filters:
    -  filtertype: none
Sample restore action file
# Remember, leave a key empty if there is no value.  None will be a string,
# not a Python "NoneType"
#
# Also remember that all examples have 'disable_action' set to True.  If you
# want to use this action as a template, be sure to set this to False after
# copying it.
actions:
  1:
    action: close
    description: "Close selected indices"
    options:
      delete_aliases: False
      timeout_override:
      continue_if_exception: False
      disable_action: False
    filters:
    -  filtertype: none
  2:
    action: restore
    description: "restore"
    options:
      repository: datagridbackup
      # Leaving name blank will result in restoring the most recent snapshot by age
      name:
      # Leaving indices blank will result in restoring all indices in the snapshot
      indices:
      include_aliases: False
      ignore_unavailable: False
      include_global_state: True
      partial: False
      rename_pattern:
      rename_replacement:
      extra_settings:
      wait_for_completion: True
      skip_repo_fs_check: False
      timeout_override:
      continue_if_exception: False
      disable_action: False
    filters:
    - filtertype: state
      state: SUCCESS
      exclude: False
Backup script with email service
You can also use Curator to send an email if an action failed or succeeded.
The script in the example uses a global variable to run and will not work if credentials are needed and it is run outside of the ISE, which contains that global variable. To create a global variable for your ISE session, run the following:
$global:cred = get-credential (Run this to create a global variable for your ISE session)
Note: Ensure you use the format email@domain.com or the email server will not recognize you.
cd "C:\Program Files\elasticsearch-curator"

.\curator.exe --config "C:\Users\csadmin\Desktop\Curator\Configuration.yml" "C:\Users\csadmin\Desktop\Curator\Backup.yml" | Out-File C:\Logs.txt

$Job = (Get-Content C:\Logs.txt | Select-String "successfully completed")
$complete = $Job.Contains("Job completed.")

$Job = (Get-Content C:\Logs.txt | Select-String "Snapshot FAILED")
$failed = $Job.Contains("FAILED")


if($failed) {
                $body = "A Data Grid Backup Job has failed check the backup job or email support@relativity.com to create a ticket"
                    Send-MailMessage -From "Jane Smith <jsmith@example.com>"`
                      -To "Jane Smith <jsmith@example.com>"`
                       -Subject "A Data Grid backup job has failed."`
                        -Body $body -BodyAsHTML -SmtpServer smtp.office365.com  -credential $cred  -UseSsl -Port 587
}

else {
                $body = "The Data Grid backup job has completed."
                    Send-MailMessage -From "Jane Smith <jsmith@example.com>"`
                      -To "Jane Smith <jsmith@example.com>"`
                       -Subject "A Data Grid backup job has is successful."`
                        -Body $body -BodyAsHTML -SmtpServer smtp.office365.com  -credential $cred  -UseSsl -Port 587
}

Write-Output("Done")
Setting the script as a scheduled task
Use the following steps to set the script as a scheduled task:
- Click Start > Administrative Tools > Windows Task Scheduler on the system that runs scheduled tasks.
- In the Task Scheduler, click Create Task under Actions on the right.
- Enter a name and description for the task. (Entering a description is optional.)
- Navigate to the General tab, and then select Security Options.
- Specify the user account that runs scheduled tasks. The account can be the same one that runs the Elasticsearch Windows service.
- Edit the settings to run tasks regardless of whether or not the user is logged in.
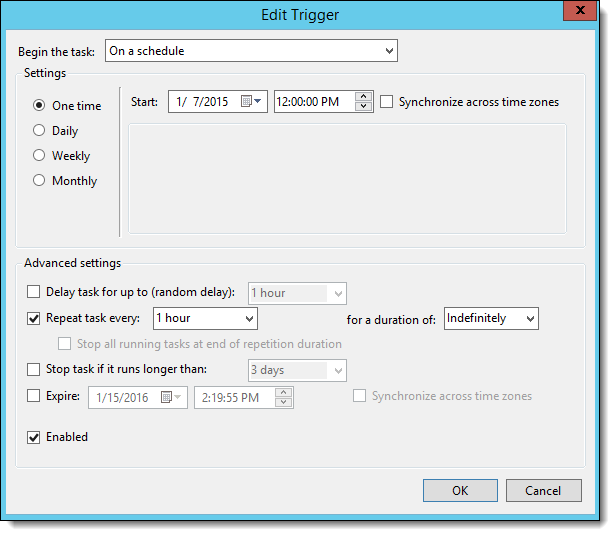
- Navigate to the Triggers tab, and then click New to add a new trigger for the scheduled task.
- Verify that the Begin the Task field is set to On a schedule, and then set the start date to your preferred time.
- Set the frequency to be every one hour if you're unsure what your recovery point objective goals are.
Note: Relativity stores the last 90 days of audits for each workspace in SQL Server. Long text fields, like extracted text, are usually never edited post import.
- Set the duration of the task to run indefinitely.
- Click OK.
- The following example has the task running every hour indefinitely:
- Navigate to the Actions tab, and then click New.
- Set the Action to Start a program.
- In the Program/script field, enter "Powershell."
- In the Add arguments (optional) field, enter the following value:
.\[Your PowerShell Script Name]
For example, if your PowerShell script is named "Migration1.ps1" then you would enter ".\Migration1.ps1" as the value.
- In the Start in (optional) field, add the location of the folder that contains your PowerShell script. In this example, the script directory is C:\Script.
The location entered in the Start in box also stores the scheduled task run times, the job history for the copies, and any additional logging that may occur.
- Click OK after configuring your preferred settings.
- Set any other preferred settings in the Conditions and Settings tabs. You can also set up an additional action to email an system admin each time the script runs.
- Click OK.
When you complete these steps, the task runs according to your settings.
Restoring a snapshot
There are multiple methods for restoring snapshots. Restoring snapshots from the Elasticsearch head console is the recommended procedure, but you can also use cURL to restore snapshots. The Elasticsearch website's documentation relies heavily on cURL commands for snapshot restoration. Brief descriptions of both methods are provided here.
Restoring snapshots from the Elasticsearch head console
You can restore a snapshot from the Elasticsearch head console. Use the following steps to restore a snapshot with this method:
- Navigate to the Elasticsearch head console URL (http://localhost:9200/_plugin/head).
- Expand the Query tab.
- Enter the following URL in the first field: http://localhost:9200/
- Enter _search in the second field, and use the drop-down menu to select GET.
- Enter the following code to retrieve your snapshot:
{
	"type": "fs",
	"settings": {
		"location": "/mount/backups/my_backup",
		"compress": true
	}
}
Note: You can restore a snapshot on a functioning cluster, but all indexes residing on the cluster must be closed. The restore only updates closed indexes and creates a new index for any index that doesn't already exist on the cluster.
Restoring snapshots with cURL
Most of the documentation on the Elasticsearch website relies on cURL commands to restore snapshots. You must install cURL for Windows in order to have access to cURL commands in a Windows environment. You can download cURL for Windows here.
Note: You can paste cURL commands into Marvel Sense (excluding the $ character), and Marvel automatically converts the cURL command into JSON. The cURL command doesn't convert if typed in manually, you must paste it from your clipboard.
Once you install cURL for Windows, you can restore the cluster state and all indexes in a snapshot with the following cURL command:
$ curl -XPOST "localhost:9200/_snapshot/my_backup/snapshot_1/_restore"
Note: You can restore a snapshot on a functioning cluster, but all indexes residing on the cluster must be closed. The restore only updates closed indexes and creates a new index for any index that doesn't already exist on the cluster.
For more information on creating or restoring snapshots, see Snapshot modules on the Elasticsearch website.