


You can organize facts and issues using several methods, including nesting, numeric ordering, drag and drop, and color coding.
Customizing Case Dynamics
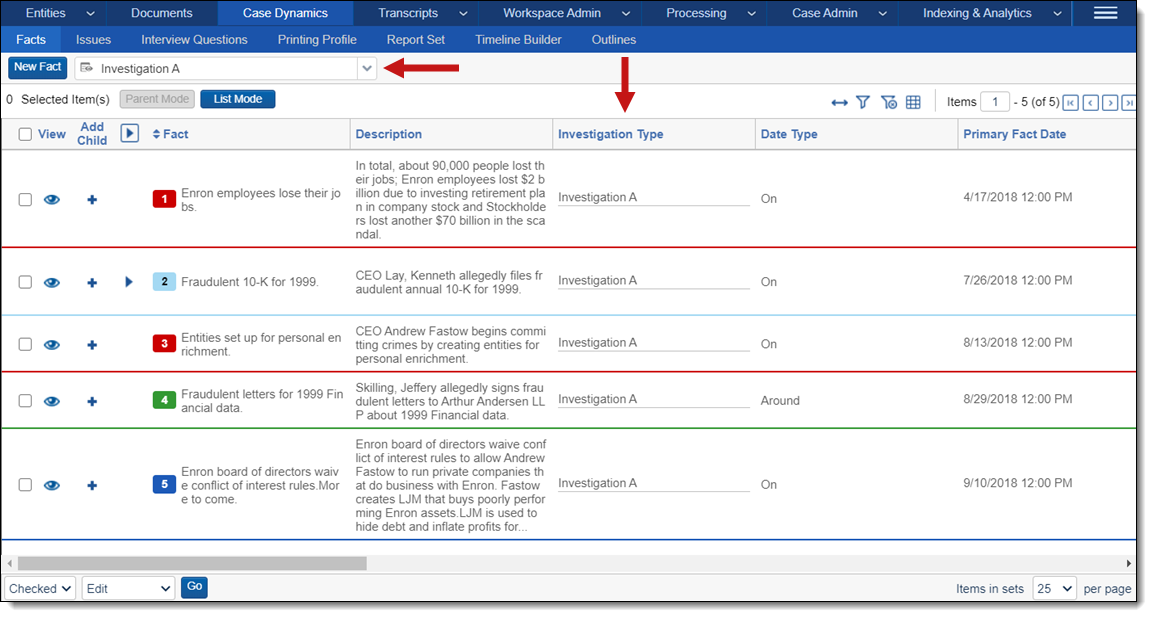
You can create custom fields, views, and layouts on any facts, issues, interview questions, or entity object. For example, imagine you have a case with three rounds of investigation. You create a custom field called Investigation Type with choices for each round - Investigation A, Investigation B, and Investigation C. Then, you create a custom view called Investigation A which returns all facts tagged with Investigation A on the Investigation Type field.
(Click to expand)
- Notes:
- You can't add a custom File type field to a Case Dynamics object.
- Do not modify the fields, views, or layouts that are part of Case Dynamics. If modified, all changes revert upon upgrade.
Viewing additional information with custom layouts
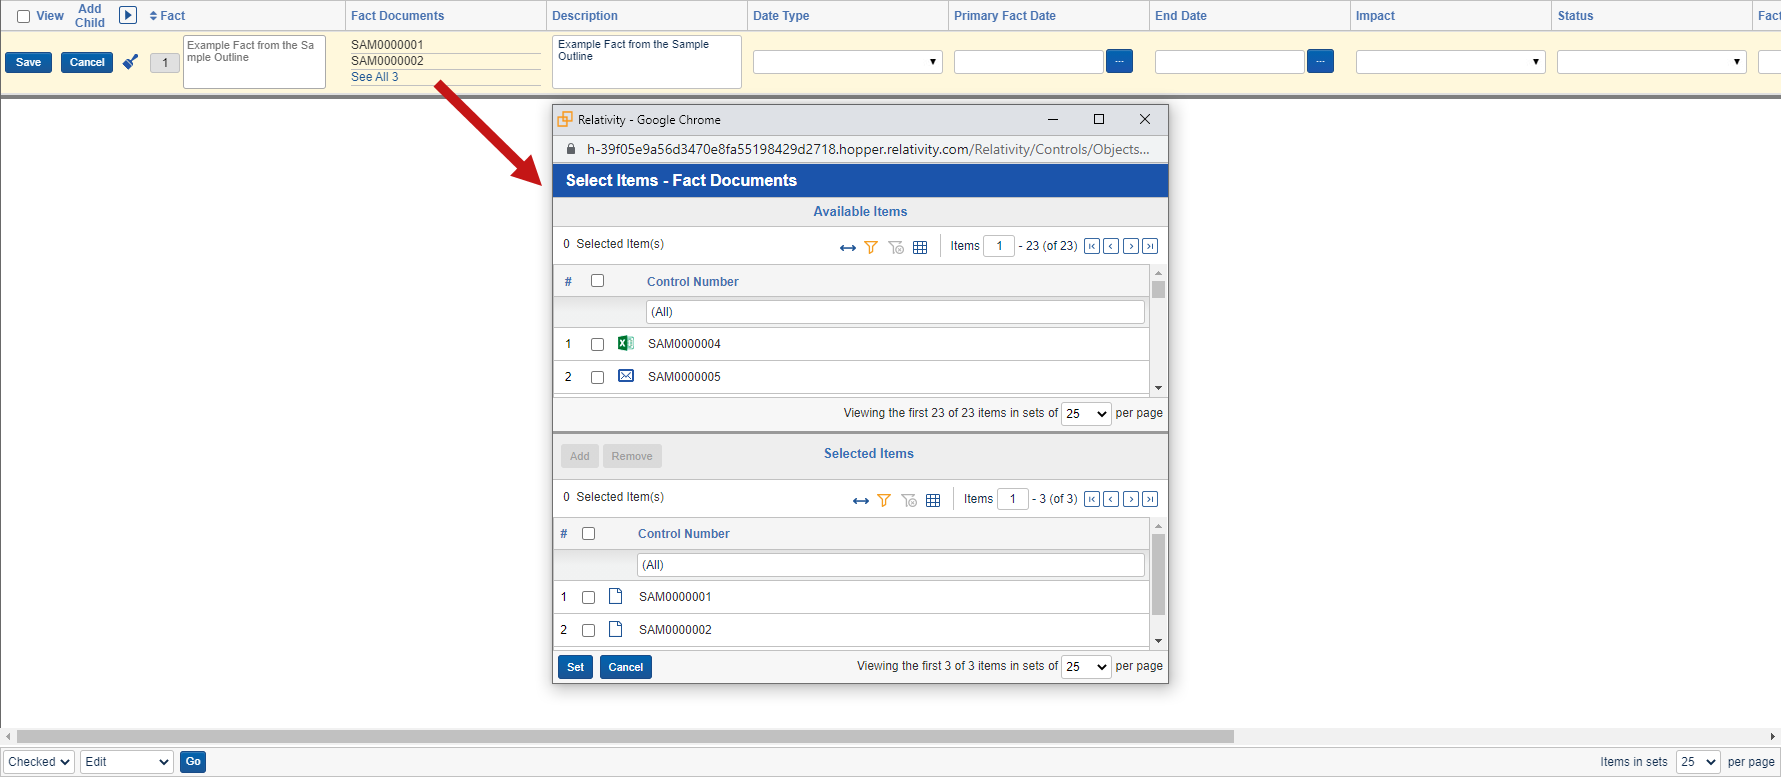
When you are editing a Case Dynamics object, such as a fact, you may find that there are additional fields that you would like to view like in the image below.
(Click to expand)
Fortunately, you can view additional fields that relate to a Case Dynamics object by creating a custom layout that utilizes a view. The view that you select should contain the fields you wish to see to make it easier to find the information you're looking for.
To create a custom layout with the desired view for a Case Dynamics, do the following:
-
Navigate to the Layouts tab.
-
Either create a copy of a Case Dynamics object layout that you will customize or create a new layout with the desired Case Dynamic object selected for the Object Type field.
-
Click the Build Layout button.
-
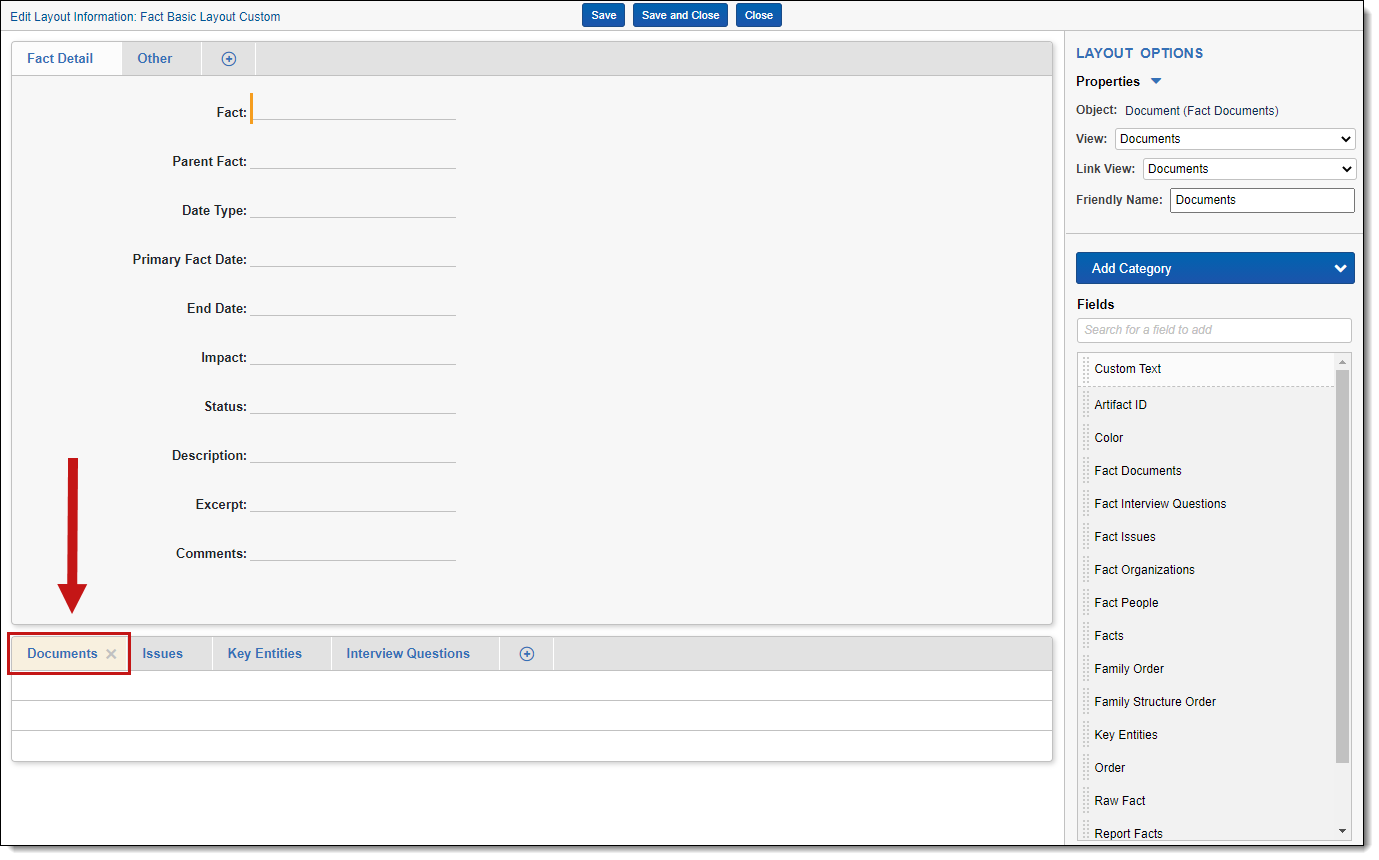
Either select the desired object list in the layout if it already exists or if you are using a newly created layout, add the desired object list and then select it.
(Click to expand)
-
Select the desired View option in the upper-right. The View field determines what you will see when you use the custom layout.
-
Select the desired Link View option in the upper-right. The Link View field determines what you will see when you click a Link button on the Case Dynamics object.
-
If desired, continue customizing other objects in the layout by repeating steps 4-6.
-
Once you are done customizing the layout, click Save and Close.
-
Navigate to the tab for the Case Dynamics object.
-
Click the
 icon in the row of the object that you wish to see additional information about.
 -
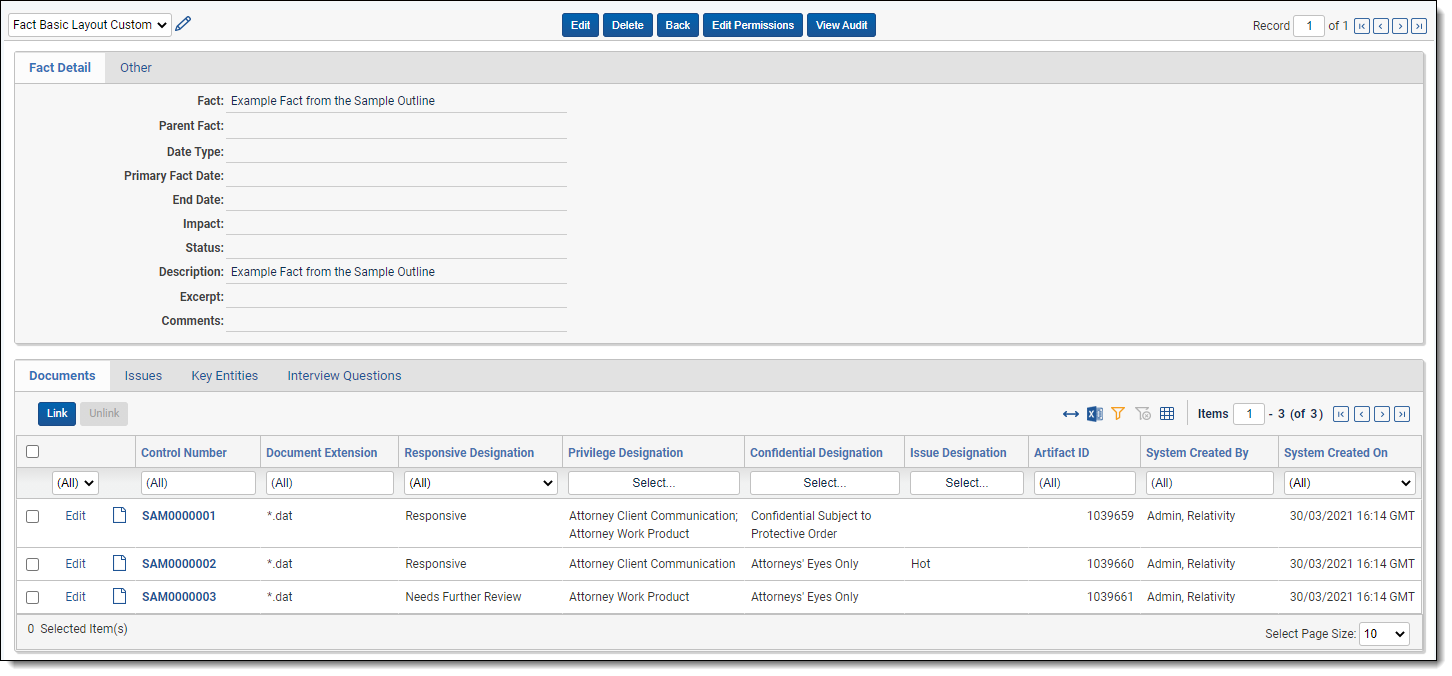
Ensure your custom layout is selected and then select the desired object tab such as Documents. The fields included in the View you previously selected will display to give you additional information about the selected object(s).
(Click to expand)
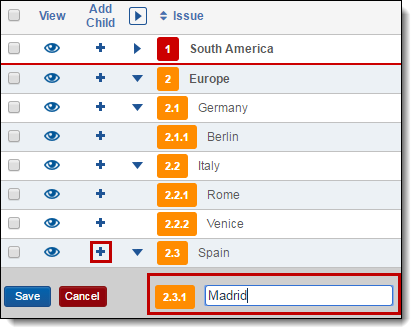
Infinite nesting and numeric ordering
You can create facts/issues and nest sub-facts/sub-issues, also known as creating parent/child relationships. There is no nesting level cap.
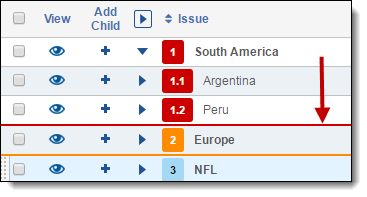
The numeric ordering functionality occurs when creating a fact or issue. The values auto increment and are editable. As you build objects out, the numbering takes the highest number value and increments it by 1 for the next object. Children or sub-facts/sub-issues also inherit the color of the parent fact/issue.
Drag and drop
To drag and drop a child fact or issue, click and drag the object's row to:
- Nest the object in another fact/issue.
- Reorder the object above or below a fact/issue.
A blue bar indicates where the object will go when you release your mouse click.
Note: The drag and drop functionality is only available on the child level. Parent topics cannot be reordered via drag and drop. To reorder parent topics, change their numeric value and refresh the page.
In the following nesting example, dropping 2.1.3.2 Venice into 2.1.3 Italy will nest Venice as a sub-object of Italy.

In the following reordering example, dropping 2.1.3 Italy between Spain and Germany will renumber Italy to 2.1.2 and Germany to 2.1.3.
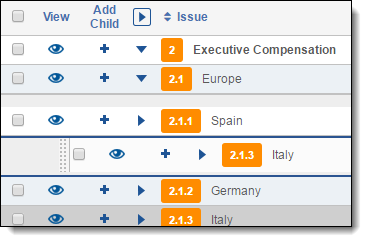
The object that you click and drag is automatically associated with the parent object to which you assign.
Deleting facts and issues
If you delete a parent object with children, Case Dynamics will unlink any associated children instead of deleting the child objects. You can delete the child facts/issues by selecting the checkbox(es) next to the child object and performing a mass delete.
Color coding
Use color coding to visually distinguish the parent facts/issues and any of its children from the other parent groups.
- Create a new fact or issue, or press Ctrl + A. By default, a new fact/issue is gray.
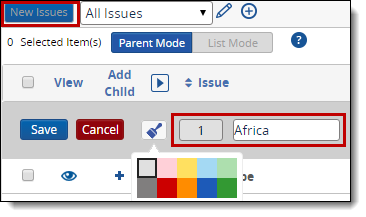
- Select
 to apply a new color from the palette. You can change the parent object color at any point by selecting the object, then .
 - Click Save when finished.
The chosen parent object color is delineated with the same colored line at the bottom of each parent object.
Inline list view organization
The pop-up dialog box in the inline list view helps you visualize hierarchies within facts, issues, and interview questions to demonstrate parent/child relationships. It also facilitates linking objects. When you create a new object through the inline list, it is automatically linked.