


You can control the applications that workspaces contain by exporting, uninstalling, and deleting them. When you export an application, you have a file that you can use to import it into other workspaces. You can also uninstall or delete applications that you no longer want in a workspace.
This page contains the following information:
Uninstalling applications
You can remove an application and all of its components from a workspace by uninstalling it. When you uninstall an application, Relativity deletes all child objects and associative objects, unless other applications or dependencies restrict their removal. Relativity also deletes any saved searches your application includes, but it doesn't remove the associated indexes from the workspace. This is because the indexes aren't part of the application. You must have the appropriate system admin permissions to lock or unlock an application. For more information, see Workspace security.
For example, you might need to uninstall an application that you accidentally deployed to a template case. If you want to remove only the application instance, or if you created an application that you haven't pushed to the library, you may want to delete it, rather than uninstall it. See Deleting applications.
Note: Applications installed via the Application Library can only be removed by System Administrators.
Uninstalling an application
Use the following steps to uninstall an application.
To ensure optimum performance of Relativity, uninstall applications only during off-hours when users aren't actively reviewing documents in any workspaces.
- Select the Relativity Applications tab in the workspace that contains the application you want to uninstall.
- Click the application name to display the details view.
- Click Unlock Application, if necessary. You can't uninstall a locked application.
- Click Uninstall Application to display the Component Summary page. This page lists object types fields, event handlers, custom pages, and other components of your application.
- (Optional) Click
 to expand the list of components. The hierarchy tree shows the parent-child relationships for component types in your application.
 - (Optional) Clear the check box for any components that you don't want to uninstall.
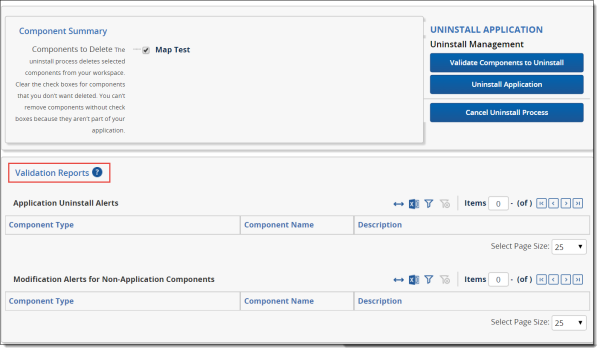
- Click Validate Components to Uninstall to view the Application Uninstall Alerts and Modification Alerts for Non-Application Components reports. See Uninstall and modification alerts.
- Click Uninstall Application. When the confirmation message appears, click Yes to complete uninstalling the application. You can manually uninstall custom pages if your application includes these components. See Manually uninstalling custom pages.
Uninstall and modification alerts
The process of uninstalling an application deletes the same components that you would delete manually through the Relativity UI. When you delete components manually, Relativity provides you with the option to view a dependencies report. You can also view reports that provide information about object dependencies, and modifications to existing objects, that occur when you uninstall an application:
- Application Uninstall Alerts - lists dependencies that may prevent the removal of an application component. For example, Relativity doesn't remove an object type that a locked application references or the parent object of a child that you want to retain in the workspace.
- Modification Alerts for Non-Application Components - lists components that aren't part of the application, but Relativity must modify them in order to uninstall the application. Other objects may reference components that are deleted as part of the uninstall process. For example, Relativity may delete an object type that an unlocked application references.
To view these reports, click Validate Components to Uninstall on the Component Summary page. See Uninstalling an application.
Viewing application uninstall errors
Relativity displays the view for the Relativity Applications tab after you click Uninstall Application on the Component Summary page. When an application fails to uninstall properly, Relativity locks the application and generates a list of errors that occurred during the uninstall process. The application also continues to appear in the list view of the Relativity Applications tab.
To view uninstall errors, click the application name in the list view to display the details page, and then click Show Errors.
Auditing the uninstall process
When you uninstall an application, Relativity audits deleted and updated components. You can view this audit information from the History tab in a workspace by selecting the All History view and filtering on a specific action. In addition, you can view changes to specific objects by clicking View Audit on their details page.
If you want to disable auditing for update or delete actions during the uninstall process, set the AuditApplicationUninstallEnabled enabled instance setting to False.
Manually uninstalling custom pages
You can uninstall custom pages that you develop for an application by manually deleting them from the IIS where the application is. You can only uninstall custom pages associated with applications that you push to the application library or that you install on a workspace.
To complete this task, you need permissions to the following machines:
- Web server (IIS) where you deploy the application.
- SQL Server where the EDDS resides.
Note: You should only uninstall custom pages when you don't want any workspace in your Relativity environment to use the application associated with them.
Determining the application GUID
You need to know the GUID for the application to uninstall its custom pages deployed on the IIS. To determine the GUID, open Microsoft SQL Server Management Studio. Run this query on the ApplicationServer table in the EDDS. Replace YourApplicationName with the name of your application.
select Name, [GUID] from EDDS.eddsdbo.LibraryApplication
where Name = 'YourApplicationName'
Uninstalling custom pages from the IIS
- Open the IIS Manager on the web server where you deployed the application with custom pages that you want to uninstall.
- Expand the Default Web Site > Relativity > CustomPages folders. The CustomPages folder should contain the application GUID associated with the custom pages that you want to uninstall.
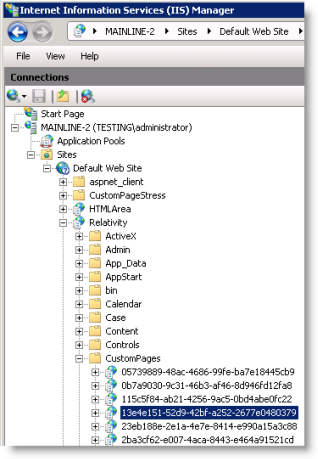
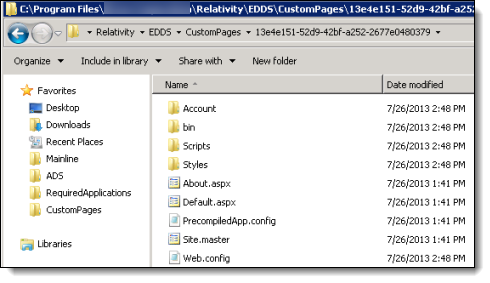
- Right-click on your application GUID, and then click Explore in the menu. Windows Explorer opens and displays a folder with the same name as your GUID. Minimize this window for later use in step 9.
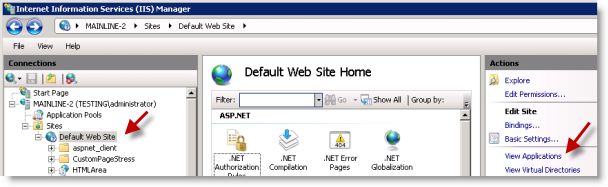
- Highlight the Default Web Site, and then click View Applications.
- Right-click on your application GUID, and then click Remove on the menu. Click Yes on the Confirm Remove dialog.

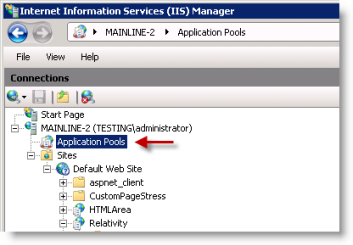
- Click Application Pools located under the server name in the Connections pane.
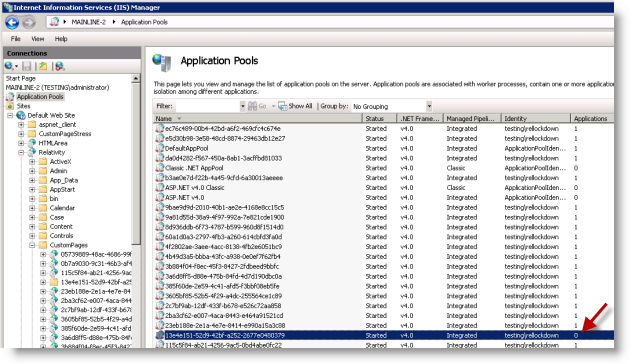
- Locate the GUID for your application in the Application Pools pane. Confirm that the Application column displays 0.
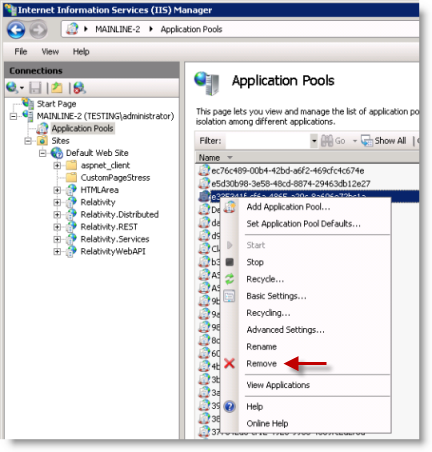
- Right-click on the application pool with your GUID, and then click Remove on the menu. Click Yes on the Confirm Remove dialog.
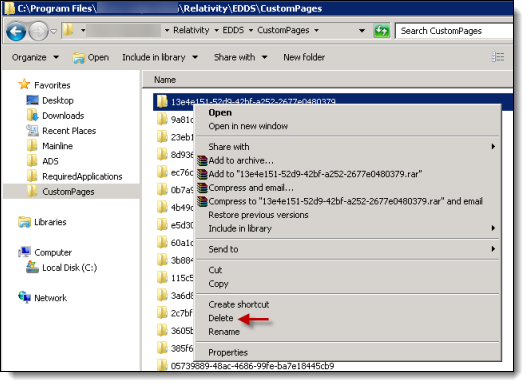
- Maximize the Windows Explorer window that you opened in step 3. In the left pane, click the Custom Pages parent folder for your GUID subfolder.
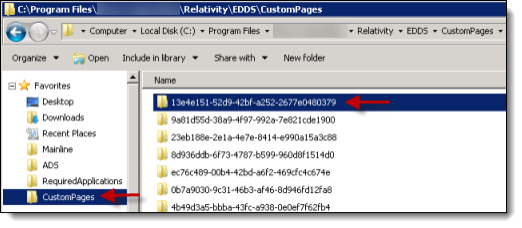
- Right-click on your GUID folder, and then click Delete. Click Yes on the Delete Folder dialog.
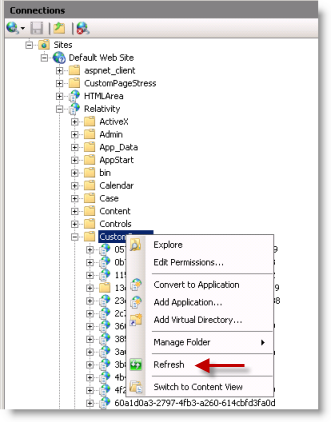
- Right-click on the CustomPages folder in the Connections pane of the IIS Manager, and then click Refresh. The tree no longer displays your GUID subfolder under the CustomPages folder.
- Open Microsoft SQL Server Management Studio. To ignore the custom pages that you want uninstalled, run the following update statement on the ApplicationServer table in the EDDS. Replace YourApplicationGUID with the GUID assigned to your application.
update edds.eddsdbo.ApplicationServer
set State = 3
where AppGuid = 'YourApplicationGUID'
This statement sets the state of the custom pages to 3, which indicates that the custom pages should be ignored.
- Repeat these steps 1-12 on each server in your environment where you deployed the application.
Updating the state on custom pages
If you need to deploy the uninstalled custom pages, you can update their state to make them active. Run the following update statement on the ApplicationServer table in the EDDS. Replace YourApplicationGUID with the GUID assigned to your application.
update edds.eddsdbo.ApplicationServer
set State = 0
where AppGuid = 'YourApplicationGUID'
This statement sets the state of the custom pages to 0, which redeploys them.
Deleting applications
You can remove an application instance from a workspace by deleting it. When you delete an application instance, Relativity deletes child objects and unlinks associative objects. However, it doesn't delete the associative objects from the workspace. If you want to delete these objects referenced by the application, uninstall it. Deleting instead of uninstalling an application may be useful when building and testing an application that hasn’t been pushed to the application library. For complete details on uninstalling applications, see Uninstalling applications.
Use these steps to delete an application:
- Select the Relativity Applications tab in the workspace containing the application that you want to delete.
- Unlock the application if necessary. You can't delete a locked application. See Locking and unlocking applications.
- Click the application name to display the details view.
- Click Delete.
- (Optional) Click Dependencies in the pop-up window to view a report containing the following information:
- Child objects to be deleted with the application
- Associative objects to be unlinked from the application
- Click Delete. Relativity deletes the application and its children and unlinks any associative objects.