


Feedback
Navigation
Relativity is a complex application with many screens and functions. This section describes the Review Interface you use to review documents as well as some of the standard procedures you'll need to perform as you use the product.
Logging in
Relativity offers several ways to log in and it's possible to have two or more methods available to you. Your system admin will provide you with all the information you need to log on. Contact your system admin if you have additional questions.
For procedures to log in, see
Tab navigation
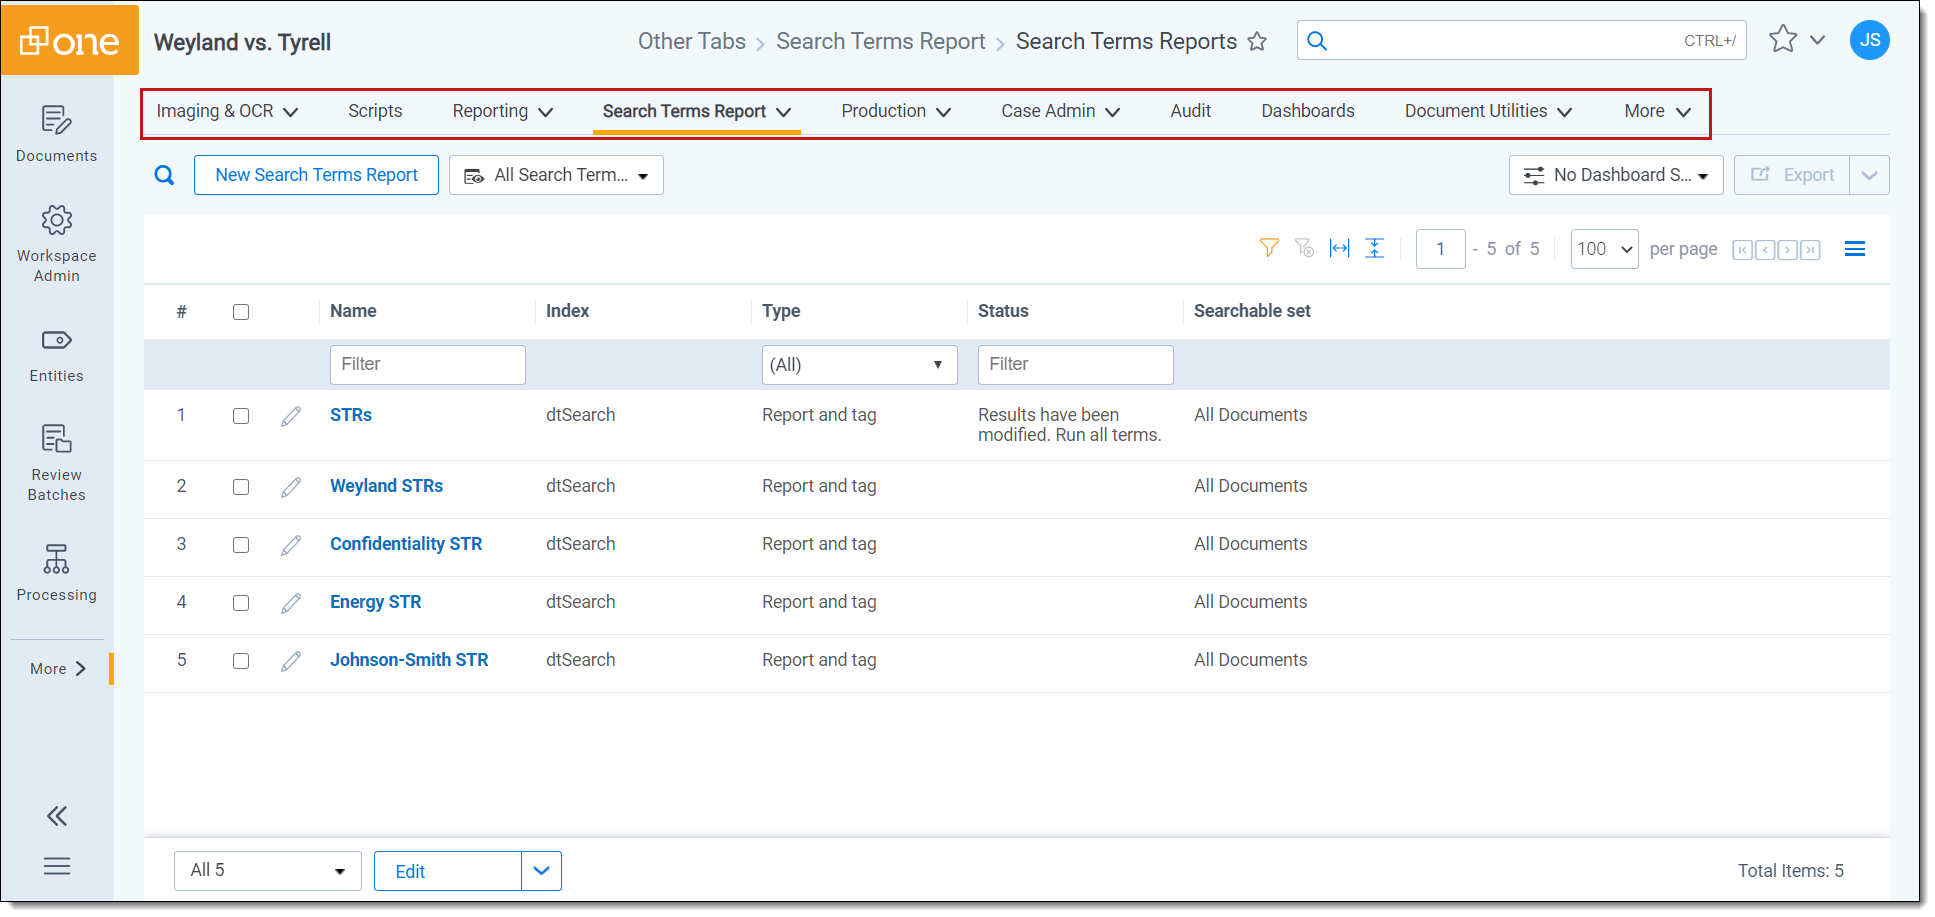
When you log in to Relativity, you see tabs displayed in the Sidebar on the left side of the page. You may also be able to access tabs using the Tab strip which runs horizontally across the top of the page. The Sidebar and Tab strip display the currently available tabs whether you are on the instance or workspace-level. The active tab in the Sidebar is indicated by the tab icon displaying in orange and in the Tab strip, the active tab is indicated by an orange line displaying under the name.
The tabs are arranged based on the Order value for each tab.
You can navigate tabs using the following features.
Sidebar
The Sidebar allows you to place tabs that you commonly use on the left-side of Relativity so that you can access them at your convenience.
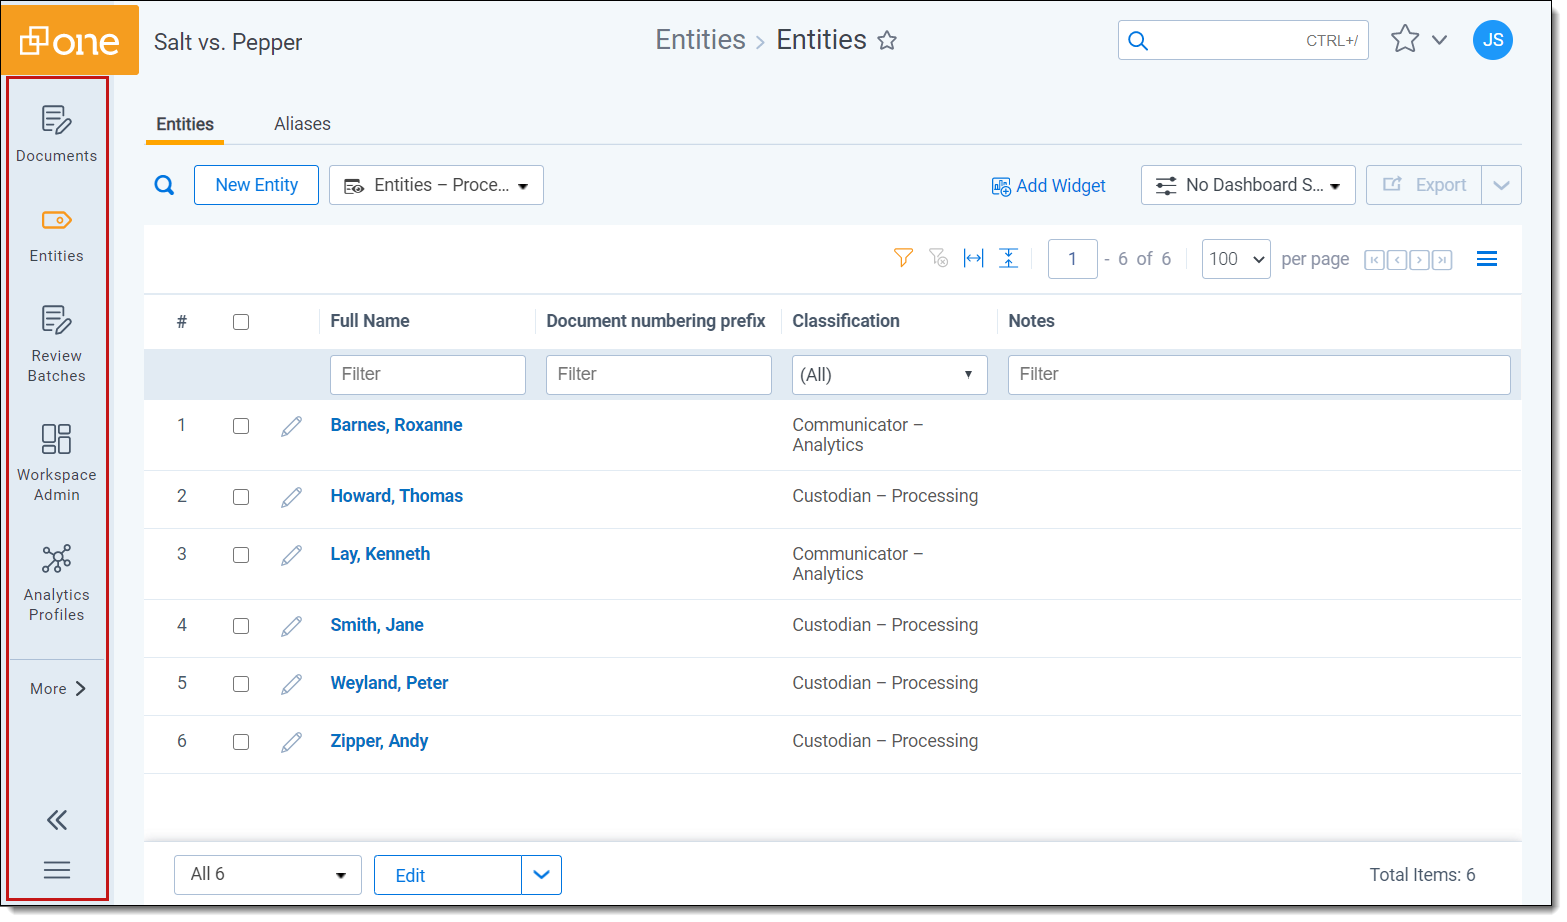
Tabs are ordered from top to bottom of the Sidebar based on the value entered in Order. The lowest Order value displays at the top and the highest value displays at the bottom.
The total number of tabs that display in the Sidebar is determined by the resolution of your browser. Tabs that have been assigned to the Sidebar and do not fit, are available by hovering your cursor over the  icon. If a tab has one or more child tabs, you can view and select those tabs by hovering over the parent tab's row in the fly-out menu.
The More icon will display with an orange bar on the right side  to indicate that the active tab is located in the More menu.
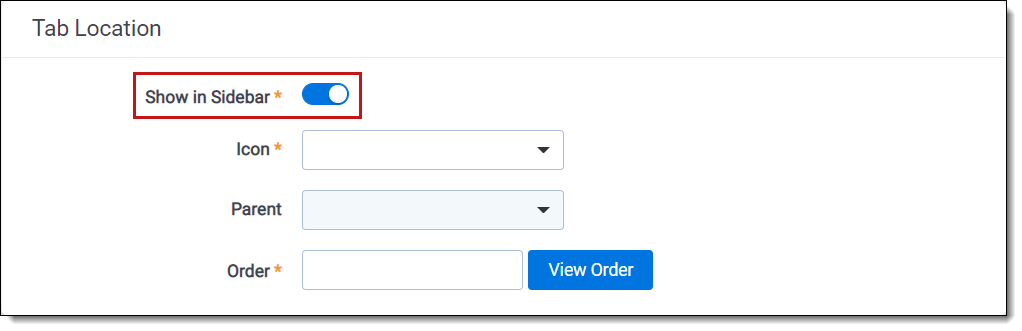
To add a new or pre-existing tab to the Sidebar, toggle the Show in Sidebar on and click Save.
Tabs can display in the Sidebar with their name and icon. Alternatively, to reduce the width of the Sidebar and increase the number of icons that can display, you can click the Collapse icon  to only display the icon for each tab.

All tabs menu
Click the  icon at the bottom of the Sidebar to display the All tabs menu. Every child tab that a user can view, as determined by their permissions, will display in the menu in alphabetic order. This menu does not display parent tabs.
Tab strip
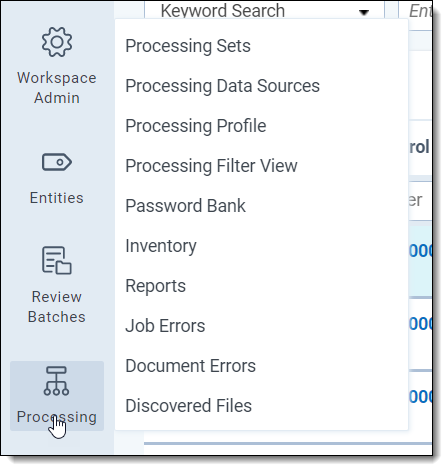
If you select a tab that either has child tabs or is a child tab to a parent tab, the Tab strip will display horizontally across the top of Relativity. If a tab in the Tab strip has one or more children tabs, hover your cursor over it to view and select the desired tab. Depending on the size of your browser, there may be more tabs than can display in the Tab strip. You can hover your cursor over  in the Tab strip to view additional tabs in a fly-out menu.
Parent and child tab display
Parent tabs can be displayed in the Sidebar or the Tab strip. Tabs that have child tabs in the Tab strip will display with an arrow on the right side.
![]()
To view the child tabs of a parent tab in the Sidebar or Tab strip, hover your cursor over the parent tab and the child tabs will display in a fly-out menu.
When you select a child tab (for example, Production Sets) from the Sidebar or the Tab strip, you are taken to that page. In addition to an orange bar displaying underneath the parent tab in the Sidebar, the child tab and the path to reach the active tab is highlighted in blue to help you track your location in the Sidebar or the Tab strip.
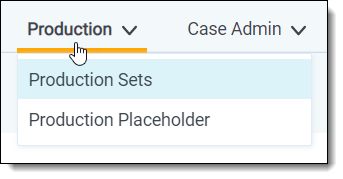
Instead of clicking the drop-down arrow, you can also click the parent tab itself. Clicking the parent tab takes you to the default child tab, which is identified by the Order setting for each child tab.
User options
When you first log in to Relativity, you see the default Home tab. Relativity displays the Workspaces tab as your default Home tab when you navigate to Home, but you can change the default Home tab to be any tab you want.
The Relativity Instances section includes federated instances you have access to. Federated instances links allow reviewers to easily switch to other Relativity environments.
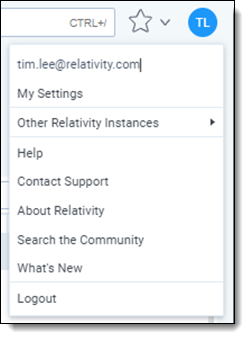
The user drop-down menu options are:
- My Settings - opens a pop-up where users can change their personal settings. See My settings for more information.
- Other Relativity instances - hover your cursor over this option to display a fly-out menu of federated instances that have been linked to your current one. Click on the desired federated instance to switch to that linked instance.
- Help - launches the Relativity Documentation website in your internet browser, which provides all Relativity user, system admin, and systems documentation in a navigable format.
- Contact Support - opens a new window in your internet browser containing the Technical Support page of the Relativity website where you can open a support ticket.
- About Relativity - opens a pop-up displaying the Relativity version number, your instance details, and licensing agreement information.
- Ask the Community - opens a new window in your internet browser containing the Relativity Community page where you can find applications for Relativity to download, stay up to date on the latest Relativity events, and interact with other Relativity users.
- Logout - logs users out of Relativity.
Changing the default Home tab
Relativity displays the Workspaces tab as your default Home tab when you navigate to Home, but you can change the default Home tab to be any tab that is available for default and that is not a specific tab within a workspace.
Perform the following steps to change the default Home tab:
- Navigate to the Tabs tab.
- Click on the tab you want to set as the default Home tab.
- Click the
 in the row of the tab you wish to edit.
 - Toggle the Set as Default Tab field on.
- Click Save.
If a user is not a member of a group with permission to view the tab set as the default Home tab, Relativity redirects to the lowest ordered tab the user's permissions allow.
My settings
Clicking My Settings from within the user drop-down menu opens a settings mode pop-up, which displays your user information. Click Edit to change your settings.
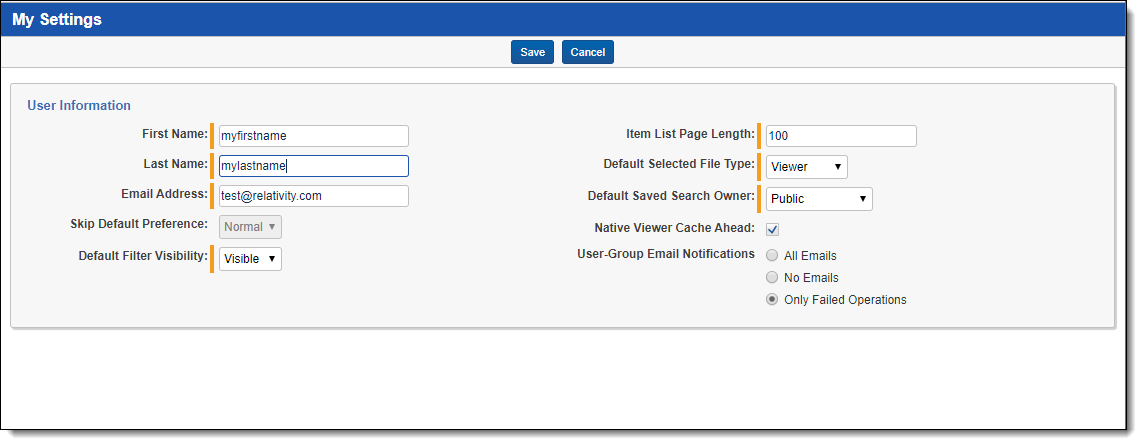
- First name - your first name.
- Last name - your last name.
Your first and last name appear as your username throughout Relativity.
- Email address - your email address and login.
- Skip Default Preference - When reviewing documents, skip prevents a reviewer seeing documents that are already coded (depending on the selected view). Choose one of the following options:
- Normal - this setting disables the skip feature.
- Skip - this setting turns on the skip feature.
- Default Filter Visibility - determines whether or not the filters for columns in views display by default.
- Hidden - hides filters by default.
- Visible - displays filters by default.
- Item list page length - a numeric field indicating the default list length for all lists in Relativity. It can be set from 1 to 200.
- Default Selected File Type - the default viewer mode (Viewer, Native, Image, Long Text, or Production) used when first loading the Viewer. If the mode selected is not available, the Viewer will instead use the first available option. See Native Viewer for details.
- Default Saved Search Owner - determines whether saved searches are public or private by default. If set to Public, the search is public and all users with rights to it can see it. If set to Logged in User, the search is private and only the logged in user is able to see it.
- Native Viewer Cache Ahead - if checked, this field pre-loads the next native document in your review queue when the active document is loaded.
- User-Group Email Notifications - user's preference for email notifications when adding or deleting Users or Groups.
- All Emails - receive all email notifications.
- No Emails - receive no email notifications.
- Only Failed Operations - receive email notifications on failed operations only.
Depending on your permissions, you may not have rights to edit the Default Saved Search Owner field.
Depending on your permissions, you may not have rights to edit the User-Group Email Notifications field.
After changing your settings as needed, click Save.
UI framework
In the UI framework, you can access dashboards and the search panel.
Dashboards
When you've created a page configuration you'd like to preserve, you can create a customized dashboard. You can save multiple dashboards to quickly change the page configuration. The item list and any widgets on the dashboard will update automatically in response to filtering or searching. Dashboards only report on data within the workspace you are in.
For a list of dashboards that provide an effective starting point for administrators to help review teams visualize their data set, see the Creating commonly-used dashboards.
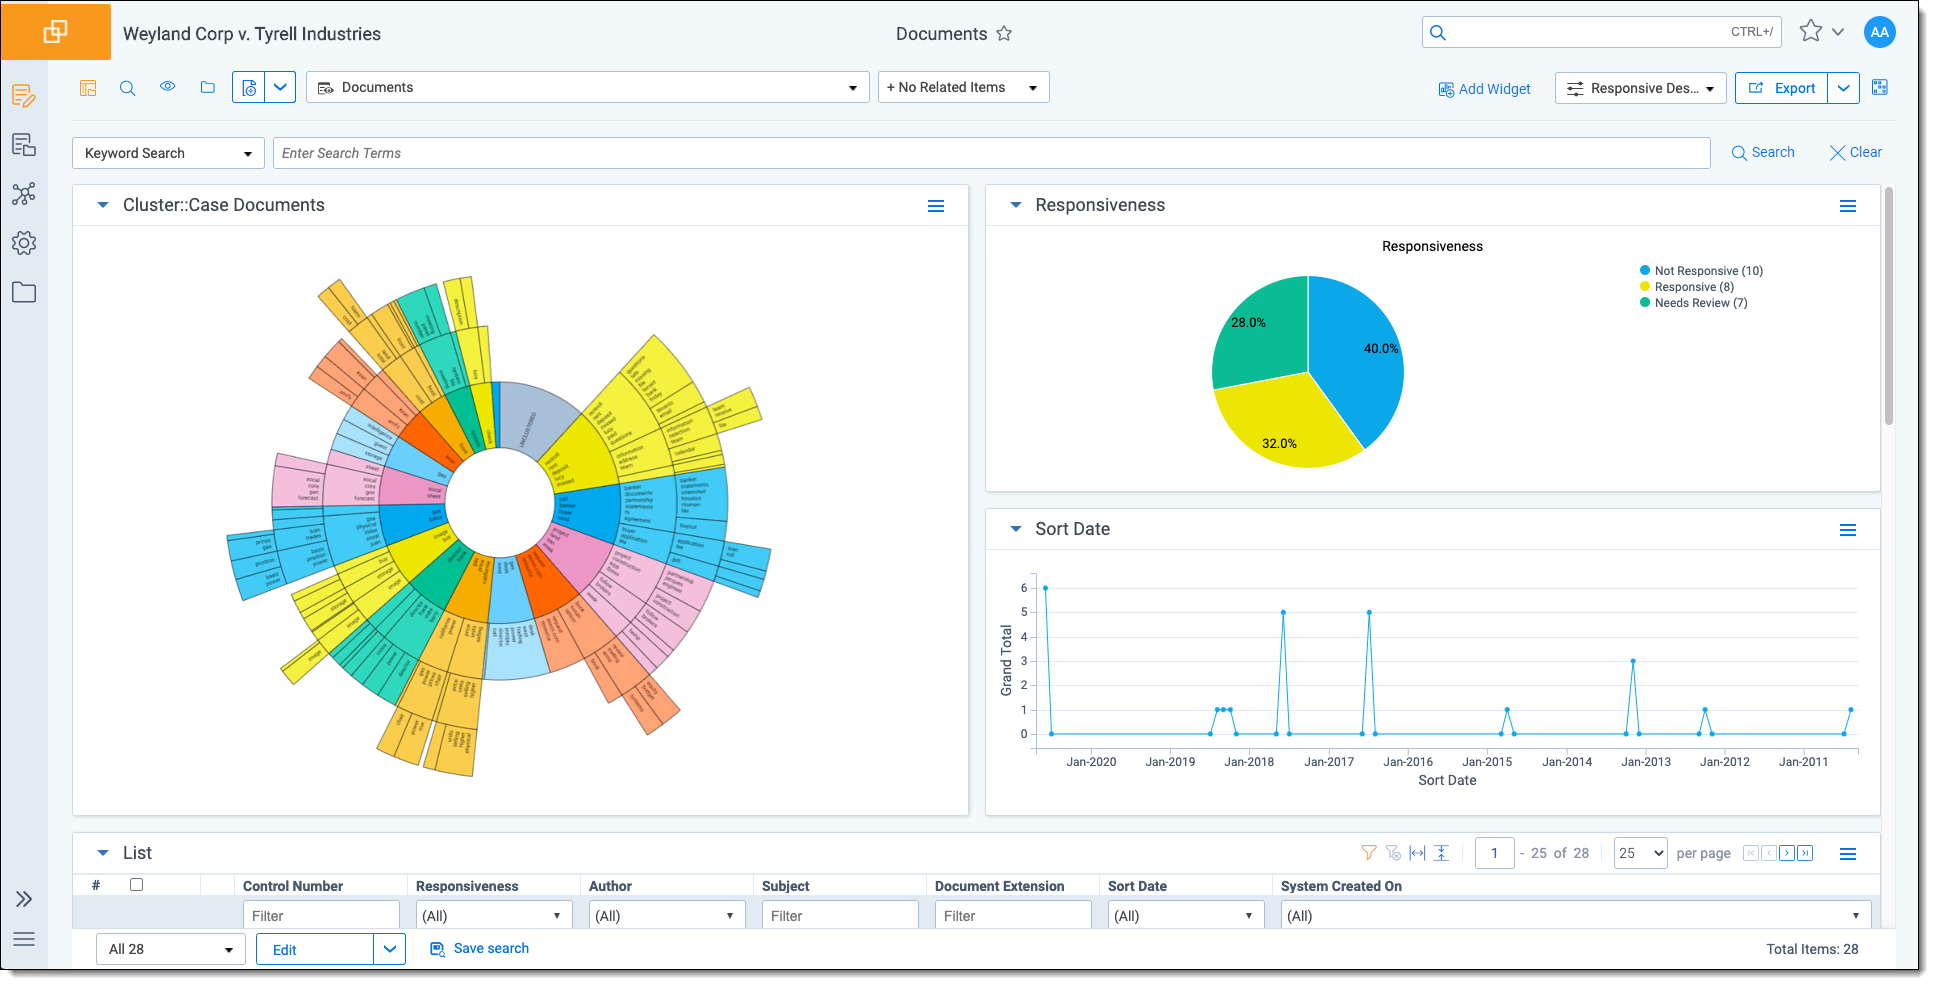
The page initially appears with the folder browser on the top left, the search panel on the bottom left and the item list to the right. Within this new framework, you have multiple options for customizing your display.
You can resize, move, or collapse any panel on the page, including any widgets you create.
- To resize any panel, hover over the line separating the item list from the panel until you see the mouse pointer change to horizontal arrows, then click and drag.
- To move, hover over the top of the panel until you see the
 icon. Then, click and drag the panel to the new location.
 - To collapse the search panel or browser pane, click the
 icon. Once collapsed, click the
  icon to restore the browser pane or the
  icon to restore the search panel.
Additionally, you can drag and drop panels to rearrange on the page. Click any panel and drag it to a new location. The other panels will automatically move to accommodate the panel you're dropping.
Dashboards and widgets can be copied over to newly created workspaces if they are part of a template. Dashboards only report on data within the workspace you are in if data is loaded in the workspace.
You must have the correct workspace permissions to add, edit, or save a dashboard and to save pivot widgets to your dashboard.
You can also export individual Pivot widgets to Excel or to PNG format from each widget's context menu. See
To enable the Add Widgets button and Pivot functionality for an Relativity Dynamic Object (RDO), you must select Enabled for the Pivot property in the Object Type Information section for the object.
Creating a dashboard
To create a dashboard:
- Click the Dashboards drop-down menu in the top right corner of the screen.

You can only access the drop-down if Pivot is Enabled for the given object type.
- Click New Dashboard to save the current page configuration as a new dashboard.
- Enter a name and an order number for the dashboard.
The dashboard with the lowest order number will appear by default when you log in to Relativity.
Adding widgets to a dashboard
You can add the following widgets to customize your dashboard:
- Pivot charts and tables - You can use Pivot to summarize data in tables or charts to visually analyze trends in your data.
- Cluster visualizations - On the Documents tab, you can use Relativity Cluster Visualization to render your cluster data as an interactive visual map by adding a Cluster Visualization widget. This offers you a quick overview of your document cluster sets and quickly drill into each cluster set to view subclusters and conceptually-related clusters of documents.
- Communication Analysis - After running the name normalization operation within structured analytics, you can use this widget to visualize communication frequencies, patterns, and networks between the entities linked to the documents in the view.
When you reach the maximum number of widgets allowed on a dashboard, the Add Widget button will be grayed out and a tooltip displays when you hover over it that lets you know the reason you cannot add any additional widgets to your dashboard. This is controlled by the MaxNumberDashboardWidgets instance setting.
Saving changes to a dashboard
You can also make changes on the fly and save a dashboard with the changes. If a dashboard has not been saved, an orange notification displays in the Dashboard drop-down menu until it is saved.
- Click the Dashboards drop-down menu in the top right corner of the screen to display the list of dashboards available on the current tab.
- Click Save to save the changes to the existing dashboard. Click Save As to save the page configuration as a new dashboard, and then enter a Name and Order number.
If a dashboard is part of a locked application, the option to save the dashboard is unavailable.
Deleting a dashboard
To delete a dashboard from the current tab you are in, click the  icon to the right of the dashboard you want to delete in the Dashboards drop-down menu.
Click Delete in the Delete Dashboard Confirmation popup to delete the dashboard.
If a dashboard is part of a locked application, the option to delete the dashboard is unavailable.
Renaming a dashboard
To rename a dashboard:
- Click on the
 icon next to the name of the dashboard in the Dashboard drop-down menu.
 - Enter a Name and an Order number for the dashboard. The order number controls the order in which the dashboard displays in the list.
- Click Save to save your changes.
If a dashboard is part of a locked application, the option to edit the dashboard is unavailable.
Using the search panel
While working in the Document list in the new UI framework, you can use the
Resetting your password
There are two ways you can reset your password if your system admin has given you the appropriate permissions. You can use the Reset Password option inside Relativity or the Forgot your password? link on the Relativity login screen.
If your password has expired, the Reset Password dialog appears automatically when you log in to Relativity. Your system admin determines when your password expires and the number of previous passwords that you can't reuse.
Resetting your password inside Relativity
If you're already logged in to Relativity, you can reset your password by clicking Reset Password in the Home drop-down menu. This directs you to a Reset Password pop-up.
Enter your old password, then enter and retype your new password. Click Save.
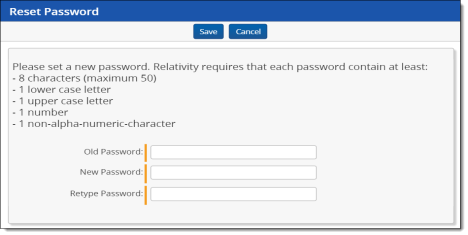
You can use your new password next time you log in to Relativity.
Resetting your password outside Relativity
If you can't log in to Relativity because you've forgotten your password, perform the following steps to reset your password.
- Click Forgot your password? on the login screen.
- Enter your email address in the pop-up.
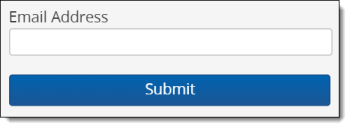
Relativity sends an email to the address you provide. You should receive this message within a few minutes. If you don't receive an email, check your spam or junk mail folder. - Click the link in the email to reset your password. This link will be active for 15 minutes and expires after that time. If the link has expired, or if you click the link more than once, you'll have to generate a new password reset request.
- The link directs you to a page where you can create a new password.
- Enter a new password and retype it, then click Submit. After your password successfully resets, you'll get a message prompting you to log in with your new password. An email will be sent to the address you entered, notifying you that your password reset was successful.
Favorites
The Favorites menu contains all your bookmarks (Favorites) and the last 10 pages in your browsing history (Recents). The Favorites menu can be accessed by clicking the  icon in the upper-right part of the page.
Use Favorites to quickly navigate the Relativity application. If you visit a particular page on a regular basis, minimize the number of clicks it takes to get there by adding the page as a favorite.
To mark a page as a favorite, click the star to the right of the breadcrumbs at the top of the page. The star turns yellow and Relativity adds the page to the Favorites section. Relativity doesn't limit the number of pages you can mark as a favorite.
Relativity records pages in the Recents section on each page load. That means that pop-up windows aren't recorded as Recents.
If you're a system admin, you can turn off this feature by editing the RecentHistoryEnabled and FavoritesEnabled instance setting values. You can also change the number of Recents the Favorites menu displays by editing the RecentHistoryNumberOfItemsDisplays instance setting value.
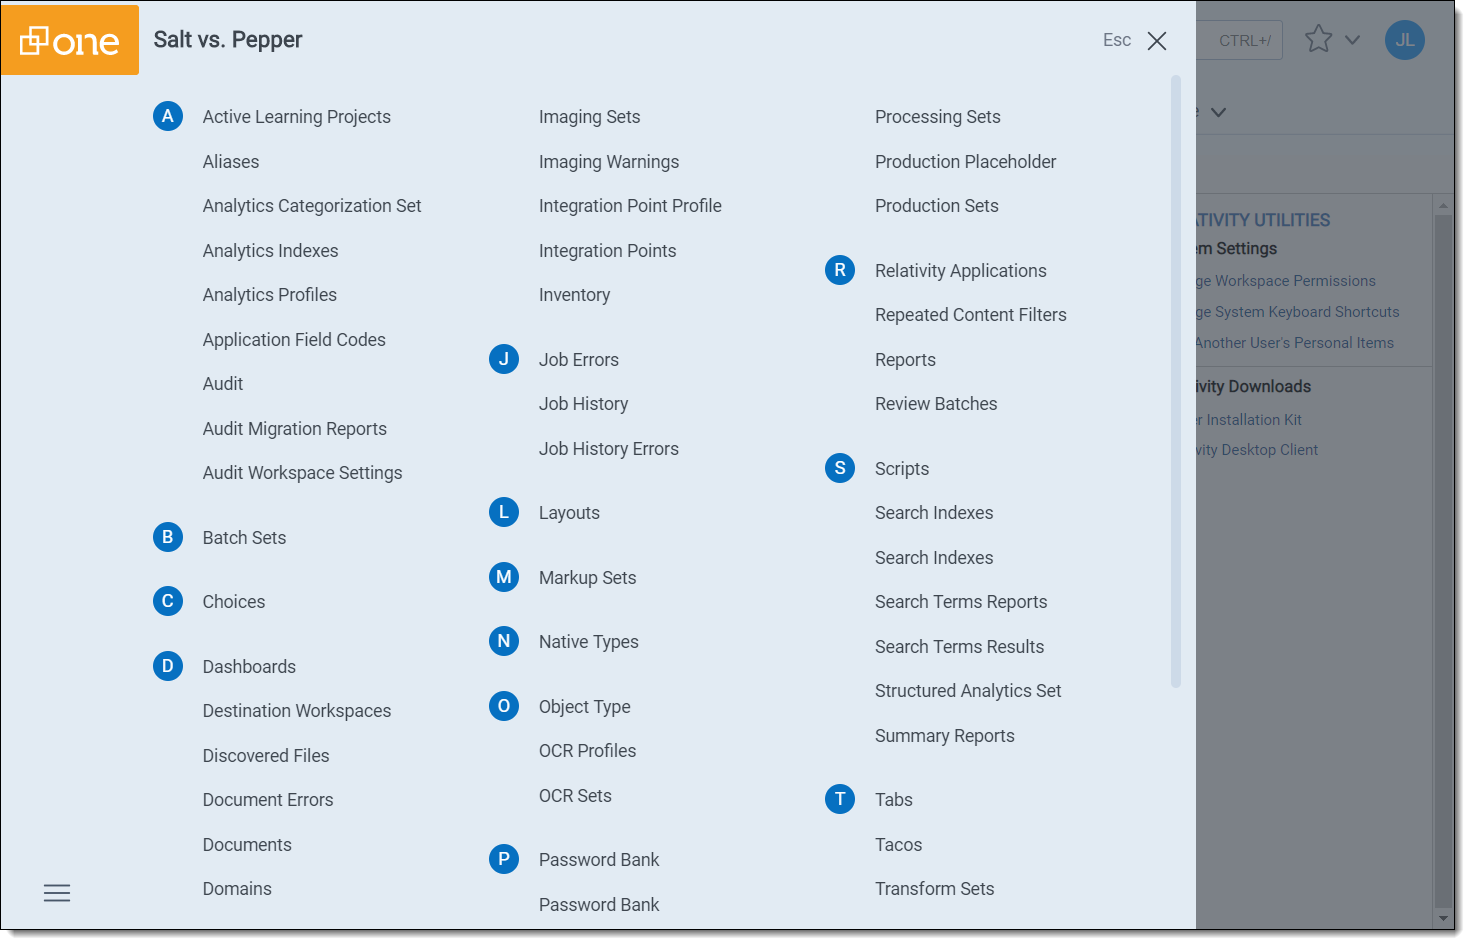
Quick nav
Quick nav can be used to quickly search for and navigate to any workspace or tab in Relativity, including parent tabs that might not otherwise be visible. Each user can only find and access a tab if they were granted the corresponding Tab Visibility permission.
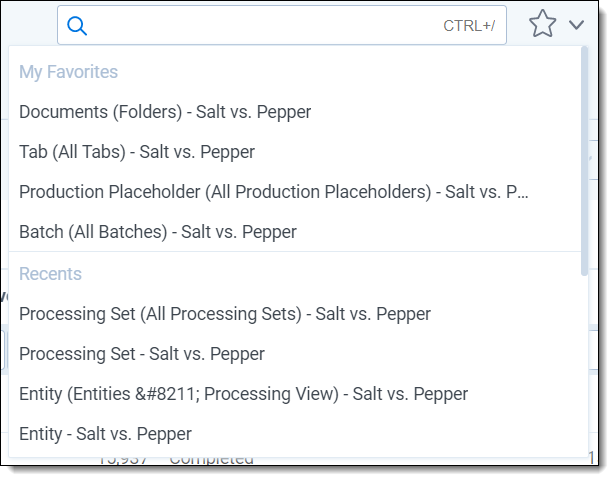
To access quick nav, click the Quick nav search box in the upper right corner of Relativity, or use the keyboard shortcut Ctrl+/.
Verify that the quick nav Ctrl+/ keyboard shortcut works on custom pages. Contact Customer Support with any problems.
Open quick nav, and type the name of any tab or workspace.

Any tab or workspace that contains the character string within the name appears in the list of results. Results appear after you type more than one character, and they refine with each character you type. The results link you directly to the tab or workspace in Relativity.
In Relativity terms, the search works the same as a leading and trailing wildcard search.
You can click on any result or use the up and down arrow keys to move through the results. Press Enter to navigate to the selected item.
Your search remains until the page is refreshed or you navigate to a new tab. The Esc key also clears your search from quick nav. If no text is entered in the quick nav search field, the Esc key closes quick nav. You can also click anywhere outside the quick nav window to close it.
Quick nav displays three types of results in the following order:
- Workspace tabs - lists all workspace tabs that fit the search criteria and are available with your permission settings.
This item only appears when you are in a workspace.
- Admin Tabs - lists all admin tabs that fit the search criteria and are available with your permission settings.
- Workspaces - lists all workspaces that fit the search criteria and are available with your permission settings. Click the workspace to go to the default tab for that workspace.
Quick nav results only reflect items available with your permission settings.
Quick nav functionalitysection
The following list highlights more features of quick nav functionality.
- Type the word "home" in quick nav to navigate to your default Home tab.
- Quick nav is enabled or disabled with the
- Quick nav is available to look up workspaces and admin tabs from Home for groups assigned the Use Quick Nav admin permission, and it is available to look up tabs in a workspace for groups assigned the Use Quick Nav workspace permission.
- The maximum number of returned quick nav search results is limited to any number between 2 and 50, but the default is 20.
- The maximum number of searchable characters is 50.