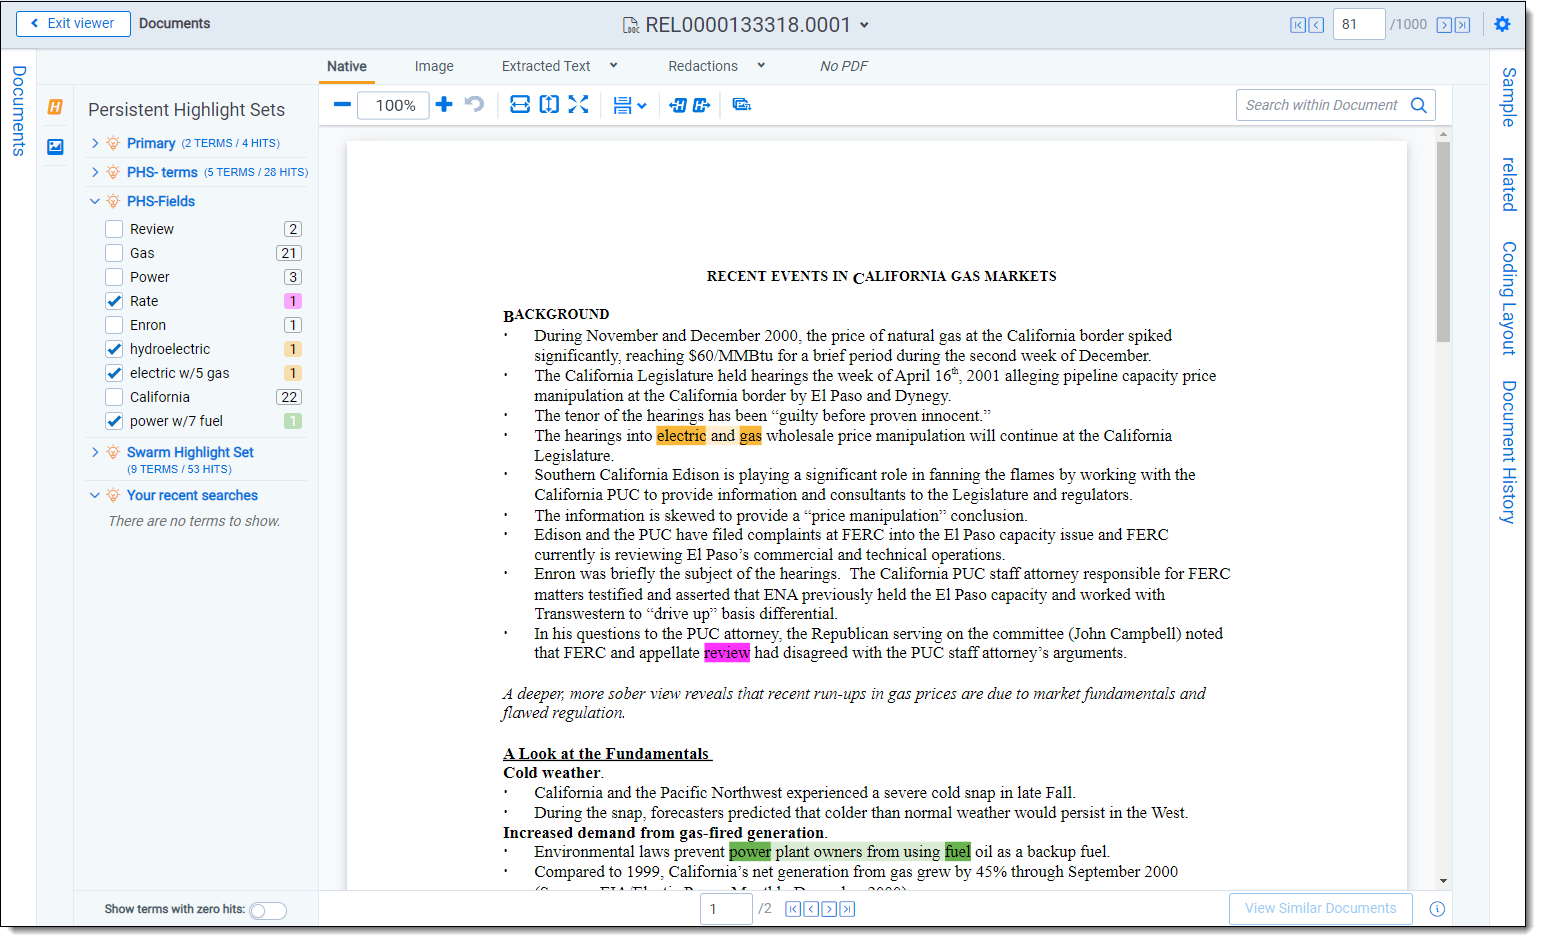
Persistent highlight sets
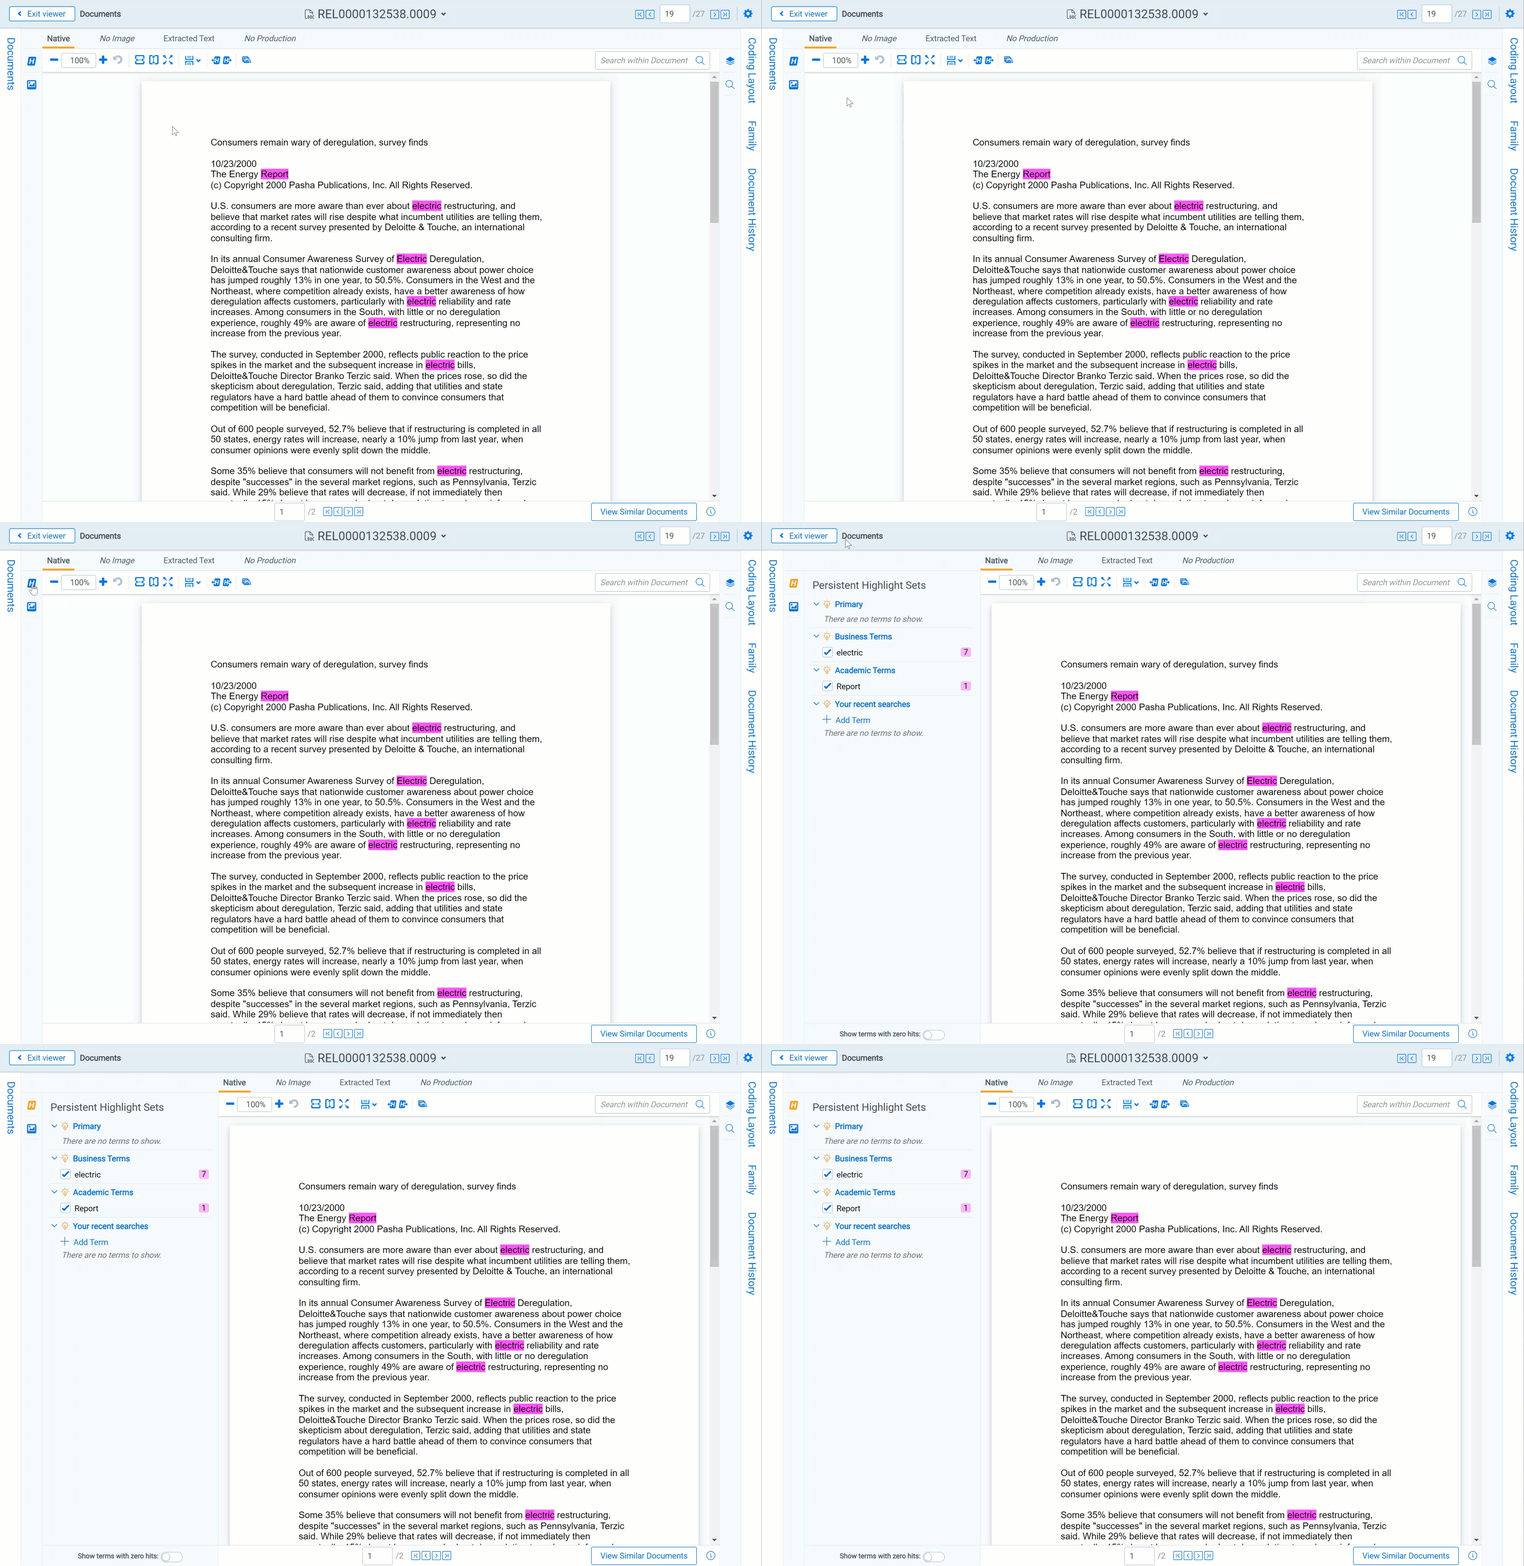
With persistent highlight sets you can configure and apply term highlighting to assist with document review in the Viewer. In the Persistent Highlight Pane of the Viewer, you can see all sets saved in a workspace and apply or hide term highlights in the document you're reviewing.
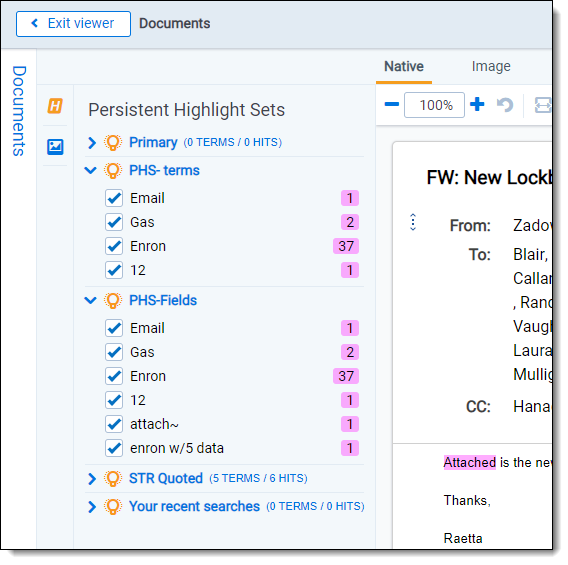
If a document you're reviewing contains any of the terms specified in a set, the list of terms and the number of times they appear in the document appear under the set. If a document contains no terms from the set, you can't expand or collapse the set in the tree. If the document contains some terms in the set, only the terms that exist in the document appear below the set name.
System admins can control which highlight sets different users see when working within a document. See
Persistent highlight sets are independent of markup sets. See
Getting started with persistent highlight sets
You create persistent highlight sets in the Persistent Highlight Sets tab of a workspace. Each set includes a list of terms populated manually or from a source field in the set configuration. After you create a persistent highlight set, the set and its terms are available in the Persistent Highlight Pane of the Viewer.
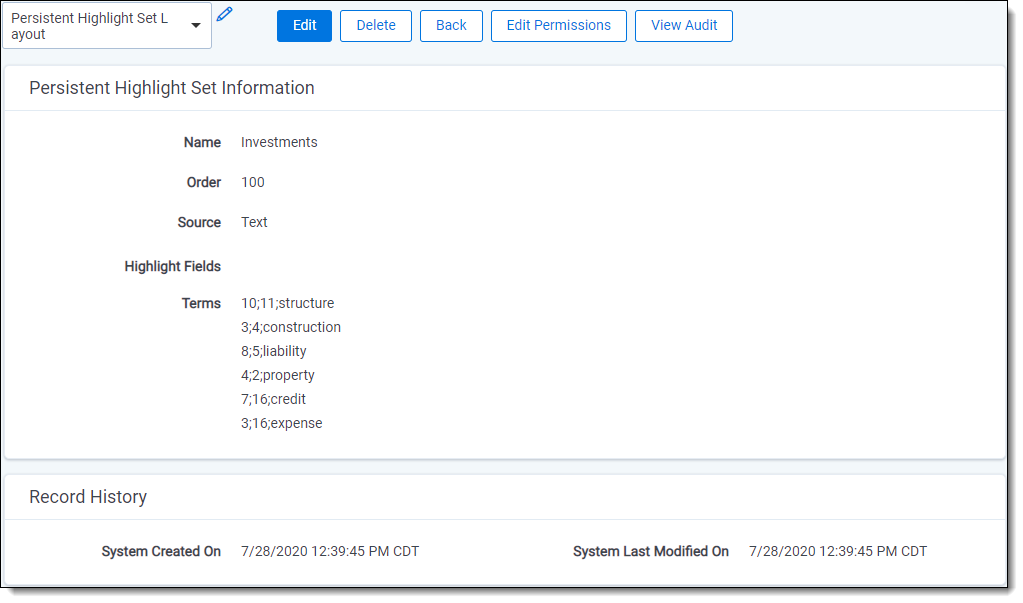
The following persistent highlight set includes several terms with highlight color-coding. See Color-coding persistent highlights for more information.
This set is available when a user opens the viewer and any edits made to this set are reflected immediately.
Showing and hiding persistent highlight sets in the Viewer
To view the list of available persistent highlights sets and related terms in the Persistent Highlight pane, click the Show/Hide Persistent Highlight Pane icon ![]() in the left drawer.
in the left drawer.
Click the  next to a persistent highlight set to expand it and show the list of terms from that set found in the document. By default, all persistent highlight sets are enabled in the Viewer, and terms found in a document are selected in the Persistent Highlight Pane and highlighted in the document. Click a persistent highlight set's name or the
  icon to hide all term highlights from the set in the Viewer. When a persistent highlight set's icon is
  and the terms appear partially transparent in the Persistent Highlight Pane, the term highlights for the set are hidden in the Viewer.
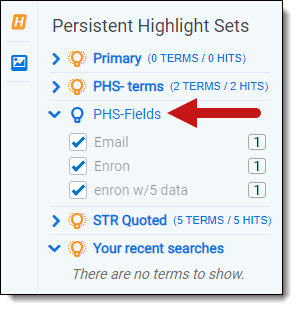
Clear a term's check box to hide its highlights in the Viewer. Select its check box to apply highlighting for the term in the Viewer again.
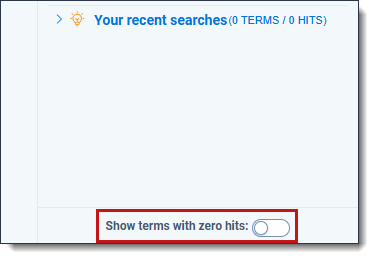
While using persistent highlight sets, you can determine whether terms that do not have any hits display in the Persistent Highlight Sets pane or not. If the Show terms with zero hits option is enabled, all terms in a persistent highlight set, including those with zero hits display in the Persistent Highlight Sets pane. However, if a field has hits for some Viewers and no hits in others, in the Viewers where there are no hits, the field will display as having zero hits.
If the Show terms with zero hits option is disabled, then any terms in a persistent highlight set that are not present in the current document will not display in the Persistent Highlights Set pane.
For example, if you created a set named Investments that contains five highlight terms and have the Show terms with zero hits option disabled, only three of the terms show in the pane for a particular document, because the other two terms have no hits and thus, are not present in the document.
Navigating persistent highlight hits in the Viewer
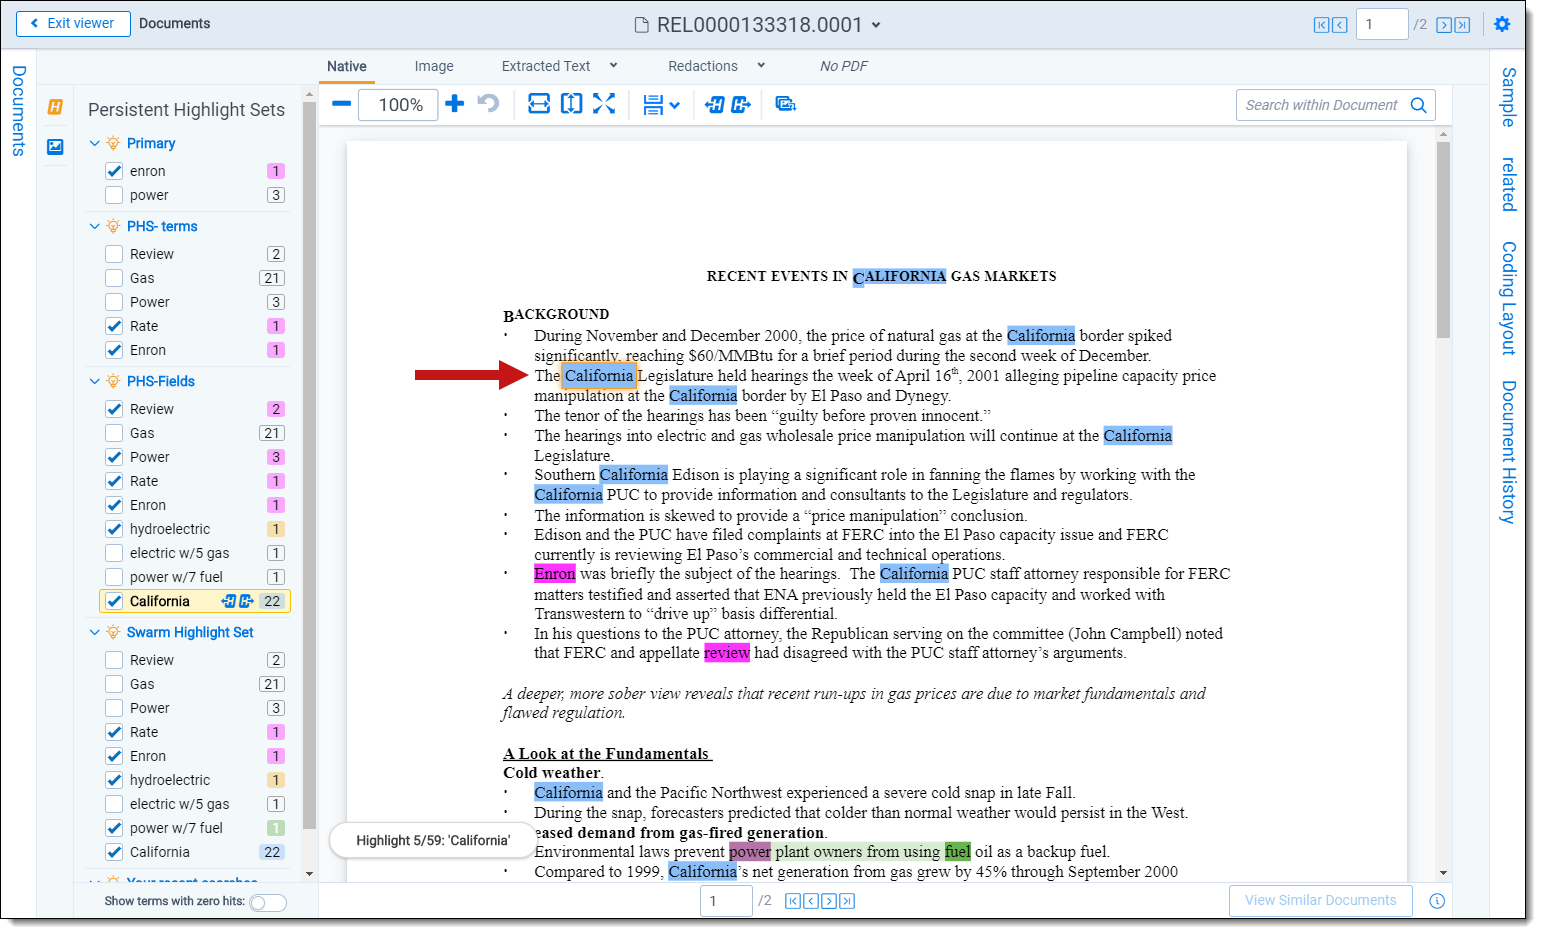
You can navigate through the hits for a persistent highlight set or for a term while viewing a document in the Viewer. Click on either the persistent highlight set or the desired term in the Persistent Highlight Pane and the Go to Next/Previous Highlights icons display in the row.
![]()
You can use the Next/Previous icons to cycle through the hits for either the persistent highlight set or the highlighted term. Regardless of where you are in a document, when you click the Next icon  for the first time, you will be taken to the first highlight in the document for that persistent highlight set or term even if you've moved past it while browsing the document.
Clicking the Next/Previous icons also emphasizes the actively navigated highlight with an orange glow to help you track which one is active.
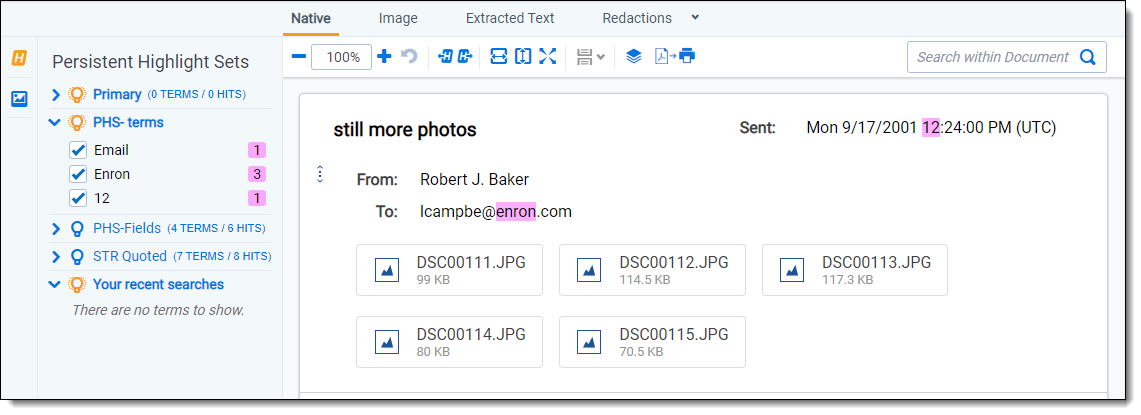
When you select a persistent highlight term in the Persistent Highlight Pane, in addition to highlighting all instances of that term in the body of an email, the Viewer also highlights instances of the term in the email header.
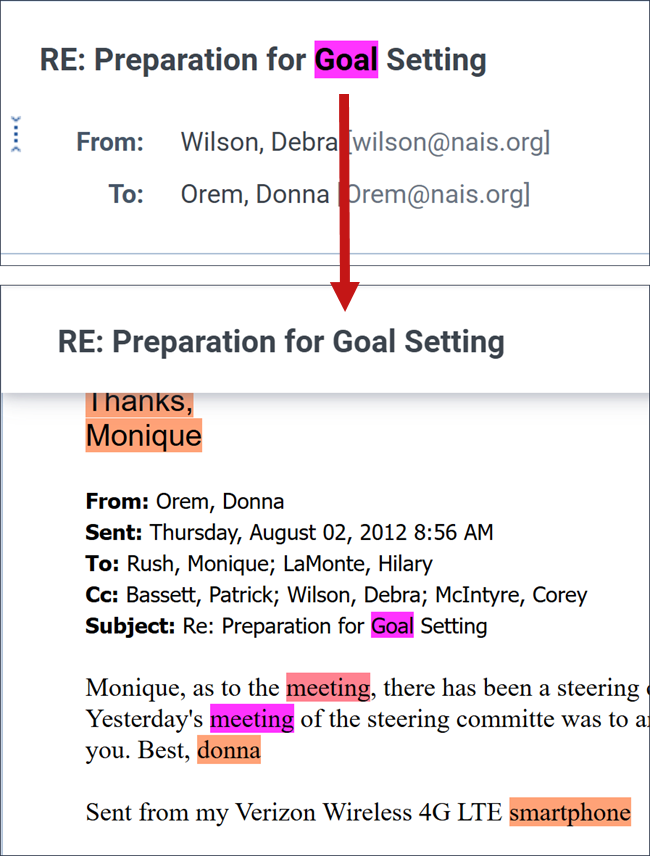
The number of terms and hits is listed to the left of the persistent highlight set's name. It is possible to have many highlight sets enabled but no highlights appear in a document.
Selections made in the Persistent Highlight pane persist throughout a user's session in Relativity. This includes any of the following changes related to the Persistent Highlight Pane in the Viewer:
- Showing or hiding the Persistent Highlight Pane.
- Enabling or disabling a persistent highlight set.
- Expanding or collapsing the term list for a persistent highlight set.
- Checking or clearing terms check boxes in a persistent highlight set.
Recent searches in the Persistent Highlight Sets pane
In addition to accessing persistent highlight sets, you can also search for terms and highlight any matches temporarily using the Your recent searches section. You can perform either dtSearch or Keyword searches from this section.
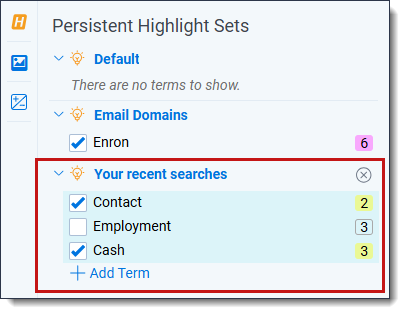
You can also search using the search bar on the document list. The search bar lets you choose a search index, find search term matches, and then view matches in the Your recent searches section across different documents. The search term matches stay highlighted while navigating between documents as long as you do not remove the search condition from the search panel or log out of Relativity.

To perform either a dtSearch or Keyword search in the Your recent searches section:
- Optionally, click on the Persistent Highlighting icon to expand the Persistent Highlight Sets pane.
- Click the + Add Term button.
- Enter the desired dtSearch or Keyword search terms in the textbox.
- Click the Confirm icon or press Enter on your keyboard.
The Your recent searches section updates with the number of matches and any matches are highlighted in yellow in the current document.
Optionally, you can select a search in the Your recent searches section and use the Next/Previous icons to cycle through the matches. Regardless of where you are in a document, when you click the Next icon  for the first time, you will be taken to the first highlight in the document for that persistent highlight set or term. Even if you have moved past it while browsing the document.
Navigating highlighted terms in the Viewer
To navigate between terms highlighted on a document in the Viewer, use the Go to Previous Highlight  and Go to Next Highlight
  icons on the Viewer toolbar.
The Go to Previous Highlight and Go to Next Highlight icons only navigate between terms enabled in the Persistent Highlight Pane.
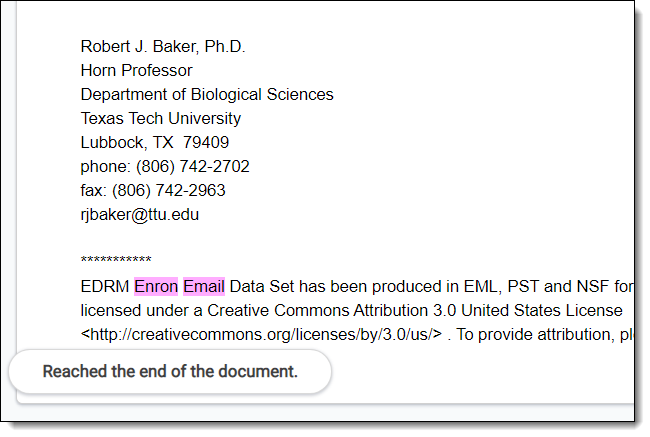
When navigating through a document's highlighted terms, the following notification displays in the bottom-left to inform you that you've reached the beginning or end of the document and there are no more highlights.
Actively navigated and inactive highlights
To support advanced highlights within persistent highlight sets, two types colors can be available in the Viewer - actively navigated and inactive highlights. The colors are the same, but have a different level of opacity. Active highlights are the highlights that the Viewer is focused on. Active highlights are at full opacity and inactive highlights are at a lower opacity level. See Color-coding persistent highlights for more information.
Beginning in Relativity 11.3.1, the auto-contrast feature has been added to color-coding persistent highlights. This feature automatically determines the text color based off the background color you select to ensure readability no matter which colors are selected. For example, if the background color is closer to black, the text will automatically be white or if the background color is closer to white, the text will automatically be black.
The opacity level of the highlights for proximity searching and inactive terms can be adjusted by editing the value of the ViewerHighlightStyleDefault instance setting.
| Color name | Highlight Color | Number |
|---|---|---|
| [Default] | 0 | |
| Black | 1 | |
| Dark red | 2 | |
| Dark green | 3 | |
| Dark yellow | 4 | |
| Dark blue | 5 | |
| Dark magenta | 6 | |
| Dark cyan | 7 | |
| Light gray | 8 | |
| Gray | 9 | |
| Red | 10 | |
| Green | 11 | |
| Yellow | 12 | |
| Blue | 13 | |
| Magenta | 14 | |
| Cyan | 15 | |
| White | 16 | |
| Light green | 17 | |
| Light blue | 18 | |
| Light yellow | 19 | |
| Light purple | 20 | |
| Light red | 21 | |
| Light orange | 22 | |
| Purple | 23 | |
| Orange | 24 | |
| Dark purple | 25 | |
| Dark orange | 26 |
Persistent highlight set behavior across Viewers
Note the following regarding persistent highlight set behavior as the reviewer moves from document to document, changes Viewers, and uses pane toggles:
- Any changes made to a persistent highlight set tree in the panel when the Viewer is undocked, such as terms selected or unselected, will display when the Viewer is docked again.
- A synced standalone Viewer won't display changes made to a persistent highlight set, such as terms selected or unselected, in the pane of the main Viewer. However, Persistent Highlight Pane settings remain the same in the standalone Viewer as the reviewer goes from doc to doc within the standalone Viewer.
- The Persistent Highlight Pane maintains its current state when you swap Viewer panes.
- The Persistent Highlight Pane in the Extracted Text Viewer and Native Viewer are independent of each other. A change made to the pane in the Extracted Text Viewer is not automatically reflected when the reviewer switches to the Native Viewer and vice versa.
- Advanced persistent highlighting, available when using a search term report as a highlight field source, is only available in the Native and Extracted Text Viewer. See Using the highlight fields source.
Persistent highlight behavior
When using a search term report that includes search syntax as a highlights source field, the highlight behavior is more inclusive than using persistent highlight terms. See Using the highlight fields source.
The different levels of opacity occur on a key term and interval term level. The key terms in the search are high opacity level highlights. The other interval terms picked up with search syntax are highlighted at a lower opacity level. For example, if you use the search "account w/5 cap" the words "account" and "cap" are highlighted with the full opacity highlight. The words between "account" and "cap" will have the lower opacity level highlight.
Using multiple persistent highlight sets
During the course of a review, the number of terms can grow as legal teams learn more about the case and the documents in it. In these cases, it may be beneficial to create multiple highlight sets.
With multiple highlight sets you'll have better organization and control over highlighted terms. For example, you may want to create highlight sets for:
- Key Terms
- Privilege Terms
- Specific Issue Terms (unique terms)
You can visually group related terms by assigning a different highlight color to the terms in each highlight set.

When multiple highlight sets include the same term the colors used in each set will mix together. For example, if a highlight set includes the term "apple" highlighted in blue and another highlight set includes the term "apple" highlighted in red, the highlight color will combine and display as purple in the Viewer. This only applies if both highlight sets are active for the same term.
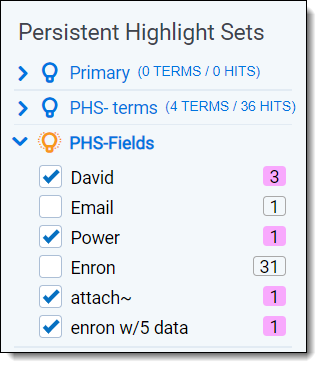
Persistent highlighting sets and individual terms can be toggled on or off depending on reviewers’ preferences or needs. A reviewer can control which sets or terms they have highlighted during review.
Clicking on the light bulb icon for a persistent highlight set enables or disables highlighting for the entire set. The  icon indicates a persistent highlight set is enabled in the Persistent Highlight Pane. The
  icon indicates a persistent highlight set is disabled in the Persistent Highlight pane. When disabling a persistent highlight set in the Viewer, terms included in the set aren't highlighted in documents until the set is enabled again.
Clicking a check box activates or deactivates highlighting for an individual term.
Security is another way to control persistent highlight sets. System admins can use object-level security to display only the persistent highlights sets necessary for users to complete their reviews. Limiting the visibility of persistent highlight sets also provides a cleaner interface for reviewers. See Relativity object security for more information.
Performance considerations
Several factors can affect the performance of persistent highlight sets. These factors include individual document size, the number of terms, the types of operators used, and the performance of the local machine. For more information about how to create high performance searches, visit Creating efficient searches for persistent highlighting.
Individual document size
The size of individual documents affects persistent highlighting performance, not the workspace's document count. The larger the document, the longer it takes for persistent highlighting to compare and highlight each term in the document against the term list.
For example, Excel files with many tabs require more time to load. Persistent highlighting searches the contents of each tab, compares each term against the term list, highlights any term matches, then moves to the next tab until it has gone through the entire document. A 500-page document takes much longer to render highlights than a one-page email.
Number of terms
When using the Terms Search option as your source for persistent highlighting, performance can slow down as the list of terms grows. Performance degradation can occur once the list reaches 100 terms, and significant slowness occurs at 500 terms depending on the resources of your local machine. If you have a large list of terms, using Highlight Fields through search terms reports is a better solution.
Types of operators used
Creating efficient searches improves the performance of persistent highlighting whether working with a Terms Search or Highlight Fields. See Creating efficient searches for persistent highlighting.
Local machine
Persistent highlighting is rendered by the local machine, not by the Relativity server. If the resources for the local machine are strained, it will also affect performance.


