


Feedback
Extracting text
Once you've imported data to a data store, you can extract electronic text from the documents to build indexes used for keyword searches. Depending on the document type, Invariant extracts the text directly, or it may physically layout the document before it can extract the text.
Invariant can directly extract text from file formats that it can open, such as Word, Excel, PowerPoint, and others. For example, Invariant instantiates Word, opens the document, and requests the electronic text from Word. Any comments or markup added with the Track Changes feature are also extracted as electronic text. In addition, Invariant extracts any embedded graphics that the document contains during the import process. Invariant treats the graphics as children of the document, in which they separately undergo OCR. When you run a keyword search on the entire document family, any text matches that Invariant pulls from the images are indirectly linked to the document, since the images are children of the document.
For other file types, Invariant must physically layout the document by converting it to PDF. Invariant has a PDF engine and other functionality to layout the document in memory as text only. It then extracts the electronic text from each page of the PDF, as well as detects any graphics. Invariant handles the graphics by sending them to the OCR engine for electronic text extraction. Some files requiring this type of processing include JPEG, TIFF, PDF, Visio, and JungUm Global (GUL).
Extracting text
To extract text from an import job:
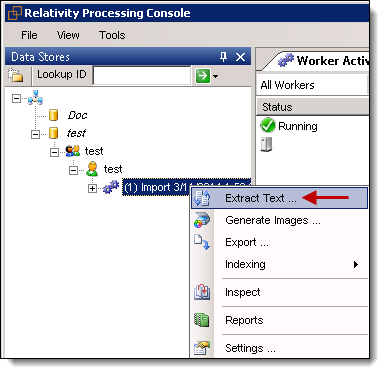
- In the Data Stores window, drill down to a completed import job. An import job is directly under a custodian.
- Right-click the import job >Extract Text.
- From the Data Extract Job dialog box, on General tab, select options for the following fields:
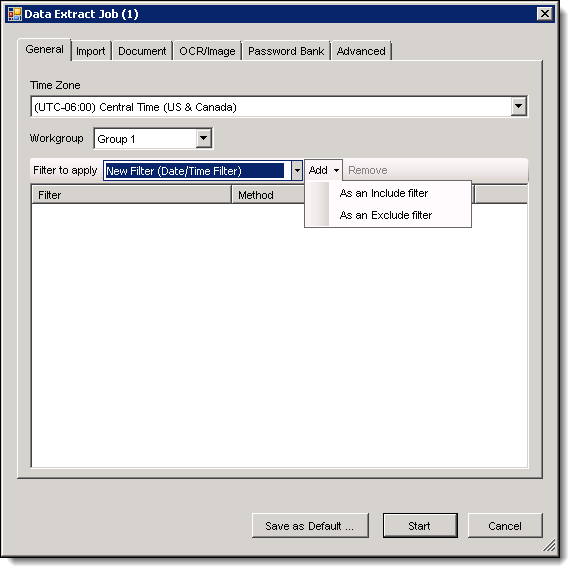
- Time Zone - set time zone required by the data set. This information is especially important for processing emails, as date and time are listed in messages and appointments. Obtain the correct time zone from the client.
You should specify the time zone setting prior to running text extraction. If you change the time zone after running text extraction, then you should run text extraction again. Also, make sure to change the following settings prior to re-running: on the OCR/Image tab in the General Options section, check Overwrite intermediate files and un-check Preserve existing pages.
- Workgroup - select a group. If you want to start the job manually, leave this field set to Group 0.
- Filter to apply - use created filters to control the data that you want included in or excluded from the extraction job. Leave this field blank if you want to extract all the data. See Filtering data.
- Add - If you're using a filter, click Add. Select an option to include or exclude the data returned by this filter in the text extraction job.
We recommend not using filters on first-time extracted text. Instead, use filters to retry errors on subsequent text extraction jobs. See Using filters to resolve errors. If you intend to create a full text search filter on your data, the text will need to be indexed prior to filter creation. Any items filtered out of text extraction will throw an error during the indexing stage.
- (Optional) Select the OCR/Image tab if you want to set options for documents that must undergo OCR before the text can be extracted.
- Click Start. The job is moved into the queue, which displays in the Job Activity window.
- Monitor the progress of the job in the Job Activity window.
If your workgroup is set to Group 0, highlight the job and select another group to begin processing. If you have workers assigned to Group 0, this is not necessary, and the first available worker will begin the job.
Once the text extraction job completes, you can index the data. See Indexing data.

Inspecting the extracted text
After the job completes, verify that the text is successfully extracted from the files.
To inspect the extracted data:
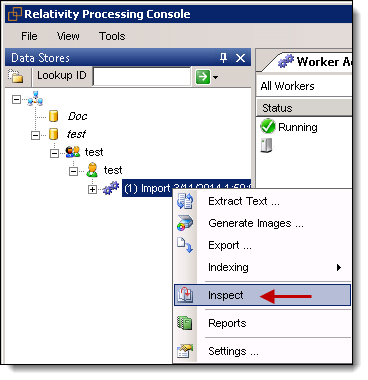
- In the Data Stores window, drill down to the import job that you used for the extract text job.
- Right-click on the import job, and click Inspect.
- From the Matter Inspector dialog box, click Refresh Needed to display the documents in the text extraction job. If you did not apply a filter, all the documents display.
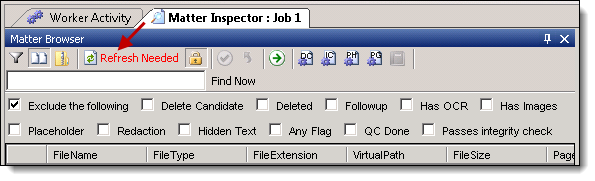
- In the Matter Inspector window, scroll to the right to display Message, Extracted Text File Name, and Intermediate file columns. You can sort each column in ascending or descending order by clicking on the column header. Review the following columns and their content for troubleshooting information:
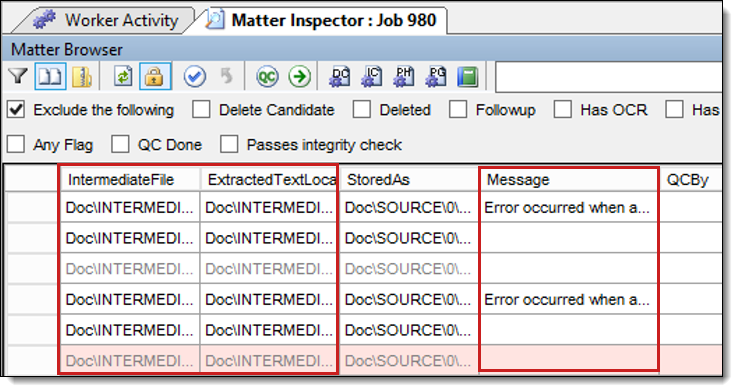
- Message - lists any errors that occurred during import, text extraction or image generation. You may want to re-run text extraction on documents with errors, depending on the type of error. See Manually re-running single documents with errors.
- Extracted Text File Name - lists the path where the extracted text is stored. If this column is empty, the file may be an image type file, in which case the Intermediate File column will be populated or the file may be of an unprocessable type (audio/video files, system files, etc). If the document fits neither of these categories, you should re-run text extraction on the file. See Manually re-running single documents with errors.
- Intermediate File - lists the path to the intermediate file (PDF) created when text can’t be directly extracted from the native file. This intermediate file undergoes OCR to provide text for the document. If there is no extracted text, this column is empty, and the file is not unprocessable, you should re-run text extraction on the file. See Manually re-running single documents with errors.
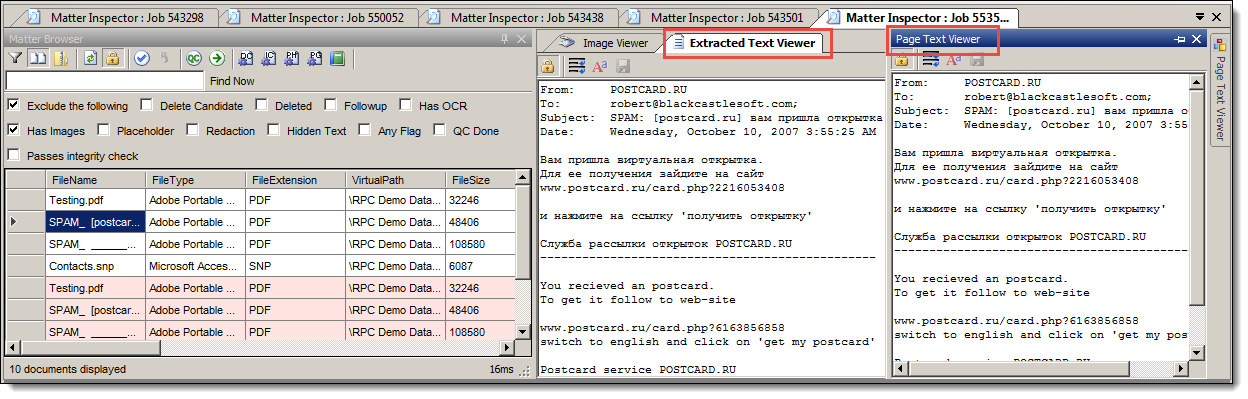
To examine the extracted text for a document, click Extracted Text Viewer. If the document only has an intermediate file, click Page Text Viewer.
Manually re-running single documents with errors
Use these steps to manually resolve an error in a single document:
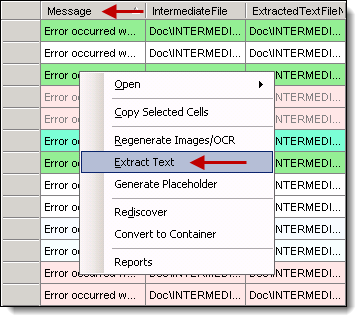
- Right-click an error in the Message column, and select Extract Text. A new extraction job creates.
- In the Job Activity window, highlight the job and select a Group to begin processing.
- After the job processes, repeat the steps in Inspecting the extracted text.
Using filters to resolve errors
You can resolve multiple errors simultaneously by using filters. You can filter by file ID and rerun only those files which do not have extracted data. For more information, see Filtering data.
- Highlight a data store that you want to filter for errors.
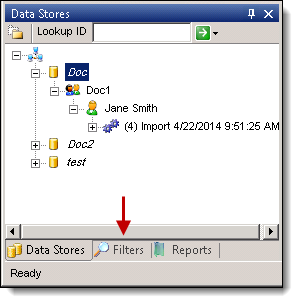
- Navigate to the Filters tab in the Data Store window (You can also right-click on a data store, and select Filters from the menu.)
- Click New Filters and select Expression.
- Enter a descriptive name in the New Filter box and press TAB. (If you don't press TAB after entering a filter name, the filter name might not get updated in the database.)
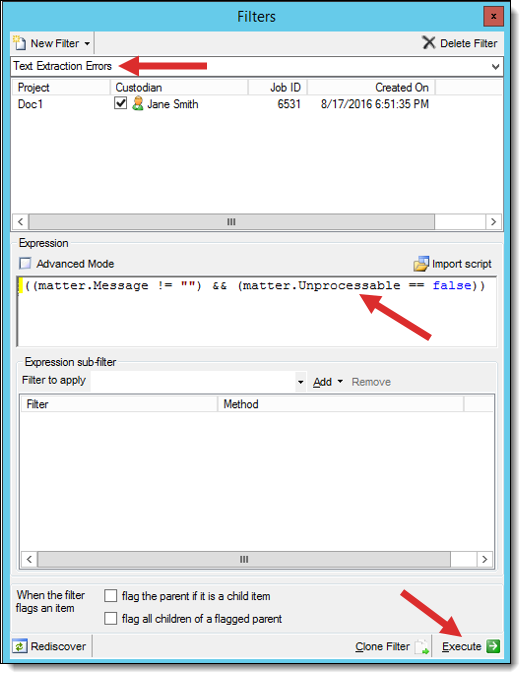
- Select the checkbox next to the Custodian that you want to run the filter on.
- In the Expression box, enter the following text: ((matter.Message != "") && (matter.Unprocessable == false)).
This expression returns any records where the Message column is not blank and the file is not flagged as unprocessable. This means that any files from which the text was extracted successfully are not returned. You must capitalize Message and Unprocessable, and use two sets of double quotation marks in the expression.
- Click Execute at bottom of Filter tab. When the filter is finished click Done in the pop-up dialog box.
- In the Data Stores window, drill down to the import job that you used for the extract text job.
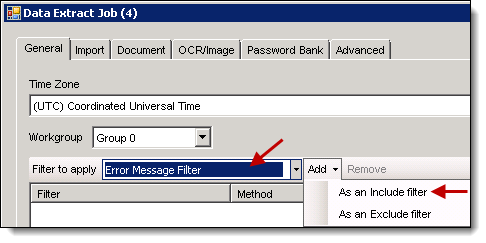
- Right-click the import job > Extract Text.
- On the General tab, select your filter in the Filter to apply box filter.
- Click Add and select As an include filter. The RPC will only rerun documents that have an error message and are not flagged as unprocessable.
- In the Job Activity window, highlight the job and select a Group to begin processing.
- After the job processes, repeat the steps in Inspecting the extracted text. All messages should be cleared.