Creating and running a Move job
The move function acts as a 2-in-1 archive and restore. This function can be used to move a workspace or its components between resources on the current installations of Relativity. One way this function can be useful is in moving a workspace from one SQL Server to another.
- A Move job only moves the files stored in the default file repository. If you have files in additional repositories, those files will not be moved with a Move job. To move files in multiple repositories, you must perform an Archive job, and then a Restore job.
- A Move job is unsupported for Processing data. Data maybe lost if you use Move for workspace with Processing.
- Ensure that your case workspace is not actively being updated during an ARM move to prevent inconsistencies. ARM creates a copy of the database when the job starts, which is then restored to the destination SQL server. If the job is canceled at any point, ARM restores the source workspace using the initial backup created.
- The Resource Pool, Database Server, File Repository, and Cache Location drop-downs for Move jobs now respect the Visible in Drop-down property for Resource Pool and Resource Server artifacts. If the particular item you are looking for is not listed in the drop-down, check its corresponding artifact record and ensure this flag is turned on. All previously saved jobs that use items with this flag turned off will cause errors in future jobs.
To create a new Move job, click New Move Job at the top of the ARM Jobs page. The New Move Job page appears.
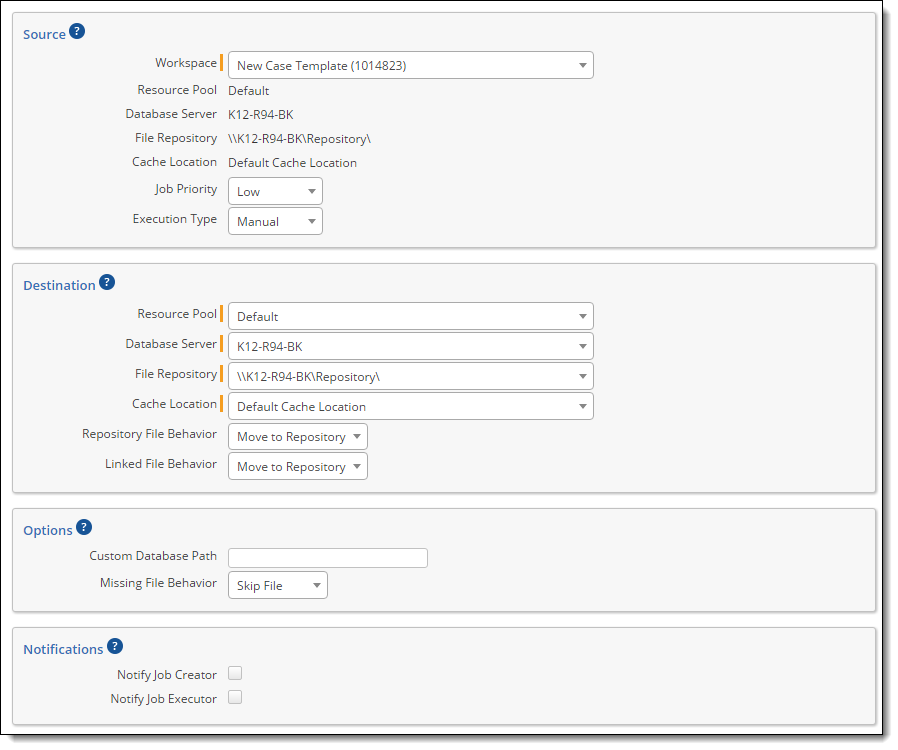
Configure the following settings in each section on the New Move Job page.
- When the Source and Destination database servers are different, ARM creates a copy of the LDF and MDF database files. The copied files are then moved and have references updated. The Source database's LDF and MDF files are NOT removed. You must clean these up manually after the job is complete.
- Move jobs are not supported when the source database server has a higher version of SQL Server than the destination server.
Source
- Workspace—select the workspace that will have its components and resources moved or changed. While a workspace is having a component moved, it will be unavailable for use. All move actions take place on the current environment. The following fields are automatically populated based on the selected workspace’s information:
- Resource Pool
- Database Server
- File Repository
- Cache Location
- Job Priority—select a priority of High, Medium, or Low for the job from the drop-down menu. The job priority determines the order in which ARM agents attempt to complete tasks for each job that is running concurrent to another job. If multiple jobs are running simultaneously with the same priority, the ARM agent prioritizes whichever job was created first.
- Execution Type—select from the following options:
- Manual—run the job manually from the Job List page.
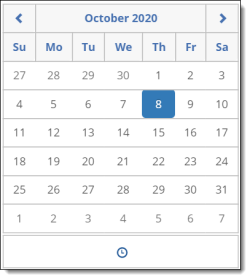
- Scheduled—run the job automatically at a specified date and time. When you select this option, the Scheduled Start Time field appears. Click inside the field, and then select a date and time from the calendar. You can schedule multiple jobs to run at the same time.

You do not need to click Run job, the system will run it automatically. Clicking Run job before the specified date and time will instantly start the job.
Destination
- Resource Pool—select the resource pool in which the workspace will reside. You can select the resource pool in which the workspace currently resides.
- Database Server—select the destination workspace database server. If the database already exists on that server due to migration such as log shipping or availability groups, the backup action will not be performed by the job. You can select the database server on which workspace currently resides.
- File Repository—select the destination file repository. You can select the file repository in which the workspace currently resides.
- Cache Location—select the destination cache location. You can select the cache location in which the workspace currently resides.
- Repository File Behavior—select this option Leave in Place to leave the native files in their original repository, or Move to Repository to move the files to the new fileshare repository. Documents that you add to the workspace will be added to the new file repository regardless of this setting.
- Linked File Behavior—select Move to Repository to move the corresponding linked files over to the new file repository. Select Copy to Repository to copy the linked files over to the new file repository. Select Leave in Place to leave the linked files in the old repository.
Options
- Custom Database Path—you can provide a custom database path in which to place the physical database files, MDF or LDF, instead of the default location configured in Relativity. The file path you provide is passed to SQL and can be either a UNC path or a physical file path.
- Missing File Behavior—you can set the behavior of the Move operation when it encounters missing files. You can either set it to Skip File or Stop Job.
Notifications
- Notify Job Creator—select this checkbox to notify the job creator by email when the job is started, paused, or canceled, or when the job completes successfully or fails in error.
- Notify Job Executor—select this checkbox to notify the job executor by email when the job completes successfully or fails in error.
Specific email notification settings can be configured on the Configuration page; however, selecting these two options will register the Job Creator or Job Executor for all of them. You will not receive redundant alerts. For example, if you are the job executor, you will not receive the Job Started notification.
When you've finished configuring settings for the Move job, click Save.
The Move Job Details page appears with a console on the right side of the page.
From this console, you can:
- Click Run Job to run the job manually. See Job statuses and options.
- Click Delete Job to delete the job.
- Click the ARM Jobs tab to navigate back to the Job list and view the newly created Move job.
On this page


