


Feedback
Note: We’ve streamlined our Staging boundaries to more effectively separate staging data from workspace and system data. With this change, you can no longer write to or access data outside of the four defined staging area folders. The four defined staging area folders: ARM, ProcessingSource, StructuredData, and TenantVM.
Folders removed in the update include FTA, Temp, Export, and dtSearch. In addition to any other folders you manually created. Refer to the
Integration Points provides you with the ability to export data directly from your workspace. This includes exporting saved searches, case folders, and productions directly from your workspace, and scheduling future or recurrent export jobs.
Notes:
- Although importing and exporting a load file is possible in Integration Points,
- When you export data to a load file through Integration Points, your files are saved to a \StructuredData folder on the fileshare. To access this file share, look at the AppID in the URL of your Relativity environment and locate the folder on the fileshare.
Exporting a folder to load file
To create an integration point specifically for exporting a folder, perform the following steps:
- Navigate to the Integration Points tab.
- Click New Integration Point.
- Complete the following fields in the Setup category of the Create Integration Point layout:

- Name—the name of your integration for reference purposes.
- Type—select Export to designate this as an export job. Selecting this sets the Source field to be Relativity.
- Source—this is automatically set to Relativity since you are exporting data out of a Relativity workspace.
- Destination—select Load File.
- Transferred Object—select Document.
- Profile—use this to complete the remaining Integration Points settings based on the settings of a saved profile. This includes all of the fields in the Connect to Source layout, as well as field mappings. If no profiles exist in the workspace, you do not have the option of selecting them. To apply a profile that you previously created, select it from the drop-down list. For more information on profiles, see Integration Points profiles.
- Email Notification Recipients—enter the email addresses of those who should receive notifications of whether the integration point export succeeded or failed. Use semi colons between addresses.
- Log Errors—select Yes or No to denote whether Relativity tracks item level errors.
- If you select Yes, each job also logs any item level errors.
- If you select No, Relativity does not log these item level errors.
- Regardless of your selection, job-level errors are always recorded in Relativity.
- Enable Scheduler—gives you the option of scheduling additional exports. Selecting Yes makes the following fields available:
- Frequency—the interval at which Relativity promotes data using this integration point.
- Daily—select this option to promote data once every day.
- Weekly—select this option to promote data on a weekly basis. You can specify how often in the Reoccur field, in which you will provide a number value in the Every # week(s) choice. You can then specify on which day of the week the data promotion will take place by checking any of the days of the week listed.
- Monthly—select the day of the month that you want this integration point to promote data once every month.
- Reoccur—enter the number of month(s) in which this integration point recurrently promotes data.
- Send On
- Day __ the month—select the day of the month that you want this integration point to promote data.
- The __ of the Month—select this option for this integration point to promote dataon the chosen day of every month. For example, "The Second Friday of the month."
- Start Date—the date that you want Integration Points to start promoting the data.
- End Date—(Optional) the date that you want Integration Points to stop promoting the data. Leaving the End Date blank causes the Integration Point to run indefinitely at the scheduled interval.
- Scheduled Time—the time at which this integration point promotes date. This time is local to your PC, not to the server.
- Frequency—the interval at which Relativity promotes data using this integration point.
- Click Next to advance to the Source Information layout.
- Complete the following fields on the Source Information layout:

- Source—select Folder from the drop-down list. Specify that you want to select a folder, from which you want export the data in your load file. You will select this folder below from the folder structure in the Folder field. You will also need to select a View from the Views field.
- Folder—click on the down arrow and expand the folder structure, locate the folder from which you want to export the data, and select it. This field is only available if you selected Folder + Subfolders as the source above.
- Views—click on the down arrow and select a view for the data that you want to export. This is only available if you selected Folder or Folder + Subfolders as the source above.
- Start Export at Record—select a record number that identifies the initial document for export. Integration Points exports the document with this record number and continues exporting documents with subsequent record numbers.
- Source Fields | Selected Fields| Renamed Fields—choose the fields that you want to export by moving them to the Selected Fields box. The box on the left displays all available source fields. The fields listed in the Selected Fields column are determined by what you select for the Source field above, as well by the folder, production set, or saved search that you select. Only the fields in the Selected Fields box on the right will be exported when you run the integration point. If you wish to rename the fields in your load file before exporting them, you can do so through the Rename option described below. The fields whose names you change are displayed in the Renamed Fields column.
- Rename—gives you the option of renaming the fields in your load file before exporting them. When you click this button, you are presented with the following settings and buttons in the Rename Fields window:
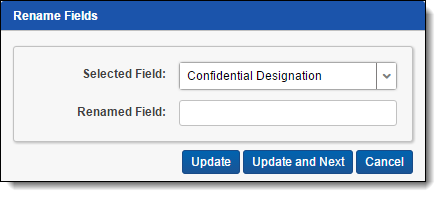
- Selected Field—displays the current name of the field that you selected from the Source Fields column. To change its name, use the Renamed Field below.
- Renamed Field—enter the new name for the Selected Field. This name will appear in the Renamed Fields column of the layout once you click the Update or Update and Next button below. If you do not change the original name of the selected field, then the Renamed Fields column contains an empty row for that field.
- Update button—click this button to update the selected field to the name you entered in the Renamed Field setting. When you do this, the renamed field appears in the Renamed Field column.
- Update and Next button—click this button to update the selected field to the name you entered in the Renamed Field setting and then move to the next field in the Selected Field column. When you do this, the renamed field appears in the Renamed Field column and the next field appears in the Selected Field setting.
- Cancel button—click this to exit the Rename Fields window without applying any changes to current field names.
- Click Next to advance to the Destination Information layout.
- Complete the following fields on the Destination Information layout:
 Load File Options
 - Export Type—this field reflects the type of export job you are running, which you specified on the Setup layout. By default, Load File is selected as the base configuration for your export job. You also have the option of enhancing the load file by selecting Images, Natives, and Text Fields as Files, depending on the makeup of your data. Selecting any of these options makes additional corresponding output settings available, which are described below.
- The Text Fields as Files option determines the export of the extracted text or OCR. Select this option if you want to export files as individual document-level text files, with one file per document. Integration Points includes text as part of your load file if you deselect this option and if a long text field is included in the selected fields that you mapped in the Source Information layout.
- Destination Folder—specify the folder into which you want to export the data from the load file. This reads the Default File Repository and lets you select a subfolder of that location.
- Create Export Folder—check this box to create an export folder named after the existing Relativity Integration Point job and the timestamp in your export folder. This will prevent the overwriting of any previous Relativity Integration Point exports to your export folder. When you check this box, the value displayed in the Destination Folder field is updated to reflect the [JobName]_[RunTimeStampUTC] information.
- Image File Format—select one of these formats for image-level load file:
- Opticon
- IPRO
- IPRO (Full Text)
- Data File Format—select the format for the document-level load file you are exporting:
- Relativity (.dat)—load file exports with the standard Concordance delimiters.
- HTML (.html)—load file is in HTML and contains hyperlinks to launch any exported files.
- Comma-separated (.csv)—load file exports as delimited text file that uses a comma to separate values.
- promote data—load file exports with the custom delimiters that you select.
- Data File Encoding—select an encoding for the document-level load file from the drop-down box.
- File Path—controls how the export path for the files is referenced. Select one of the following options:
- Use absolute paths—paths to exported files are represented as absolute paths. For example, C:\ Desktop\VOL001\NATIVE001\AS000001.msg
- Use relative paths—paths to exported files are represented as relative paths. For example, .\VOL001\NATIVE001\AS000001.msg
- Use prefix—a prefix is added to the relative path, such as a CD drive letter. For example, D:\VOL001\NATIVE001\AS000001.msg
- Include Native Files Path—check this box if you want to include the native file path in your data once you export it. Note that in the load file, for example a Relativity.dat file, there will be file path information added for every record you are exporting.
- Export Multiple Choice Fields as Nested—select this option to maintain the hierarchy of Relativity multiple-choice lists, when applicable. The nested value delimiter, a backslash, separates child choices.
- Name Output Files After—select one of the following naming convention for exported files:
- Identifier—select this option to name the files after the identifier for your workspace.
- Begin production number—select this option to name the files after the production number. (This number may be the Bates number for a production.) Relativity names files after the production number only if you select Produced Images as the Production Precedence below.
- Append Original File Name—select this option to append the original name of the file to the end of the exported file name.
- File Type—select one of these file types:
- Single-page TIF/JPG
- Multi-page TIF
- Production Precedence—select one of the following groups of produced documents for export instead of the original images:
- Original Images—exports only the original, non-produced images.
- Produced Images—exports a produced version of the images. When you select this, the following fields become available:
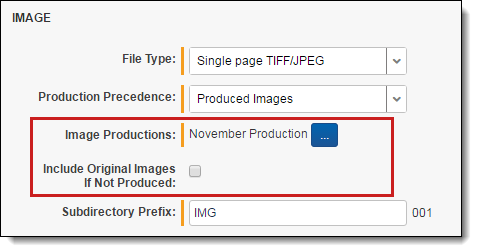
- Image Productions—select the produced images that you want to act as the precedence.
- Include Original Images If Not Produced—exports only the original images in the event that they have not been produced.
- Subdirectory Prefix—enter the alpha prefix for the subdirectory that stores exported images. By default, this is set to IMG.
- Subdirectory Prefix—enter the alpha prefix for the subdirectory that stores exported native files. By default, this is set to NATIVE. This field is only available if you selected Natives for the Export Type field above.
- Text File Encoding—select the encoding for the document-level text files
- Text Precedence—select and assign an order to long text fields that Relativity checks for text when performing an export. You must select one or more long text fields to use this functionality. Click the ellipsis to display the Pick Text Precedence pop-up. To move fields between columns, highlight them and click the Right or Left single or double arrows. Use the Up and Down arrows to order the precedence of the fields.
- Subdirectory Prefix—enter the alpha prefix for the subdirectory that stores exported text files. By default, this is set to TEXT.
- Prefix—enter the alpha prefix for the volume identifier. By default, this is set to VOL.
- Start Number—select the first number used for the numeric section of the volume identifier. Multiple volumes increment numbers during export creating unique volume identifiers.
- Number of Digits—select the number of digits attached to the prefix. (For example, if you select 3, the output is VOL001, VOL002, and so on.)
- Max Size (MB)—select the maximum size allowed for each volume in MBs.
- Start Number—select the starting number for the subdirectories.
- Number of Digits—select the number of digits of the subdirectory prefix (For example, if you select 3, the output is IMG001, IMG002, and so on.)
- Max Files—select the number of files to store in each subdirectory.
Note: When creating an integration point based on a profile, if you change the saved search, folder, or production set on the Setup layout, the fields listed in the Selected Fields window below are not updated to reflect the new source that you selected. If you're not using a profile to creating the integration point, these fields are updated to reflect the newly selected source.

- Click Save to save this integration point with these export settings.
Exporting a folder and subfolders to a load file
To create an integration point specifically for exporting a folder and subfolders, perform the following steps:
- Navigate to the Integration Points tab.
- Click New Integration Point.
- Complete the following fields in the Setup category of the Create Integration Point layout:
- Name—the name of your integration for reference purposes.
- Type—select Export to designate this as an export job. Selecting this sets the Source field to be Relativity.
- Source—this is automatically set to Relativity since you are exporting data out of a Relativity workspace.
- Destination—select Load File.
- Transferred Object—select Document.
- Profile—use this to complete the remaining Integration Points settings based on the settings of a saved profile. This includes all of the fields in the Connect to Source layout, as well as field mappings. If no profiles exist in the workspace, you do not have the option of selecting them. To apply an existing profile, select it from the drop-down list. For more information on profiles, see Integration Points profiles.
- Email Notification Recipients—enter the email addresses of those who should receive notifications of whether the integration point export succeeded or failed. Use semicolons between addresses.
- Log Errors—select Yes or No to denote whether Relativity tracks item level errors. Regardless of your selection, job-level errors are always recorded in Relativity.
- If you select Yes, each job also logs any item level errors.
- If you select No, Relativity does not log these item level errors.
- Enable Scheduler—gives you the option of scheduling additional exports. Selecting Yes makes the following fields available:
- Frequency—the interval at which Relativity promotes data using this integration point.
- Daily—select this option to promote data once every day.
- Weekly—select this option to promote data on a weekly basis. You can specify how often in the Reoccur field, in which you will provide a number value in the Every # week(s) choice. You can then specify on which day of the week the data promotion will take place by checking any of the days of the week listed.
- Monthly—select the day of the month that you want this integration point to promote data once every month.
- Reoccur—enter the number of month(s) in which this integration point recurrently promote data.
- Send On
- Day __ the month—select the day of the month that you want this integration point to promote data.
- The __ of the Month—select this option for this integration point to promote data on the chosen day of every month. For example, "The Second Friday of the month."
- Start Date—the date that you want Integration Points to start promoting the data.
- End Date—(Optional) the date that you want Integration Points to stop promoting the data. Leaving the End Date blank causes the Integration Point to run indefinitely at the scheduled interval.
- Scheduled Time—the time at which this integration point promotes data. This time is local to your PC, not to the server.
- Frequency—the interval at which Relativity promotes data using this integration point.
- Click Next to advance to the Source Information layout.
- Complete the following fields on the Source Information layout:

- Source—select Folder + Subfolders from the drop-down list and specify that you want to select a folder and subfolders from which you want export the data in your load file. You will select this folder below from the folder structure in the Folder + Subfolders field. You will also need to select a View from the Views field.
- Folder + Subfolders—click on the down arrow and expand the folder structure, locate the folder and subfolders from which you want to export the data, and select it. This field is only available if you selected Folder + Subfolders as the source above.
Note: When creating an integration point based on a profile, if you change the saved search, folder, or production set on the Setup layout, the fields listed in the Selected Fields window below are not updated to reflect the new source that you selected. If you're not using a profile to creating the integration point, these fields are updated to reflect the newly selected source.
- Views—click on the down arrow and select a view for the data that you want to export. This is only available if you selected Folder or Folder + Subfolders as the source above.
- Start Export at Record—select a record number that identifies the initial document for export. Integration Points exports the document with this record number and continues exporting documents with subsequent record numbers.
- Source Fields | Selected Fields | Renamed Fields—choose the fields that you want to export by moving them to the Selected Fields box. The box on the left displays all available source fields. The fields listed in the Selected Fields column are determined by what you select for the Source field above, as well by the folder, production set, or saved search that you select. Only the fields in the Selected Fields box on the right will be exported when you run the integration point. If you wish to rename the fields in your load file before exporting them, you can do so through the Rename option described below. The fields whose names you change are displayed in the Renamed Fields column.
- Rename—gives you the option of renaming the fields in your load file before exporting them. When you click this button, you are presented with the following settings in the Rename Fields window:
- Selected Field—displays the field that you have selected from the Source Fields column, the name of which you can change in the Renamed Field below.
- Renamed Field—enter the desired new name for the field. This name will appear in the Renamed Fields column of the layout once you click the Update or Update and Next button below. If you do not change the original name of the selected field, then the Renamed Fields column contains an empty row for that field.
- Update button—click this button to update the selected field to the name you entered in the Renamed Field setting. When you do this, the renamed field appears in the Renamed Field column.
- Update and Next button—click this button to update the selected field to the name you entered in the Renamed Field setting and then move to the next field in the Selected Field column. When you do this, the renamed field appears in the Renamed Field column and the next field appears in the Selected Field setting.
- Cancel button—click this button to exit the Rename Fields window without applying any changes to current field names.
- Click Next to advance to the Destination Information layout.
- Complete the following fields on the Destination Information layout:Load File Options
- Export Type—this field reflects the type of export job you are running, which you specified on the Setup layout. By default, Load File is selected as the base configuration for your export job. You also have the option of enhancing the load file by selecting Images, Natives, and Text Fields as Files, depending on the makeup of your data. Selecting any of these makes additional corresponding output settings available, which are described below.
- The Text Fields as Files option determines the export of the extracted text or OCR. Select this option if you want to export files as individual document-level text files, with one file per document. Integration Points includes text as part of your load file if you deselect this option and if a long text field is included in the selected fields that you mapped in the Source Information layout.
- Destination Folder—specify the folder into which you want to export the data from the load file. This reads the Default File Repository and lets you select a subfolder of that location.
- Create Export Folder—check this box to create an export folder named after the existing Relativity Integration Point job and the timestamp in your export folder. This will prevent the overwriting of any previous Relativity Integration Point exports to your export folder. When you check this box, the value displayed in the Destination Folder field is updated to reflect the [JobName]_[RunTimeStampUTC] information.
- Image File Format—select one of these formats for image-level load file:
- Opticon
- IPRO
- IPRO (Full Text)
- Data File Format—select a the format for the document-level load file you are exporting:
- Relativity (.dat)—load file exports with the standard Concordance delimiters.
- HTML (.html)—load file is in HTML and contains hyperlinks to launch any exported files.
- Comma-separated (.csv)—load file exports as delimited text file that uses a comma to separate values.
- Custom (.txt)—load file exports with the custom delimiters that you select.
- Data File Encoding—select an encoding for the document-level load file from the drop-down box.
- File Path—controls how the export path for the files is referenced. Select one of the following options:
- Use absolute paths—paths to exported files are represented as absolute paths. For example, C:\ Desktop\VOL001\NATIVE001\AS000001.msg
- Use relative paths—paths to exported files are represented as relative paths. For example, .\VOL001\NATIVE001\AS000001.msg
- Use prefix—a prefix is added to the relative path, such as a CD drive letter. For example, D:\VOL001\NATIVE001\AS000001.msg
- Include Native Files Path—check this box if you want to include the native file path in your data once you export it. Note that in the load file, for example a Relativity.dat file, there will be file path information added for every record you are exporting.
- Export Multiple Choice Fields as Nested—select this option to maintain the hierarchy of Relativity multiple-choice lists, when applicable. The nested value delimiter, a backslash, separates child choices.
- Name Output Files After—select one of the following naming convention for exported files:
- Identifier—select this option to name the files after the identifier for your workspace.
- Begin production number—select this option to name the files after the production number. (This number may be the Bates number for a production.) Relativity names files after the production number only if you select Produced Images as the Production Precedence below.
- Append Original File Name—select this option to append the original name of the file to the end of the exported file name.
- File Type—select one of these file types:
- Single-page TIF/JPG
- Multi-page TIF
- Production Precedence—select one of the following groups of produced documents for export instead of the original images:
- Original Images—exports only the original, non-produced images.
- Produced Images—exports a produced version of the images. When you select this, the following fields become available:
- Image Productions—select the produced images that you want to act as the precedence.
- Include Original Images If Not Produced—exports only the original images in the event that they have not been produced.
- Subdirectory Prefix—enter the alpha prefix for the subdirectory that stores exported images. By default, this is set to IMG.
- Subdirectory Prefix—enter the alpha prefix for the subdirectory that stores exported native files. By default, this is set to NATIVE. This field is only available if you selected Natives for the Export Type field above.
- Text File Encoding—select the encoding for the document-level text files
- Text Precedence—select and assign an order to long text fields that Relativity checks for text when performing an export. You must select one or more long text fields to use this functionality. Click the ellipsis to display the Pick Text Precedence pop-up. To move fields between columns, highlight them and click the Right or Left single or double arrows. Use the Up and Down arrows to order the precedence of the fields.
- Subdirectory Prefix—enter the alpha prefix for the subdirectory that stores exported text files. By default, this is set to TEXT.
- Prefix—enter the alpha prefix for the volume identifier. By default, this is set to VOL.
- Start Number—select the first number used for the numeric section of the volume identifier. Multiple volumes increment numbers during export creating unique volume identifiers.
- Number of Digits—select the number of digits attached to the prefix. (For example, if you select 2, the output is VOL001, VOL002, and so on.)
- Max Size (MB)—select the maximum size allowed for each volume in MBs.
- Start Number—select the starting number for the subdirectories.
- Number of Digits—select the number of digits of the subdirectory prefix (For example, if you select 3, the output is IMG001, IMG002, and so on.)
- Max Files—select the number of files to store in each subdirectory.
- Click Save to save this integration point with these export settings.
Once Relativity saves the integration point, you will be able to run it and export the data based on the settings you specified. See Running the export job for details.
Exporting a production to a load file
To create an integration point specifically for exporting a production set, perform the following steps:
- Navigate to the Integration Points tab.
- Click New Integration Point.
- Complete the following fields in the Setup category of the Create Integration Point layout:
- Name—the name of your integration for reference purposes.
- Type—select Export to designate this as an export job. Selecting this sets the Source field to be Relativity.
- Source—this is automatically set to Relativity since you are exporting data out of a Relativity workspace.
- Destination—select Load File.
- Transferred Object—select Document.
- Profile—use this to complete the remaining Integration Points settings based on the settings of a saved profile. This includes all of the fields in the Connect to Source layout, as well as field mappings. If no profiles exist in the workspace, you do not have the option of selecting them. To apply an existing profile, select it from the drop-down list. For more information on profiles, see Integration Points profiles.
- Email Notification Recipients—enter the email addresses of those who should receive notifications of whether the integration point export succeeded or failed. Use semi colons between addresses.
- Log Errors—select Yes or No to denote whether Relativity tracks item level errors. Regardless of your selection, job-level errors are always recorded in Relativity.
- If you select Yes, each job also logs any item level errors.
- If you select No, Relativity does not log these item level errors.
- Enable Scheduler—gives you the option of scheduling additional exports. Selecting Yes makes the following fields available:
- Frequency—the interval at which Relativity promotes data using this integration point.
- Daily—select this option to promote data once every day.
- Weekly—select this option to promote data on a weekly basis. You can specify how often in the Reoccur field, in which you will provide a number value in the Every # week(s) choice. You can then specify on which day of the week the data promotion will take place by checking any of the days of the week listed.
- Monthly—select the day of the month that you want this integration point to promote data once every month.
- Reoccur—enter the number of month(s) in which this integration point recurrently promotes data.
- Send On
- Day __ the month—select the day of the month that you want this integration point to promote data.
- The __ of the Month—select this option for this integration point to promote data on the chosen day of every month. For example, "The Second Friday of the month."
- Start Date—the date that you want Integration Points to start promoting the data.
- End Date—(Optional) the date that you want Integration Points to stop promoting the data. Leaving the End Date blank causes the Integration Point to run indefinitely at the scheduled interval.
- Scheduled Time—the time at which this integration point promotes data. This time is local to your PC, not to the server.
- Frequency—the interval at which Relativity promotes data using this integration point.
- Click Next to advance to the Source Information layout.
- Complete the following fields on the Source Information layout:
- Source—select Production from the drop-down list. specify that you want to select a production set, from which you want export the data in your load file. You will select this folder below from the folder structure in the Folder + Subfolders field. You will also need to select a View from the Views field.
- Production Set—click on the down arrow and select the production set that you want to act as the source for the load file. This field is only available if you have selected Production as the source above.
- Start Export at Record—select a record number that identifies the initial document for export. Integration Points exports the document with this record number and continues exporting documents with subsequent record numbers.
- Source Fields | Selected Fields| Renamed Fields—choose the fields that you want to export by moving them to the Selected Fields box. The box on the left displays all available source fields. The fields listed in the Selected Fields column are determined by what you select for the Source field above, as well by the folder, production set, or saved search that you select. Only the fields in the Selected Fields box on the right will be exported when you run the integration point. If you wish to rename the fields in your load file before exporting them, you can do so through the Rename option described below. The fields whose names you change are displayed in the Renamed Fields column.
- Rename—gives you the option of renaming the fields in your load file before exporting them. When you click this button, you are presented with the following settings in the Rename Fields window:
- Selected Field—displays the field that you have selected from the Source Fields column, the name of which you can change in the Renamed Field below.
- Renamed Field—enter the desired new name for the field. This name will appear in the Renamed Fields column of the layout once you click Update or Update and Next below. If you do not change the original name of the selected field, then the Renamed Fields column contains an empty row for that field.
- Update button—click this button to update the selected field to the name you entered in the Renamed Field setting. When you do this, the renamed field appears in the Renamed Field column.
- Update and Next button—click this button to update the selected field to the name you entered in the Renamed Field setting and then move to the next field in the Selected Field column. When you do this, the renamed field appears in the Renamed Field column and the next field appears in the Selected Field setting.
- Cancel button—click this button to exit the Rename Fields window without applying any changes to current field names.

Note: When creating an integration point based on a profile, if you change the saved search, folder, or production set on the Setup layout, the fields listed in the Selected Fields window below are not updated to reflect the new source that you selected. If you're not using a profile to creating the integration point, these fields are updated to reflect the newly selected source.
- Click Next to advance to the Destination Information layout.
- Complete the following fields on the Destination Information layout:Load File Options
- Export Type—this field reflects the type of export job you are running, which you specified on the Setup layout. By default, Load File is selected as the base configuration for your export job. You also have the option of enhancing the load file by selecting Images, Natives, and Text Fields as Files, depending on the makeup of your data. Selecting any of these makes additional corresponding output settings available, which are described below.
- The Text Fields as Files option determines the export of the extracted text or OCR. Select this option if you want to export files as individual document-level text files, with one file per document. Integration Points includes text as part of your load file if you deselect this option and if a long text field is included in the selected fields that you mapped in the Source Information layout.
- Destination Folder—specify the folder into which you want to export the data from the load file. This reads the Default File Repository and lets you select a subfolder of that location.
- Create Export Folder—check this box to create an export folder named after the existing Relativity Integration Point job and the timestamp in your export folder. This will prevent the overwriting of any previous Relativity Integration Point exports to your export folder. When you check this box, the value displayed in the Destination Folder field is updated to reflect the [JobName]_[RunTimeStampUTC] information.
- Image File Format—select one of these formats for image-level load file:
- Opticon
- IPRO
- IPRO (Full Text)
- Data File Format—select a the format for the document-level load file you are exporting:
- Relativity (.dat)—load file exports with the standard Concordance delimiters.
- HTML (.html)—load file is in HTML and contains hyperlinks to launch any exported files.
- Comma-separated (.csv)—load file exports as delimited text file that uses a comma to separate values.
- Custom (.txt)—load file exports with the custom delimiters that you select.
- Data File Encoding—select an encoding for the document-level load file from the drop-down box.
- File Path—controls how the export path for the files is referenced. Select one of the following options:
- Use absolute paths—paths to exported files are represented as absolute paths. For example, C:\ Desktop\VOL001\NATIVE001\AS000001.msg
- Use relative paths—paths to exported files are represented as relative paths. For example, .\VOL001\NATIVE001\AS000001.msg
- Use prefix—a prefix is added to the relative path, such as a CD drive letter. For example, D:\VOL001\NATIVE001\AS000001.msg
- Include Native Files Path—check this box if you want to include the native file path in your data once you export it. Note that in the load file, for example a Relativity.dat file, there will be file path information added for every record you are exporting.
- Export Multiple Choice Fields as Nested—select this option to maintain the hierarchy of Relativity multiple-choice lists, when applicable. The nested value delimiter, a backslash, separates child choices.
- Name Output Files After—select one of the following naming convention for exported files:
- Identifier—select this option to name the files after the identifier for your workspace.
- Begin production number—select this option to name the files after the production number. (This number may be the Bates number for a production.) Relativity names files after the production number only if you select Produced Images as the Production Precedence below.
- Append Original File Name—select this option to append the original name of the file to the end of the exported file name.
- File Type—select one of these file types:
- Single-page TIF/JPG
- Multi-page TIF
- Production Precedence—select one of the following groups of produced documents for export instead of the original images:
- Original Images—exports only the original, non-produced images.
- Produced Images—exports a produced version of the images. When you select this, the following fields become available:
- Image Productions—select the produced images that you want to act as the precedence.
- Include Original Images If Not Produced—exports only the original images in the event that they have not been produced.
- Subdirectory Prefix—enter the alpha prefix for the subdirectory that stores exported images. By default, this is set to IMG.
- Subdirectory Prefix—enter the alpha prefix for the subdirectory that stores exported native files. By default, this is set to NATIVE. This field is only available if you selected Natives for the Export Type field above.
- Text File Encoding—select the encoding for the document-level text files
- Text Precedence—select and assign an order to long text fields that Relativity checks for text when performing an export. You must select one or more long text fields to use this functionality. Click the ellipsis to display the Pick Text Precedence pop-up. To move fields between columns, highlight them and click the Right or Left single or double arrows. Use the Up and Down arrows to order the precedence of the fields.
- Subdirectory Prefix—enter the alpha prefix for the subdirectory that stores exported text files. By default, this is set to TEXT.
- Prefix—enter the alpha prefix for the volume identifier. By default, this is set to VOL.
- Start Number—select the first number used for the numeric section of the volume identifier. Multiple volumes increment numbers during export creating unique volume identifiers.
- Number of Digits—select the number of digits attached to the prefix. (For example, if you select 2, the output is VOL001, VOL002, and so on.)
- Max Size (MB)—select the maximum size allowed for each volume in MBs.
- Start Number—select the starting number for the subdirectories.
- Number of Digits—select the number of digits of the subdirectory prefix (For example, if you select 3, the output is IMG001, IMG002, and so on.)
- Max Files—select the number of files to store in each subdirectory.
- Click Save to save this integration point with these export settings.
Once Relativity saves the integration point, you will be able to run it and export the data based on the settings you specified. See Running the export job for details.
Exporting a saved search to a load file
To create an integration point specifically for exporting a saved search, perform the following steps:
- Navigate to the Integration Points tab.
- Click New Integration Point.
- Complete the following fields in the Setup category of the Create Integration Point layout:
- Name—the name of your integration for reference purposes.
- Type—select Export to designate this as an export job. Selecting this sets the Source field to be Relativity.
- Source—this is automatically set to Relativity since you are exporting data out of a Relativity workspace.
- Destination—select Load File.
- Transferred Object—select Document.
- Profile—use this to complete the remaining Integration Points settings based on the settings of a saved profile. This includes all of the fields in the Connect to Source layout, as well as field mappings. If no profiles exist in the workspace, you do not have the option of selecting them. To apply a profile that you previously created, select it from the drop-down list. For more information on profiles, see Integration Points profiles.
- Email Notification Recipients—enter the email addresses of those who should receive notifications of whether the integration point export succeeded or failed. Use semi colons between addresses.
- Log Errors—select Yes or No to denote whether Relativity tracks item level errors. Regardless of your selection, job-level errors are always recorded in Relativity.
- If you select Yes, each job also logs any item level errors.
- If you select No, Relativity does not log these item level errors.
- Enable Scheduler—gives you the option of scheduling additional exports. Selecting Yes makes the following fields available:
- Frequency—the interval at which Relativity promotes data using this integration point.
- Daily—select this option to promote data once every day.
- Weekly—select this option to promote data on a weekly basis. You can specify how often in the Reoccur field, in which you will provide a number value in the Every # week(s) choice. You can then specify on which day of the week the data promotion will take place by checking any of the days of the week listed.
- Monthly—select the day of the month that you want this integration point to promote data once every month.
- Reoccur—enter the number of month(s) in which this integration point recurrently promote data.
- Send On
- Day __ the month—select the day of the month that you want this integration point to promote data.
- The __ of the Month—select this option for this integration point to promote data on the chosen day of every month. For example, "The Second Friday of the month."
- Start Date—the date that you want Integration Points to start promoting the data.
- End Date—(Optional) the date that you want Integration Points to stop promoting the data. Leaving the End Date blank causes the Integration Point to run indefinitely at the scheduled interval.
- Scheduled Time—the time at which this integration point promote data. This time is local to your PC, not to the server.
- Frequency—the interval at which Relativity promotes data using this integration point.
- Click Next to advance to the Source Information layout.
- Complete the following fields on the Source Information layout:
- Source—select Saved Search from the drop-down list. specify that you want to select a saved search, from which you want export the data in your load file. You will select this folder below from the folder structure in the Folder + Subfolders field. You will also need to select a View from the Views field.
- Saved Search—click on the down arrow and select the saved search that you want to act as the source for the load file. This field is only available if you selected Saved Search as the source above.
- Start Export at Record—select a record number that identifies the initial document for export. Integration Points exports the document with this record number and continues exporting documents with subsequent record numbers.
- Source Fields | Selected Fields| Renamed Fields—choose the fields that you want to export by moving them to the Selected Fields box. The box on the left displays all available source fields. The fields listed in the Selected Fields column are determined by what you select for the Source field above, as well by the folder, production set, or saved search that you select. Only the fields in the Selected Fields box on the right will be exported when you run the integration point. If you wish to rename the fields in your load file before exporting them, you can do so through the Rename option described below. The fields whose names you change are displayed in the Renamed Fields column.
- Rename—gives you the option of renaming the fields in your load file before exporting them. When you click this button, you are presented with the following settings in the Rename Fields window:
- Selected Field—displays the field that you selected from the Source Fields column, the name of which you can change in the Renamed Field below.
- Renamed Field—enter the desired new name for the field. This name will appear in the Renamed Fields column of the layout once you click Update or Update and Next below. If you do not change the original name of the selected field, then the Renamed Fields column contains an empty row for that field.
- Update button—click this button to update the selected field to the name you entered in the Renamed Field setting. When you do this, the renamed field appears in the Renamed Field column.
- Update and Next button—click this button to update the selected field to the name you entered in the Renamed Field setting and then move to the next field in the Selected Field column. When you do this, the renamed field appears in the Renamed Field column and the next field appears in the Selected Field setting.
- Cancel button—click this to exit the Rename Fields window without applying any changes to current field names.

Note: When creating an integration point based on a profile, if you change the saved search, folder, or production set on the Setup layout, the fields listed in the Selected Fields window below are not updated to reflect the new source that you selected. If you're not using a profile to creating the integration point, these fields are updated to reflect the newly selected source.
- Click Next to advance to the Destination Information layout.
- Complete the following fields on the Destination Information layout:Load File Options
- Export Type—this field reflects the type of export job you are running, which you specified on the Setup layout. By default, Load File is selected as the base configuration for your export job. You also have the option of enhancing the load file by selecting Images, Natives, and Text Fields as Files, depending on the makeup of your data. Selecting any of these makes additional corresponding output settings available, which are described below.
- The Text Fields as Files option determines the export of the extracted text or OCR. Select this option if you want to export files as individual document-level text files, with one file per document. Integration Points includes text as part of your load file if you deselect this option and if a long text field is included in the selected fields that you mapped in the Source Information layout.
- Destination Folder—specify the folder into which you want to export the data from the load file. This reads the Default File Repository and lets you select a subfolder of that location.
- Create Export Folder—check this box to create an export folder named after the existing Relativity Integration Point job and the timestamp in your export folder. This will prevent the overwriting of any previous Relativity Integration Point exports to your export folder. When you check this box, the value displayed in the Destination Folder field is updated to reflect the [JobName]_[RunTimeStampUTC] information.
- Image File Format—select one of these formats for image-level load file:
- Opticon
- IPRO
- IPRO (Full Text)
- Data File Format—select a the format for the document-level load file you are exporting:
- Relativity (.dat)—load file exports with the standard Concordance delimiters.
- HTML (.html)—load file is in HTML and contains hyperlinks to launch any exported files.
- Comma-separated (.csv)—load file exports as delimited text file that uses a comma to separate values.
- Custom (.txt)—load file exports with the custom delimiters that you select.
- Data File Encoding—select an encoding for the document-level load file from the drop-down box.
- File Path—controls how the export path for the files is referenced. Select one of the following options:
- Use absolute paths—paths to exported files are represented as absolute paths. For example, C:\ Desktop\VOL001\NATIVE001\AS000001.msg
- Use relative paths—paths to exported files are represented as relative paths. For example, .\VOL001\NATIVE001\AS000001.msg
- Use prefix—a prefix is added to the relative path, such as a CD drive letter. For example, D:\VOL001\NATIVE001\AS000001.msg
- Include Native Files Path—check this box if you want to include the native file path in your data once you export it. Note that in the load file, for example a Relativity.dat file, there will be file path information added for every record you are exporting.
- Export Multiple Choice Fields as Nested—select this option to maintain the hierarchy of Relativity multiple-choice lists, when applicable. The nested value delimiter, a backslash, separates child choices.
- Name Output Files After—select one of the following naming convention for exported files:
- Identifier—select this option to name the files after the identifier for your workspace.
- Begin production number—select this option to name the files after the production number. (This number may be the Bates number for a production.) Relativity names files after the production number only if you select Produced Images as the Production Precedence below.
- Append Original File Name—select this option to append the original name of the file to the end of the exported file name.
- File Type—select one of these file types:
- Single-page TIF/JPG
- Multi-page TIF
- Production Precedence—select one of the following groups of produced documents for export instead of the original images:
- Original Images—exports only the original, non-produced images.
- Produced Images—exports a produced version of the images. When you select this, the following fields become available:

- Image Productions—select the produced images that you want to act as the precedence.
- Include Original Images If Not Produced—exports only the original images in the event that they have not been produced.
- Subdirectory Prefix—enter the alpha prefix for the subdirectory that stores exported images. By default, this is set to IMG.
- Subdirectory Prefix—enter the alpha prefix for the subdirectory that stores exported native files. By default, this is set to NATIVE. This field is only available if you selected Natives for the Export Type field above.
- Text File Encoding—select the encoding for the document-level text files
- Text Precedence—select and assign an order to long text fields that Relativity checks for text when performing an export. You must select one or more long text fields to use this functionality. Click the ellipsis to display the Pick Text Precedence pop-up. To move fields between columns, highlight them and click the Right or Left single or double arrows. Use the Up and Down arrows to order the precedence of the fields.
- Subdirectory Prefix—enter the alpha prefix for the subdirectory that stores exported text files. By default, this is set to TEXT.
- Prefix—enter the alpha prefix for the volume identifier. By default, this is set to VOL.
- Start Number—select the first number used for the numeric section of the volume identifier. Multiple volumes increment numbers during export creating unique volume identifiers.
- Number of Digits—select the number of digits attached to the prefix. (For example, if you select 2, the output is VOL001, VOL002, and so on.)
- Max Size (MB)—select the maximum size allowed for each volume in MBs.
- Start Number—select the starting number for the subdirectories.
- Number of Digits—select the number of digits of the subdirectory prefix (For example, if you select 3, the output is IMG001, IMG002, and so on.)
- Max Files—select the number of files to store in each subdirectory.
- Click Save to save this integration point with these export settings.
Once Relativity saves the integration point, you will be able to run it and export the data based on the settings you specified. See Running the export job for details.
Exporting to a Relativity workspace
In addition to exporting to a CSV and load file, you have the option of exporting data from one Relativity workspace to another Relativity workspace. For more information on this capability, see Transferring (promoting) data between workspaces.
Running the export job
To export your load file based on the export settings you specified above, click Run on the Transfer Options console on the saved integration point.
Note: All Integration Points jobs are fully editable after run.
Note that you also have the option of saving this integration point as a profile through the Save as Profile button on the Transfer Options console. For more information on profiles, see Integration Points profiles.

Click OK on the run confirmation message, which informs you of where your documents will be placed.

The Run button turns to red and gives you the option of stopping the job you just kicked off, as long as that job has a status of Pending or Processing.
If necessary, monitor the progress of the promote job by viewing the Status field in the Status view at the bottom of the layout. You will see any of the following status values:
- Pending—the job has yet to be picked up by an agent.
- Validation—an agent is validating the job to make sure it has the required settings, such as access to the source and destination objects (saved searches, workspaces, etc.). If validation fails, the status changes to "Validation failed," and Relativity logs an error. If the validation succeeds, the job moves on to a status of "Processing."
- Validation failed—the job validation has failed, resulting in an error, the details of which are saved in the Job History Errors tab.
- Processing—the agent has picked up the job and is in the process of completing it.
- Completed—the job is complete, and no errors occurred.
- Completed with errors—the job is complete and errors have occurred. You can view error details in the Job History Errors tab. See Monitoring job history and errors for details.
- Error—job failed—a job-level error occurred and the job did not complete because it failed. You can view error details in the Job History Errors tab. See Monitoring job history and errors for details.
- Stopping—you clicked the Stop button, and the stop job has yet to be picked up by an agent.
- Stopped—the job has been stopped.
Stopping and restarting an export job
Relativity gives you the option of stopping an export job from proceeding in the event that you need to re-prioritize it or because you made a mistake when creating it. You can only do so when that job has a status of Pending or Processing.
Note the following about stopping an Integration Points job:
- You can also stop a scheduled job if it has a status of Pending or Processing.
- A job is cannot be stopped if it has any status other than Pending or Processing, or the point at which Relativity starts promoting documents with such as information as the user who tagged them and the source workspace.
- When you click Stop, Relativity immediately stops creating new errors for that job.
- When you click Stop on a run-now job, Relativity marks all errors associated with the current job history as Expired.
- When you click Stop on a retry job, Relativity marks all errors associated with the current job history and the previous job as Expired.
- You can start a scheduled job after you have already stopped it.
- The item counts on the Integration Points layout reflect all items promoted before the agent received the signal to stop the job.
To stop an export job, follow the steps below.
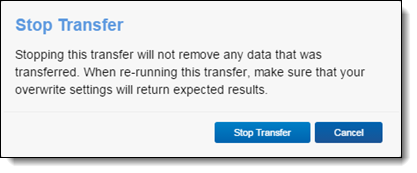
- Click Stop on the console.

Relativity then informs you that you will not be removing any data by stopping the transfer and that you should check to make sure that the overwrite setting you previously entered is still appropriate for the re-run.
- Click Stop Transfer to proceed.

To re-start a stopped job, click Run. When you do this, Relativity begins to transfer data again from the beginning but does not remove any data already transferred.
Stopping (disabling) an Integration Point from promoting data
To stop, or disable, an integration point from promoting data, simply disable, or turn off, the scheduler option.
- From the Integration Points landing page, click the Integration Point Name that you wish to disable.
- Click Edit.
- From the Import Scheduling section under Enable Scheduler, select No.This disables the scheduling mechanism for that integration point.

Scheduler date format considerations
The integration points scheduler accepts non-U.S. date formats to further accommodate, for example, users in Australia.
In this case, the default language in your browser settings is set to English (Australian) or any other language that would display a non-U.S. date format of Day/Month/Year instead of Month/Day/Year.

Relativity then properly displays the date when you select it for the Start and End Date fields in the Scheduling category.

This date format will also appear anywhere else in Relativity where a date is displayed, such as on the saved Integration Point Details layout and the Date Last Modified field on the Document list.
Automatically stopping a scheduled job that repeatedly fails
In some cases, a scheduled job may fail each time it is executed, such as when a job needs reconfiguring, and it may take some time before you become aware of these failed attempts. To mitigate this situation, you can configure an instance setting which will specify the maximum number of consecutive failed attempts encountered before the job is automatically stopped. For example, you may want to stop the scheduled job after four consecutive failed attempts at running.
- Navigate to the Instance Settings page.
- Create a new instance setting with the following settings.
- Name—enter MaxFailedScheduledJobsCount.
- Section—enter kcura.IntegrationPoints.
- Value Type—select Integer 32-bit.
- Value—enter the number of consecutive failed attempts to be executed before the scheduled job is stopped.

The integration point's Scheduling tab will display the failed jobs with a Job Type of "Scheduled Run," Job Status of "Error - job failed," Items Transferred of "0," and Total Items based on the number of items in that job. The system will attempt one more run after the configured maximum number of consecutive failed attempts before it stops the scheduled job and the Total Items column will be blank.

The "Next Scheduled Runtime (UTC)" field on the Scheduling tab will be blank, letting you know that job is not scheduled to run again. You will need to correct the error(s) before it will run again as scheduled.

When you go to the Job History page to view the job, you will see the system-generated error description explaining why the scheduled job was stopped.
