


Feedback
Last date modified: 2026-Apr-15
Centralized Authentication
Centralized Authentication provides a global identity system for user authentication and management. Powered by Okta’s Auth0 platform, it offers secure workflows and innovative features to help clients confidently manage user authentication in their instances. Centralizing user authentication data reduces the burden on admins and provides users with a streamlined authentication experience across instances.
Centralized Authentication supports all types of user authentication, including password and single sign-on (SSO) methods. For SSO, it supports Security Assertion Markup Language (SAML) and OpenID Connect (OIDC).
Prerequisites
Confirm your browser allows traffic to and from the new login page: login.relativity.one and *.auth0.com
Centralized Authentication workflow
- Admin sets up the authentication providers
- Admin invites users to Relativity instance via Centralized Authentication
- Users accept the invitation
- Users log in to RelativityOne using Centralized Authentication
Setting up your Authentication Provider
System Admins can set up one or both of the following authentication providers:
- Password–a two-factor authentication (2FA) method that includes a username, the user's email address, and a password. See Password Provider setup.Simple password setup is currently permitted, however, disabling two-factor authentication is not recommended.
- SSO (Single Sign-On)–a method that allows users to use an external authentication provider so they have one set of login credentials to access multiple applications. See SSO setup.
SSO setup
The Authentication Provider page simplifies how you manage authentication providers and also supports creating and editing password providers. System administrators can configure SSO provider connections using the guided self-service wizard that walks them through configuring their Single Sign-On provider, including testing the connection at the end.
To use your existing SSO provider with Centralized Authentication, re-register the SSO connections in Relativity using the wizard. For best results, open your identity provider in a separate window or work with someone who has access to it.
Considerations
- Common Identity Providers include:
- Okta
- ADFS
- Entra ID
- Additional supported providers include
- Google Workspace
- Keycloak
- PingFederate
- Custom options are also available:
- Custom SAML
- Custom OIDC
- Domain name, client ID, and client secret are necessary for setup.
- Use the 'Test Connection' feature to verify setup
- A successful test will prompt login and show completion status.
- After a successful test, you must enable the connection after which the page will refresh and display the new connection.
To setup your Authentication Provider, navigate to the Authentication Provider tab.
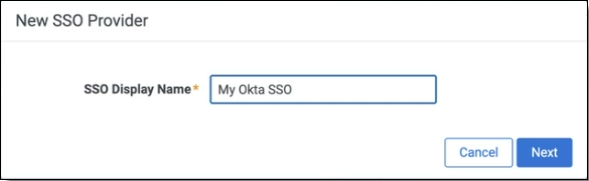
- Select the New SSO Provider button, and enter a display name. The login screen shows this name on the SSO button.
- The Wizard guides you through the setup process. This guide uses Okta as the example identity provider.
- Select your Identity Provider:
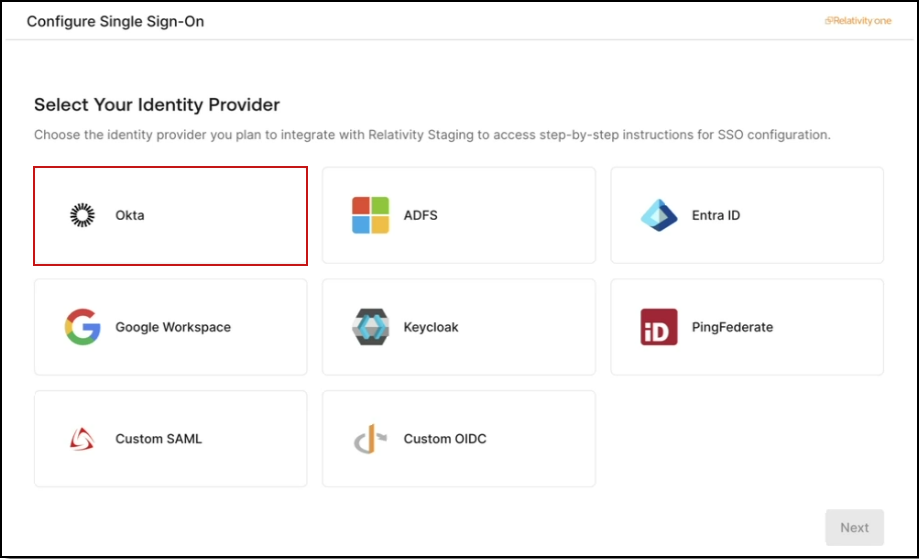 Depending on your Identity Provider, you may need to configure different settings. However, you must provide the domain name, client ID, and client secret for any Identity Provider you select.
- Select your Identity Provider:
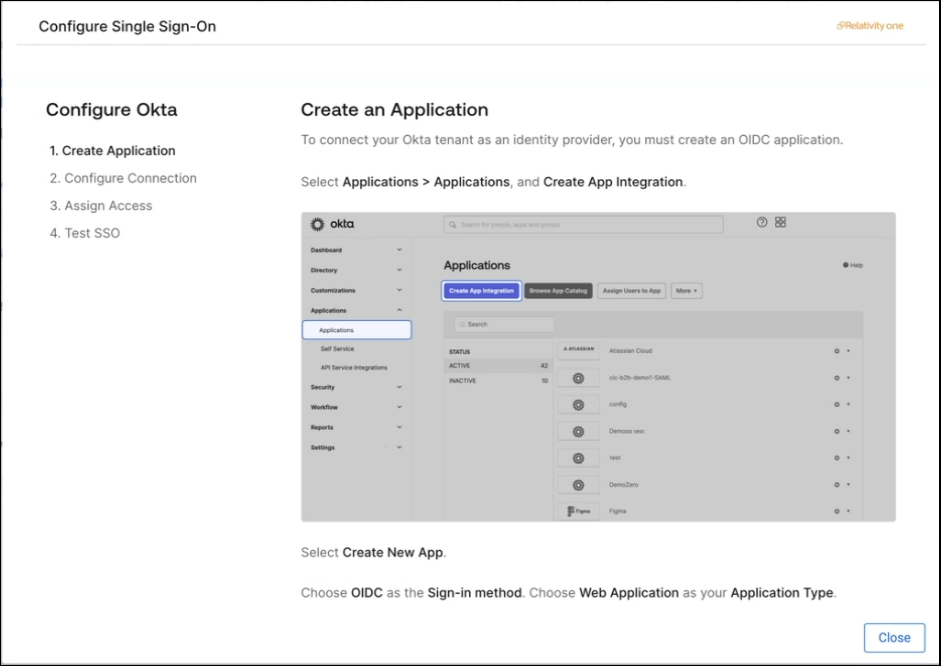
- Create an application in your Identity Provider. To connect your Okta tenant as an Identity Provider, start by creating an OIDC application. Follow the steps in the wizard, then select Next to continue. If you already have an Okta application for Relativity, copy the Callback URL and paste it into the sign-in redirect URI in Okta.
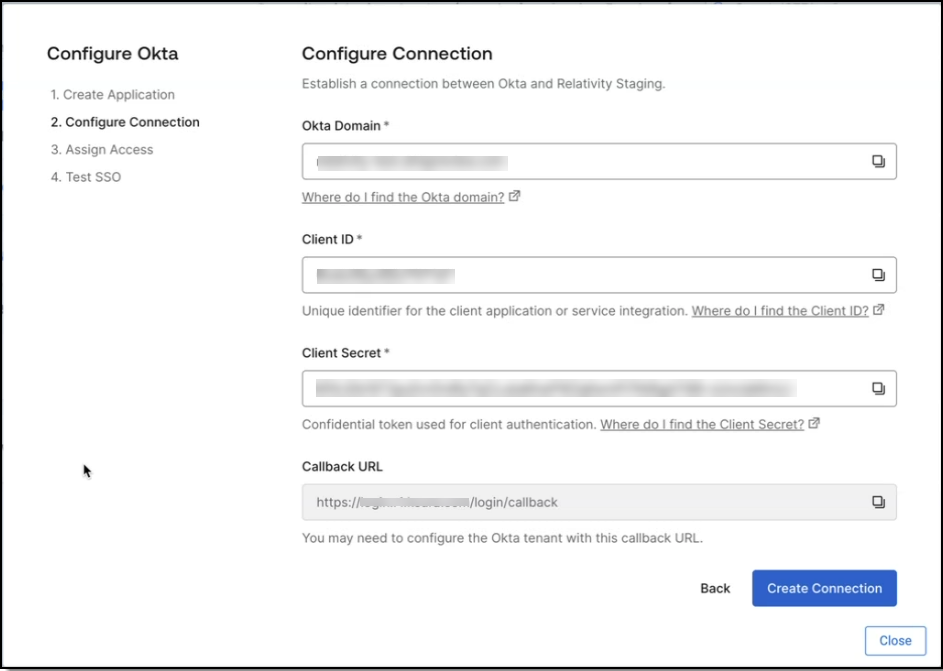
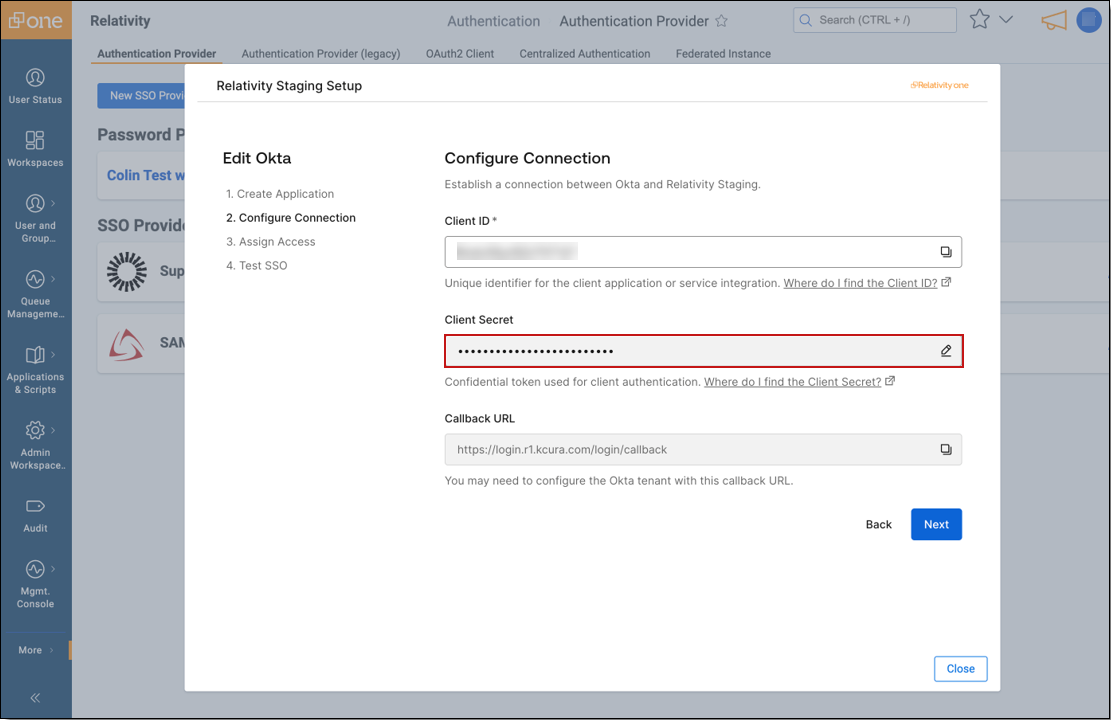
- Configure the connection. To set up your SSO provider, establish a connection between Okta and your Relativity instance. Enter the domain name, client ID, and client secret. Then select Create Connection to continue.
 Creating this connection will enable SSO access to your Relativity Instance. To prioritize security, assign access and test the connection as soon as possible once the connection is active.
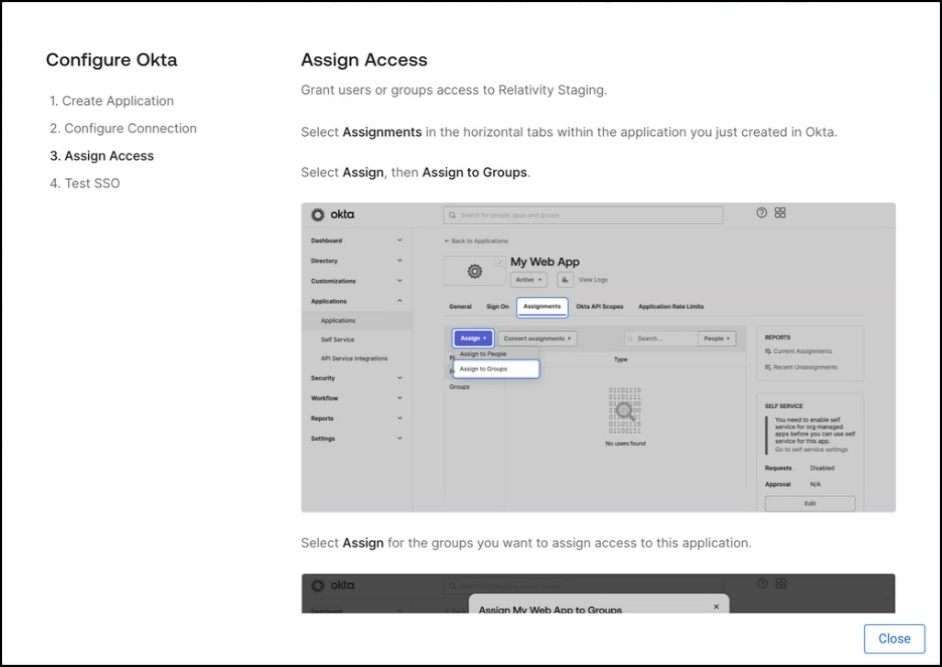
 - Grant access to the appropriate users or groups. If you're already using SSO with your Relativity instance, you don't need to reassign groups in your identity provider. If you're setting up SSO for the first time or need to update user or group assignments, follow the instructions provided. Then select Next to continue.
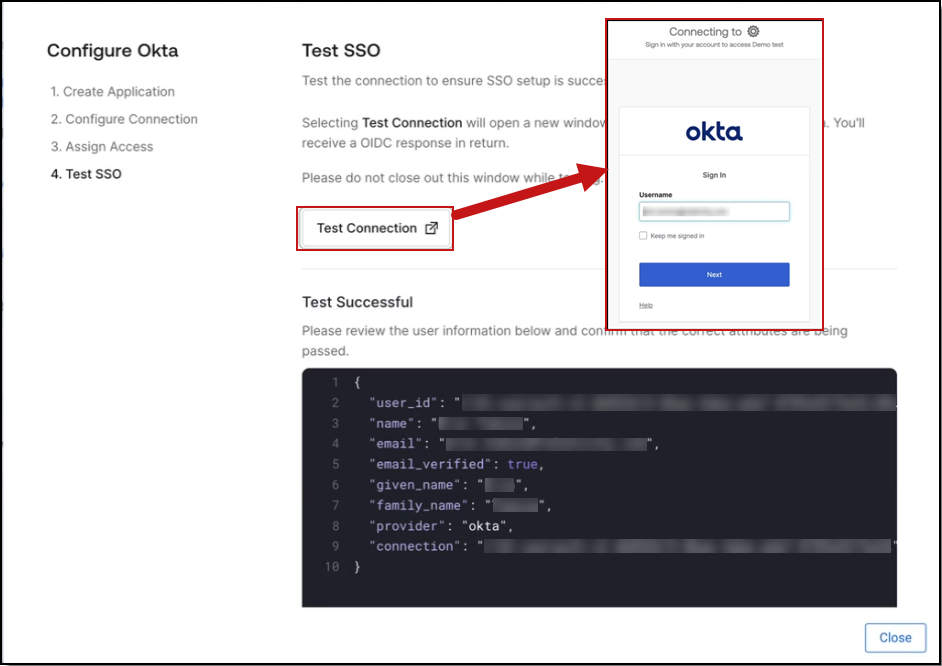
- Test the Connection. Before you enable the connection, test it to confirm it's working correctly. Select Test Connection. A new window opens and prompts you to sign in to your identity provider—Okta, in this example. If you're already signed in, the test runs automatically without prompting you again.
 To enable Relativity to use Centralized Authentication, an administrator must grant consent for the User.Read permission. This allows Relativity to access the necessary resources in Microsoft Entra ID.
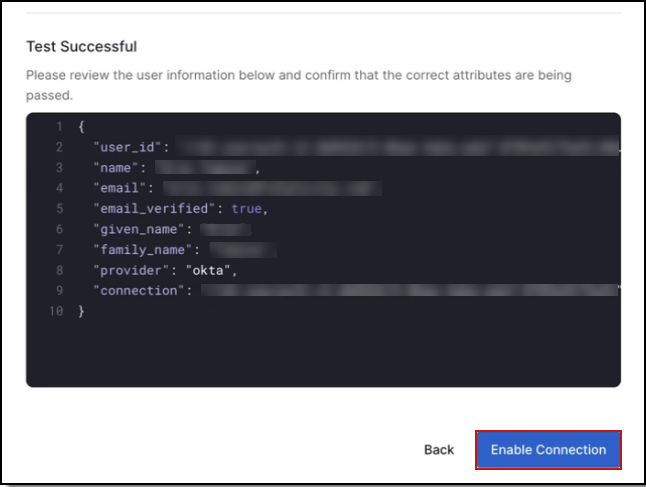
Creating this connection will enable SSO access to your Relativity Instance. To prioritize security, assign access and test the connection as soon as possible once the connection is active.
Edit an SSO Provider
- In the Authentication Provider tab, find the SSO provider you want to update.
- Select the Edit icon (pencil) to open the configuration wizard.
- On the first screen, update the SSO Display Name if needed, then select Next.
-
On the Configure Connection screen, update the connection settings as required. This is where you can rotate or update the Client Secret before it expires.
 >You must update or rotate your own SSO certificate or secret. Relativity Support cannot perform this action for you. Use the wizard's Test Connection feature to verify the configuration.
 - Complete the wizard and select Save to apply your changes.
Password Provider setup
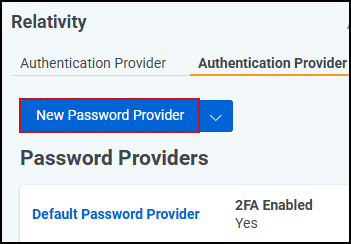
From the Authentication Provider tab, click the New Password Provider button and fill out the following fields:

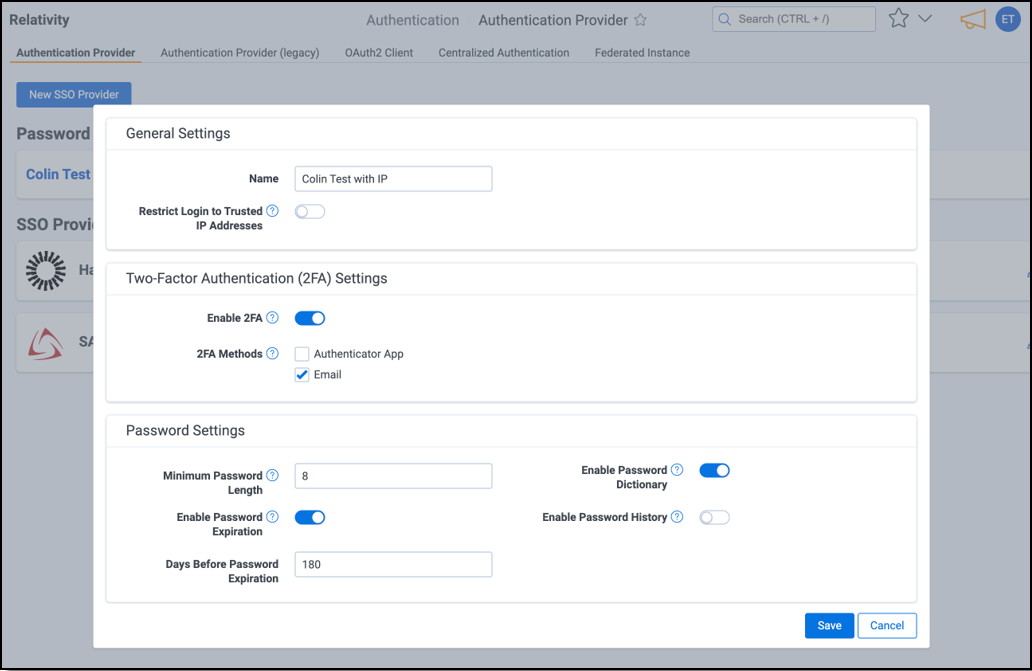
- Under General Settings, enter a Password Provider Name
- In the Two-Factor Authentication (2FA) Settings section, confirm the settings in the following fields:
- Enable 2FA–this toggle is enabled by default to use two-factor authentication for a more secure password experience. If you disable this toggle, a warning is displayed as it does not align with RelativityOne Security Best Practices.
- 2FA Methods–select one or both two-factor authentication challenge methods: Email and Authenticator App. By default, the Authenticator App is selected.
- If both are selected, the user can select which one they want to use during the login process.
- During the first sign-in, the user must configure the Authenticator app as part of the login process.
- For future logins, the user can choose whether to use the Authenticator app.
- To learn more, see the [Authenticator App section].
- In the Password Settings section, set the following fields:
- Minimum Password Length–enter the least number of characters permitted for user account passwords. RelativityOne security best practices recommends 10 or more characters.
- Enable Password Expiration–this toggle is enabled by default with the Days Before Password Expiration set to 180. If disabled, passwords never expire.
- You may update the desired number of days in the Days Before Password Expiration field.
- This value is calculated per user account based on the date the user last reset their password.
- Enable Password Dictionary–enable this toggle to prevent the 10,000 most used passwords from being used in password creation. If disabled, these passwords are permitted.
- Enable Password History–enable this toggle to prevent reuse of passwords. Enter the maximum number of previous passwords to be tracked in history in the Maximum Password History field. If disabled, users are permitted reuse previous passwords.
- Click Save.
Password requirements
| Legacy Requirements | Centralized Authentication Requirements |
|---|---|
|
Minimum character length – defined by customers (default 8) |
Minimum character length - defined by customers (default 10) |
|
4 of the 4 criteria:
|
3 of the 4 criteria:
|
Auth0's password policies follow modern standards that prioritize length rather than complexity.
Additional password considerations
| Feature | Legacy | Centralized Authentication |
|---|---|---|
| Maximum character length |
X (default 50) |
X (default 128) |
|
Maximum failed password attempts before password reset required (Brute Force Protection) |
X |
X (non-configurable - 10 attempts) |
| Maximum password age |
X (default no expiration) |
X (default 180 days) |
| Maximum password history | X | X |
| Disallow passwords in | X | |
| Set password for user | X | Not supported given potential for account sharing. |
| Suspicious IP Throttling | X | |
| Breached Password Detection | X | |
|
Bot Protection (on specific workflows, such as password reset) |
X |
After you complete the password setup, you can start inviting users.
Edit a Password Provider
- In the Authentication Provider tab, select the Edit icon next to the Password Provider you want to update.
-
In the modal window, update any of the following:
- Provider Name
- Two-Factor Authentication (2FA) Settings
- Password Settings
- Trusted IP usage
- To change the 2FA challenge method, select your preferred option (for example, switch from Authenticator App to Email).
- To update Trusted IP addresses, add or remove addresses as needed.
-
Select Save to apply your changes.
Trusted IP Support
Trusted IP support allows you to restrict user logins to specified IP addresses or ranges to enhance the security posture of your environment.
Trusted IP Overview
Centralized Authentication support for trusted IPs will differ from legacy behavior in that they will be applied at the authentication provider level instead of the individual user level.
- Password Providers - trusted IPs are defined and managed at the password provider level.
- SSO Providers - trusted IPs on OIDC providers can no longer be managed within Relativity and should be configured on your Identity Provider.
- If a user attempts to log in from an unauthorized IP address, authentication will fail.
- The Bypass MFA on Trusted IP is a configuration on the password provider which will allow users to skip the MFA challenge if they are on an authorized IP address.
If you previously configured trusted IP addresses with legacy authentication, remove them to avoid unintended interaction.
Setting up Trusted IP addresses
Follow these steps to configure trusted IP addresses for a password provider:
- Navigate to the Authentication Provider tab.
- Click the edit icon next to the password provider you want to configure.
- Enable the Restrict Login to Trusted IP Addresses toggle.
- In the Trusted IPs field, enter one or more IP addresses or ranges. Separate multiple entries with a comma, space, or new line.
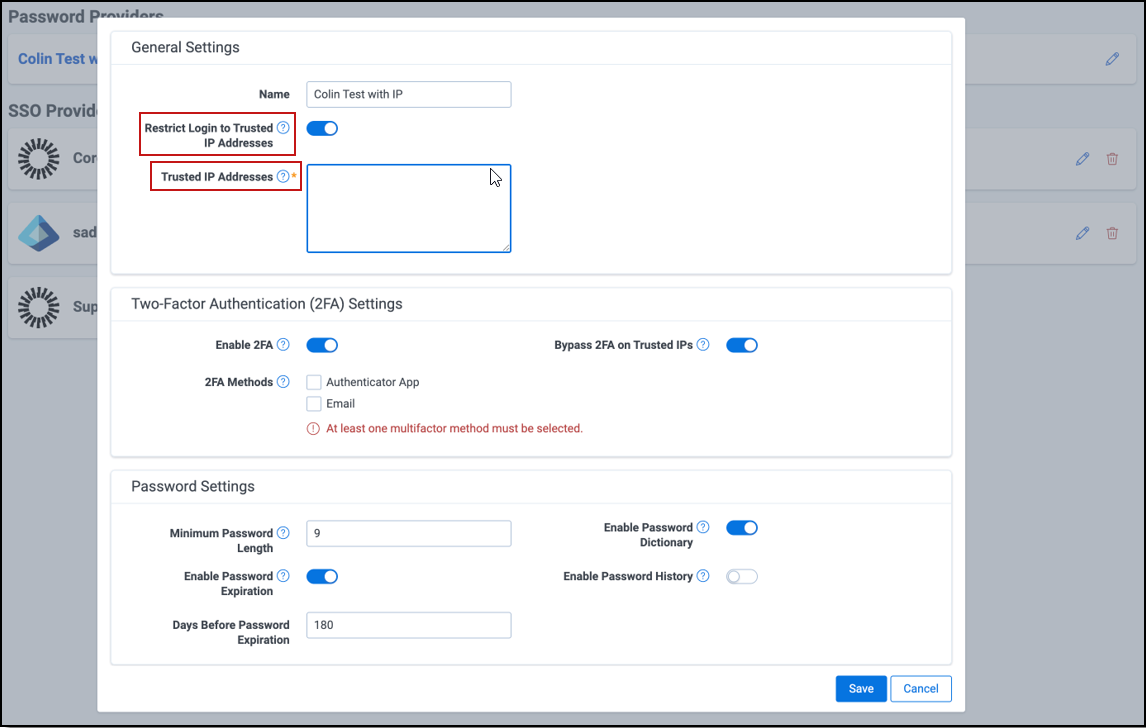
- Optional - Enable Bypass 2FA on Trusted IPs:
- If (2FA) is enabled, you can toggle Bypass 2FA on Trusted IPs to allow users to skip the 2FA challenge when logging in from a trusted IP.
- Click Save.
Inviting users
If your instance is using 'Password Only' and transitioned to Centralized Authentication between January 2025 - June 2025, please refer to Centralized Authentication - Setting Up Passwords and Inviting Users on the Community site.
After you set up authentication providers, invite users to Centralized Authentication. You can invite users individually from their user record or in bulk from the Not Invited tab on the Centralized Authentication page.
The following invitation instructions apply only to users who authenticate with a password provider. By default, users who authenticate through an SSO provider will not need to accept an invitation to use Centralized Authentication. System administrators will still need to create the user account in Relativity, and grant access through their identity provider; however, users can sign in directly using Centralized Authentication, and the system will authenticate them through their SSO provider.
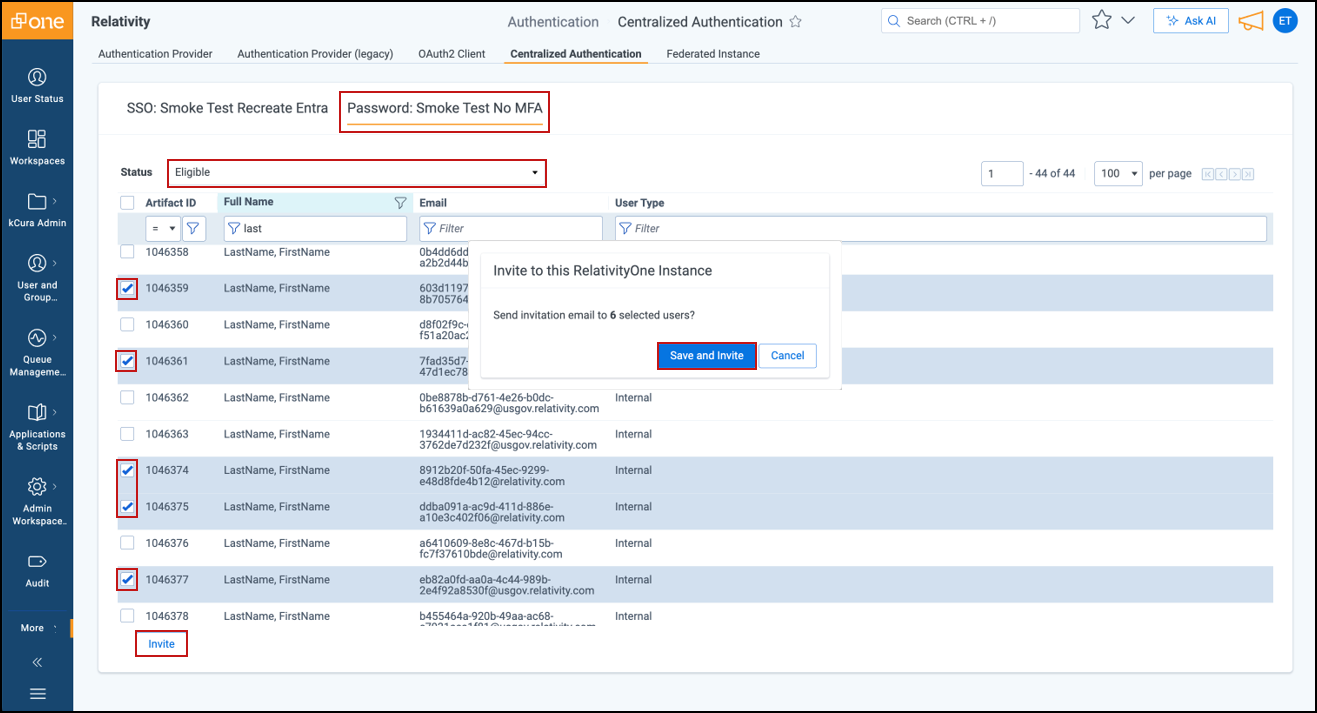
Centralized Authentication tab invitation
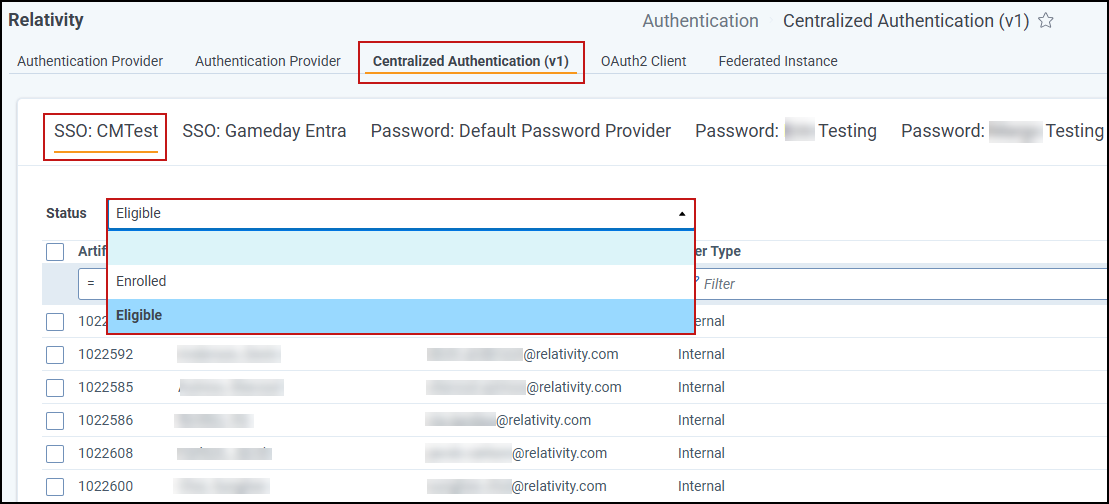
- Navigate to the Centralized Authentication tab.
- Select the Authentication Provider you want to manage users for.
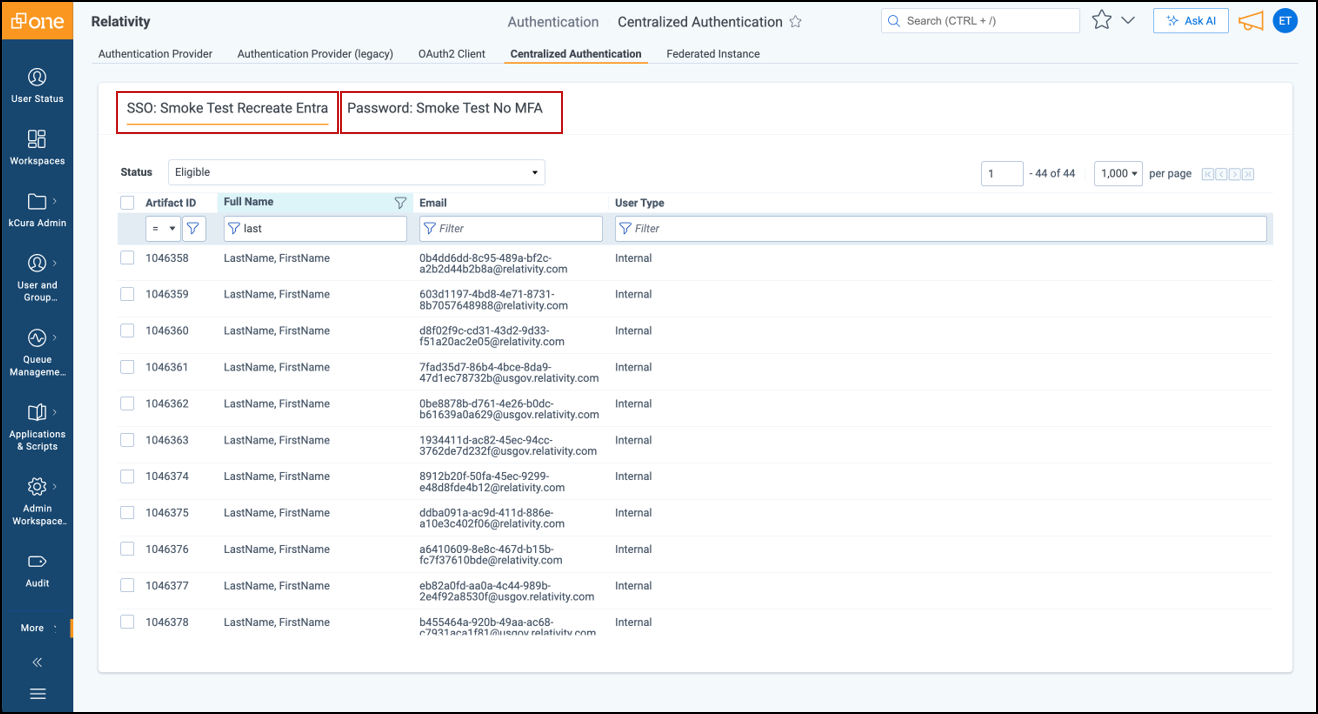
- For Password Providers:
- In the Status field drop-down, select Eligible to view users who can be invited to this password provider.
- Select one or more users and click Invite, then Save and Invite in the Confirmation window.
User tab invitation
- Navigate to the Users tab and click the Edit icon next to the user you want to invite.
-
Select the desired password provider from the drop-down menu.
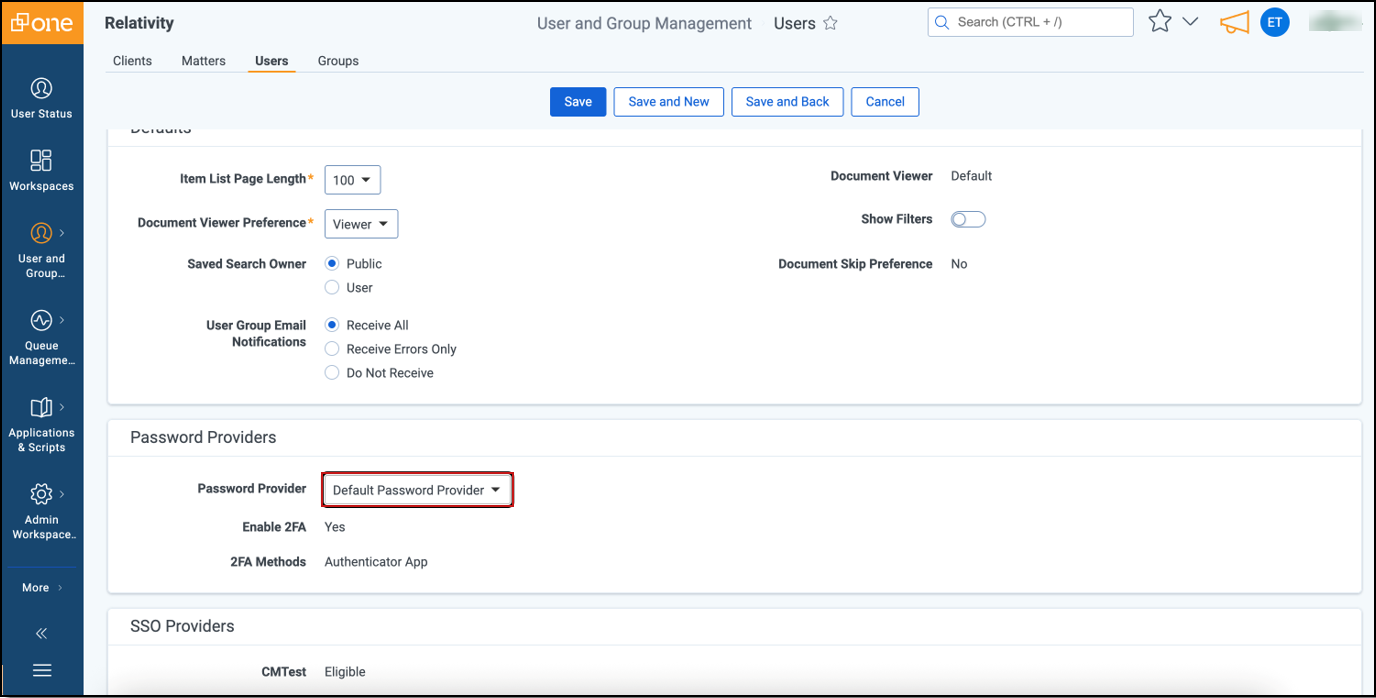 After you select the password provider, the system displays the configured MFA settings.
 - Click Save.
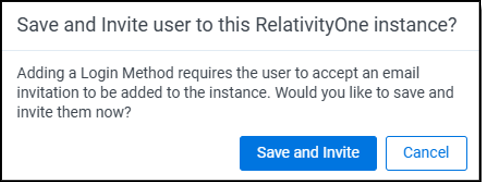
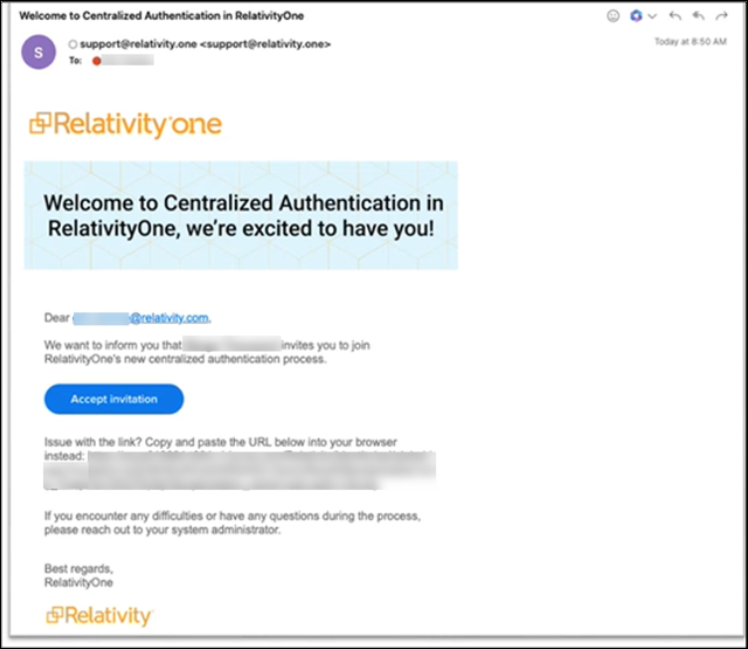
- Click Save and Invite to send the email invitation to the user to join this RelativityOne instance via Centralized Authentication.
The user receives an email invitation from support@relativity.one with the subject, "Welcome to Centralized Authentication in RelativityOne." See User accepts the invitation. Once invited, the user appears on the Pending Invitations list until they accept the invitation, at which point they move to the Accepted Invitations list within the tab for this specific password provider.
Managing user transition
Administrators can track user transitions to Centralized Authentication and manage invitations directly from the Centralized Authentication tab. This overview helps you see which users are assigned to each authentication provider and monitor their progress.
Monitor progress by Authentication Provider
Navigate to the Centralized Authentication tab, then choose the authentication provider you want to review. The information you see changes based on the provider type.
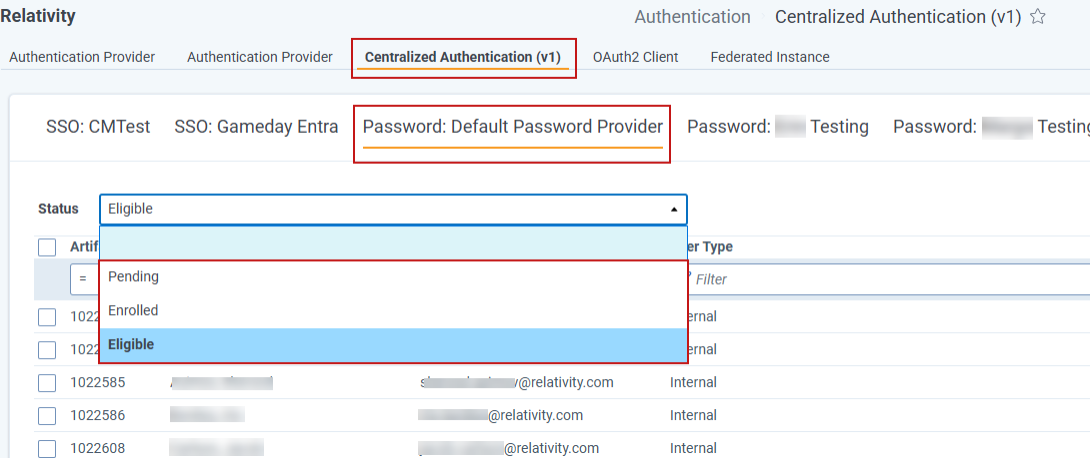
Password Providers
Status: View users in each category for the selected provider in the drop-down menu.
Eligible: Displays users not currently assigned to the provider. The list shows only enabled users and lets you filter by Artifact ID, Full Name, Email, or User Type.
Enrolled: Lists users who accepted the invitation to sign in with this provider. You can view details like Artifact ID, Full Name, Email, enrollment date, number of logins, last login date and time, and User Type.
Pending: Shows users who received an invitation but haven’t accepted it yet. The list displays Artifact ID, the Inviter’s name, the Invitee’s name, the invitation URL, when the invitation expires, and the creation date. Use the Invitation URL if a user can’t receive the invitation email.
If an invitation expires, select the user and choose Re-invite at the bottom of the screen to send a new invitation.
SSO Providers
Status: View users in each category for the selected provider in the drop-down menu.
Eligible: Shows enabled users not assigned to this provider. You can filter by Artifact ID, Full Name, Email, or User Type.
Enrolled: Displays users who have authenticated with this identity provider. This list includes Artifact ID, Full Name, Email, enrollment date, number of logins, last login date and time, and User Type.
SSO users do not need to accept invitations, so you won’t see an “Invite” button on the Eligible list.
User accepts the invitation
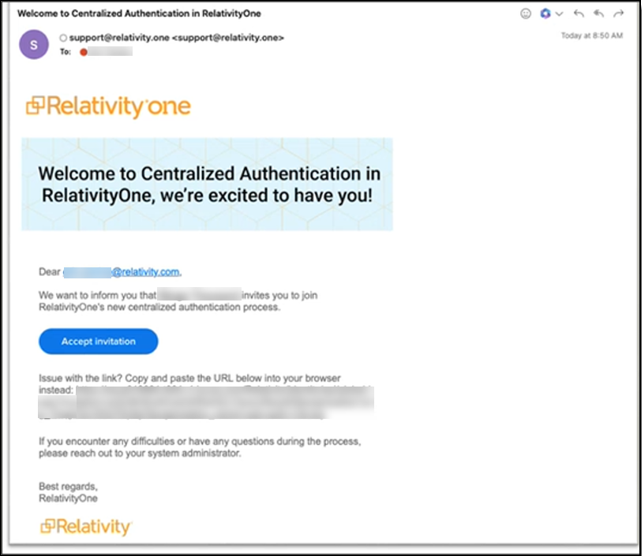
When the user receives the email invitation from support@relativity.one with the Subject, “Welcome to Centralized Authentication in RelativityOne,” they need to accept it.
- The user clicks the Accept invitation button or copies the hyperlink displayed into their browser which will take the user to the universal login page. The invitation expires after 7 days by default.
- In the "Accept your invitation" dialog, follow these steps:
- Enter your email address,set your password, and select Continue.
- If multi-factor authentication (MFA) is enabled, complete the MFA challenge based on the method configured:
- Email: Enter the one-time passcode sent to your email, then select Continue.
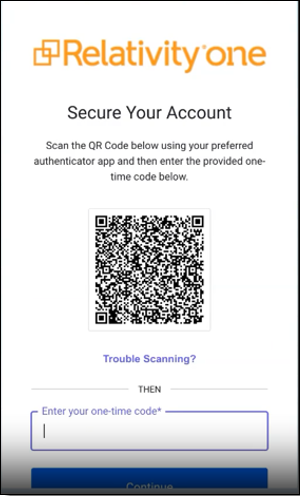
- Authenticator app: Scan the QR code displayed on the screen with a mobile Authenticator app. Enter the one-time code from the Authenticator app into the provided field and click Continue.
- If both the Authenticator App and Email are selected, the user will be prompted to register the Authenticator App during the first sign-in. On subsequent sign-ins, users are prompted to choose their preferred method for receiving the one-time code.
- Enter your email address,set your password, and select Continue.
- SSO: To begin using Centralized Authentication, SSO users must initially log in and authenticate via the Centralized Authentication page, rather than through the Identity Provider initiated flow.If the user has already set a password and receives another invitation, they must select Login instead of Sign up to access their account.
- The user logs into RelativityOne using Centralized Authentication. Admins can check the user’s acceptance status by viewing the Accepted Invitations tab in Centralized Authentication.

Logging in to RelativityOne
Your organization will notice a slight change in the login process as Centralized Authentication rolls out to users.
Transition period to Centralized Authentication
Until all users in the instance have accepted the invitation, your organization will use both the legacy authentication and Centralized Authentication workflows. During this transition period, the user login process is as follows:
- Navigate to your RelativityOne URL.
- On the login page, click Global Identity. The login background will be dark gray, indicating the user is still on the legacy system.
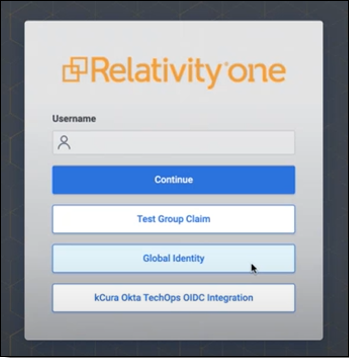
- On the universal centralized login page with a dark blue background, users can choose their assigned login method.
- Using Password login: Enter an email address and click Continue, then enter a password and click Continue.
- Using SSO login: Click the bottom SSO button for the organization.
Centralized Authentication migration
Once all users in the instance accept the invitation and your organization fully utilizes Centralized Authentication, the user login process will be as follows:
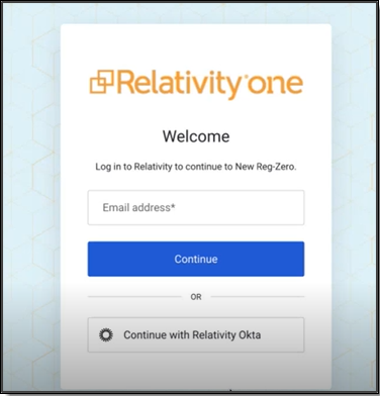
- Navigate to your RelativityOne URL. Note that users are automatically redirected to the universal centralized login page, login.relativity.one.Relativity Support cannot reset user passwords. On the RelativityOne universal login page (login.relativity.one), the “Forgot your password?” link will become visible only after you enter your email address (username) and click Continue. If you still do not see the Forgot your password? option, you must contact your RelativityOne system administrator to reset your password. Relativity Support does not perform password resets on behalf of users.
- Using Password login: Enter an email address and click Continue, then enter a password and click Continue.
- Using SSO login: Click the bottom SSO button for the organization.
Reset a User’s Authenticator App
Users may need to reset their Authenticator app when switching phones or changing apps (for example, from Google Authenticator to Microsoft Authenticator).
Follow these steps to reset a user's Authenticator App:
- Navigate to the Users tab and open the user's detail page.
- Select Reset Authenticator App.
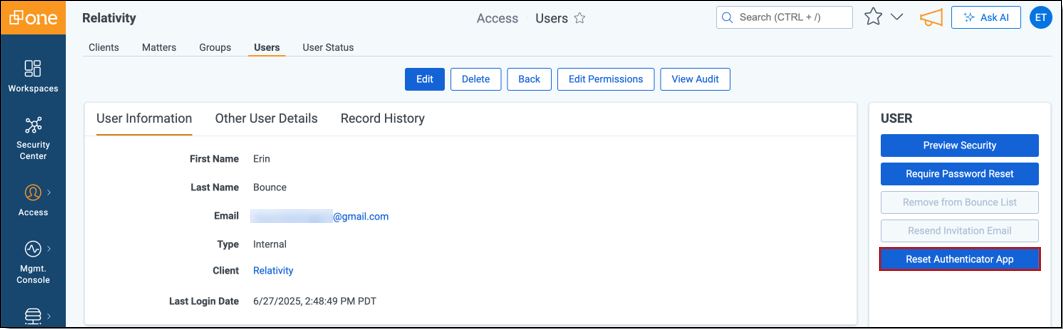
- After the reset, the system displays a success message.
- Notify the user that they need to sign in again.
What the user sees next
- The user signs in with their username and password.

- After entering their password, the system prompts them to scan a QR code to set up their Authenticator app.
- The user enters the one-time code generated by the app and signs in successfully.