Last date modified: 2026-Feb-05
Document ingestion
Billing for Data Breach Response will begin when documents are ingested using the steps below.
Document ingestion is the process of bringing processed documents from your RelativityOne workspace into the Data Breach Response application. This step ensures that only relevant, text-ready documents enter the Data Breach Response workflow before reviewing results.
Prerequisites
Ingestion requires a saved search as input. We recommend creating a list in Relativity containing the documents and generating a saved search from the list. For more information, see Saved search and Lists.
For information on supported file types for ingestion, see Import Export Overview.
Create a new ingestion job
To create a new ingestion job:
- Navigate to the Data Breach Response Application.
- Click the Jobs tab.
- Click Add Documents.

- Enter a Name for the Job.
- Select the Saved Search containing all documents to send to Data Breach Response.
- Select Data Settings. We recommend using Default if you have no specialized requirements.
- Click Create DBR Job.Selecting Save after setting up an ingestion job will begin usage and costs calculation.
See Cost explorer for more details about the information that will be displayed. See Understanding cost in Relativity for information about how costs are calculated.
Once you create the job, the ingestion job will start automatically.
It can take several minutes to hours to complete depending on how large the data set is. You can track your job's progress in the Jobs tab.
Data Breach Response ingests documents in real time as processing completes. You can see the progress of the job in the Job Details view. The same view will also show the number of documents, Job ID, and success/failure completions in real time. You do not need to stay on this page for the job to complete.
Job details
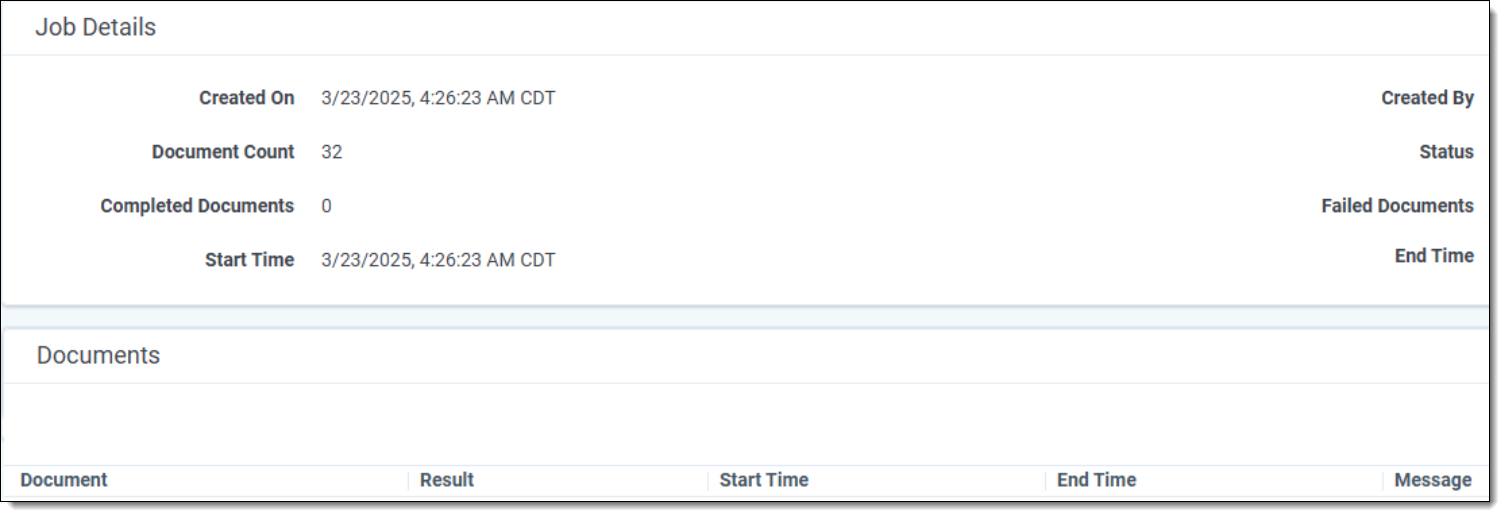
The Job Details section shows you details about a job, including if the job as a whole completed or failed.
To view Job Details select the job you would like to view from the list on the Jobs page.
Check the Status field to see the status of a job. There are three possible outcomes:
- Completed—a job that has completed with zero failed documents will say completed.
- Completed with failures—the job run was successful but there are some failed documents within the job. Open the Job Details page to investigate those failures at the document level.
- Failed—the job as a whole has failed. You will need to rerun the job or contact support to proceed with your work.
The Document Count includes both Completed Documents and Failed Documents. The Document Count does not always equal all documents run through Data Analysis.

Job failures
You can view failures on a document level using the Documents section found under the Job Details section.
To review job failures:
- Select the
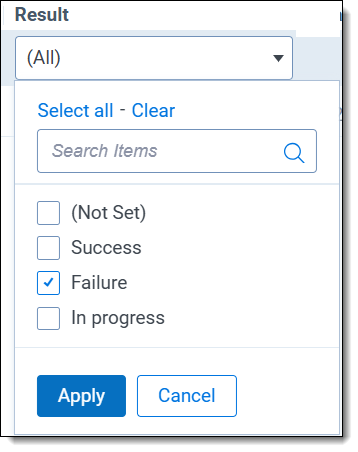
 Show Filters icon in the Documents section.
 - Filter the Result column for Failure and click Apply.

Only documents with a status of Failed will appear in the document list. You can check the message column to see why a document has failed.
If you encounter job failures, check the failure reasons. If you need to contact support, include the Job ID in your support ticket for faster resolution.
Frequently asked questions
There are two workflows where you can verify if a document has been excluded from ingestion. When a document is excluded from the ingestion job, the Jobs Detail page within the Job entry for the ingestion job will list out the error exception that prevented the document from being ingested. To locate the Data Breach Response ingestion job, navigate to the Jobs tab and click into the Ingestion job in the list to view the Job details page.
The Document list will display the Document IDs of documents included in the ingestion job and the Result. Failed Ingestion jobs on the Result column will contain the exception within the Message column that prevented the document from being ingested into the Data Breach Response project.


