


Creating and running a Database Restore job
The Database Restore Job lets you speed up the process of restoring by deciding what to restore: the database only or the whole archive.
Note: To run the Database Restore job, first contact your Database Administrator. The database must be restored in the database itself.
Creating and running a Database Restore Job
To create a new database, restore job, click New Database Restore Job at the top of the ARM Jobs page. The New Database Restore Job page appears.
Configure the following settings in each section on the New Database Restore Job page:

Source
- Database—select the database from the drop-down list.
- Job Priority—select a priority of High, Medium, or Low for the job from the drop-down list.
- Execution Type—select from the following options:
- Manual—run the job manually from the Job List page.
- Scheduled—run the job automatically at a specified date and time. When you select this option, the Scheduled Start Time field appears. Update the date and time information. You can schedule multiple jobs to run at the same time.
Destination
- Database Server—the database server that will be used by the restored workspace.
- Matter—select the matter that the restored workspace will use, or enter a matter name in the search box that displays. You can also enter a few letters from a matter name, and the list will filter based on your input. This field ensures client domains in the target Relativity environment are respected.
Notifications
- Notify Job Creator—select this checkbox to notify the job creator by email when the job is started, paused, or canceled, or when the job completes successfully or fails in error.
- Notify Job Executor—select this checkbox to notify the job executor by email when the job completes successfully or fails in error.
Note: Specific email notification settings can be configured on the Configuration page; however, selecting these two options will register the Job Creator or Job Executor for all of them. You will not receive redundant alerts (e.g., if you are the job executor, you will not receive the Job Started notification).
Once you have configured settings, click Next at the top of the screen. The Map Groups page appears.
Mapping groups
The Map Groups page displays a list of groups from the archive in the Archived Groups section and a list of groups that exist in the system in the System Groups section.
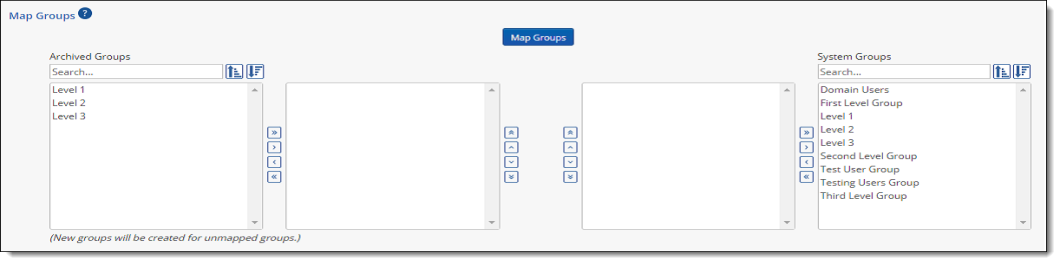
ARM automatically maps the groups from the archive to matching groups in the system. Click Map Groups to perform the automatic mapping. The following image shows the groups from the Archived Groups section mapped to matching groups from the System Groups section.
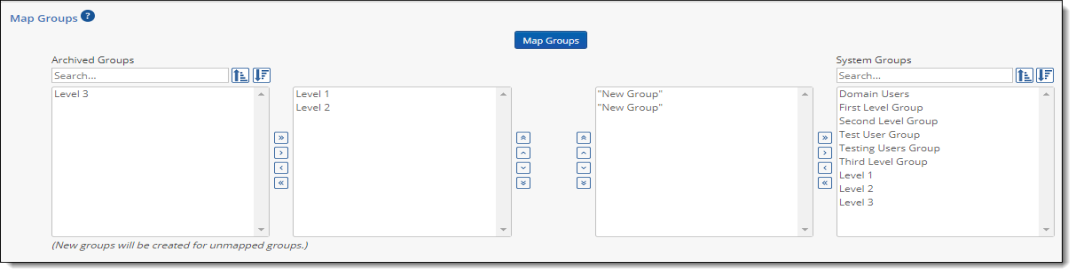
Confirm that all group names are in the proper position to be mapped correctly, and then click Save to save the new Restore job, or click Next to map users from the archive to the users that exist in the system.
Note: Every group must be mapped to perform the restore. If a group is not mapped, or if there are more Archived Groups in the archived workspace than System Groups in the target workspace, a new group is automatically created and mapped to during the restore. If you create a new group with the same name as an existing group, the new group name is appended with a note indicating that it was created by ARM.
Note: In RelativityOne, you must be a member of at least one group that has been added to a workspace before you can access it. Because an ARM Restore job creates a new workspace when you restore an ARM archive folder, you want to ensure that your Administrator group in the RelativityOne instance is mapped to one of the groups in the ARM archive before the ARM restore job is run. This will ensure that all members of your Administrator group can access the workspace once the ARM restore job completes.
Please contact Support for assistance if the Administrator group has not been mapped to a group from the ARM archive.
Mapping users
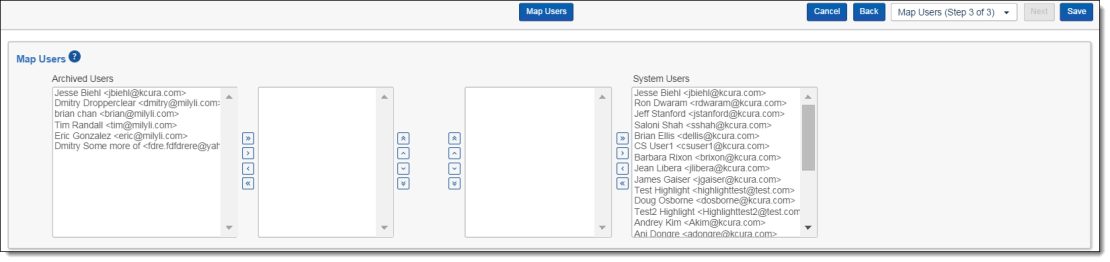
The Map Users page displays a list of users from the archive in the Archived Users section and a list of users that exist in the target workspace in the System Users section. ARM can automatically map users from the archive to matching users in the target workspace.
Note: Users must already exist in the target workspace to be available for automatic mapping. If you have archived users that you want to map, but the matching users have not yet been created in the target workspace, you must create the users in the target workspace before they can be mapped. Once the users have been created in the target workspace, they will appear in the System Users section.
Note: ARM user mapping does not associate users to groups. It only maps users for audit purposes and for private saved searches. Linking users to groups must be done outside of ARM.
Click Map Users to perform the automatic mapping. The following image shows the users from the Archived Users section mapped to matching groups from the System Users section.
Note: For ARM 9.4.1 and above, archived users are automatically mapped to users in Relativity when the user's email address matches exactly. These users will not appear on the Map Users page.
Confirm that all group names are in the proper position to be mapped correctly, and then click Next to select Application Restore options (if Include Extended Workspace Data was selected for the ARM archive). Alternately, click Save to proceed directly to the Restore Job Details page.
The Restore Job Details page appears with a console on the right side of the page.