


Feedback
Workspaces tab
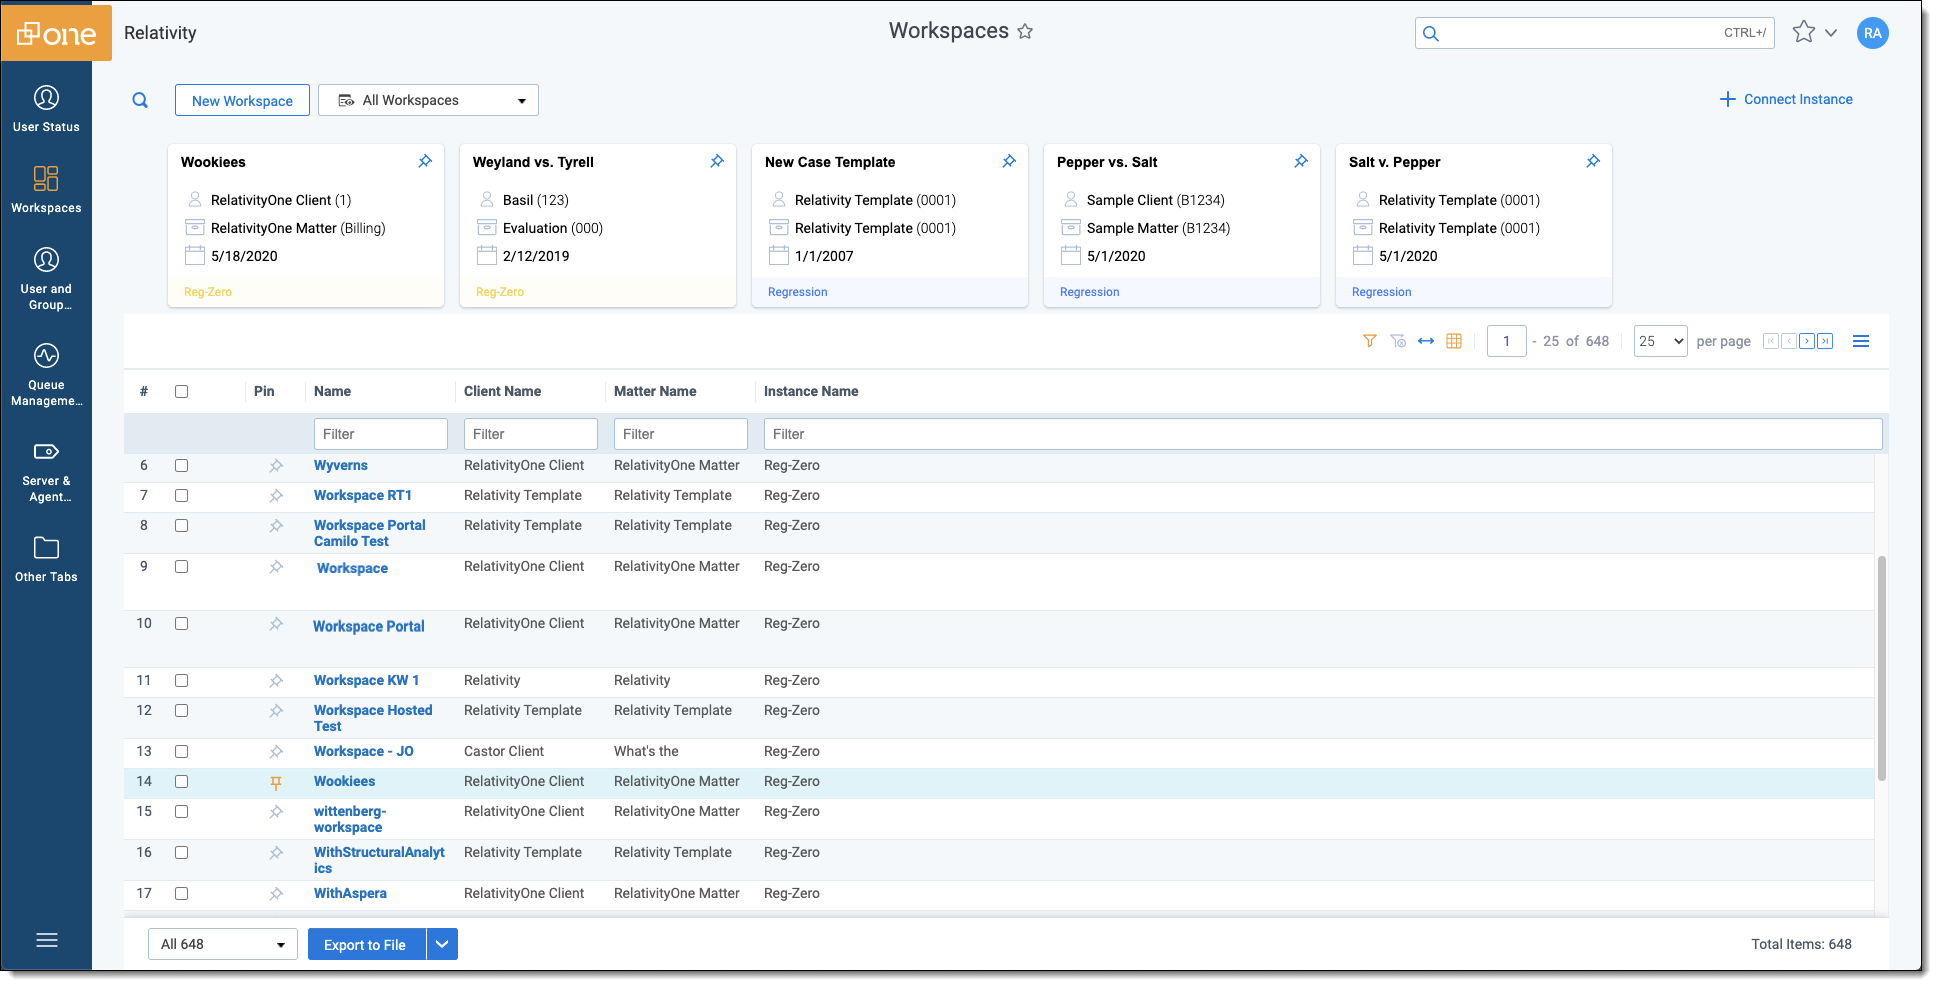
The Workspaces tab enables you to view a list of all the workspaces for both your master and satellite Relativity Server and RelativityOne instances from a single tab. The available list of workspaces displays in the grid, and you can pin your favorite workspaces and access them in the carousel at the top of the page.
You can navigate between the instances seamlessly using single sign-on.
- For both RelativityOne and Relativity Server instances, we recommend that you have an authentication provider set up for both the master and duplicate instances to get the most seamless experience using single sign-on (SSO) capability. If you do not have single sign-on set up, you will have to log in whenever you navigate between your master and satellite instances.
- This functionality is only available for customers running supported Relativity versions as well as running at least one RelativityOne instance.
For information on creating and managing your workspaces, refer to Workspaces and for navigating a workspace itself, refer to Workspace navigation.
Using the Workspaces tab
Only users who have access to both the master and duplicate instance will be able to view workspaces from your linked instances.
At the top, the workspace carousel displays all of your "pinned" workspaces. You can use the arrow buttons to the left or right to navigate through this list. In addition, workspace cards in this list will be automatically color-coded by instance so that all workspace cards from a particular Relativity instance will be visually distinguishable. This can help users tell which instance a workspace is from at a glance.
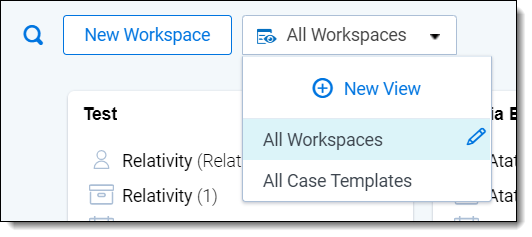
Clicking into the Views menu to the right of the New Workspace button lets you access the Relativity workspace views that you have access to within your local instance. You can also
Common Workspaces tab icons and actions
You can perform the following additional actions from the Workspaces tab:
- New Workspace button - click this button to create a new workspace. See Workspaces for more information on how to create a workspace.
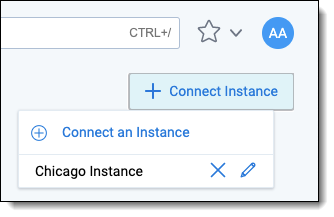
- Connect Instance - click this button to view the list of registered instances in the drop-down menu or add a new instance connection. See Managing your instance connections.
The Connect Instance icon is only available to Relativity system admins.
- Pin workspace button (
 ) - click this button to the left of a listed workspace in your list to pin it in the Pinned Workspaces carousel at the top for easy access to your most used workspaces. Click the orange
 icon to unpin the workspace from the pinned workspaces list or click the icon in the carousel section to unpin it.
Managing your instance connections
Click the Connect Instance icon to link a new instance to the current instance or view a list of existing instances. See Linking additional Relativity instances for more information on how to connect a new satellite instance.
Only users who have access to both the master and duplicate instance and are system administrators on the master instance will be able to connect a new instance.
Click the (  ) icon to edit an existing registered instance connection or the (
  ) icon to delete a registered instance connection. When editing the current instance, you can select a custom name to display for workspaces associated with that instance instead of the instance name.
If you are using the
Creating a new workspace in one of your instances
To create a new workspace:
- Click the New Workspace menu button.
- You will be redirected to create your workspace through the normal Workspace information dialog. See Workspaces .
Searching for a workspace
To search for a workspace across your connected Relativity instances, you can click the Search icon ( ) to create a quick search to locate a list of matching workspaces
You can also use the QuickNav menu to locate a workspace in your master instance by typing in the name of the workspace or you can also sort and filter the list of workspaces below by using standard Relativity item list functionality. Workspaces in remote instances will not be searchable here.
Workspaces security permissions
The following minimum instance-level security permissions are required to use the full Workspaces tab / Workspace portal functionality. To access this tab, users must be part of a group that is added at the instance level.
| Object security | Tab visibility | Admin operations |
|---|---|---|
|
|
|
For new groups that you want to grant access to the Workspaces tab and linked workspaces, add item-level security permission to the SMTPPassword instance setting.
The Workspaces tab will only display the workspaces that you have View permissions for.
The Connect Instance button only displays for Relativity System Administrators.
Linking additional Relativity instances
Custom fields created in linked instances that do not exist in the master instance will not be filterable or sortable. The content in those fields will be visible, but filtering and sorting on that field will not be enabled.
Linking to additional RelativityOne instance workspaces
To view and navigate to workspaces in other RelativityOne instances that you may have (this does not apply to Relativity Server instances).
Linking to Relativity Server instance workspaces
To link Relativity Server instance workspaces to your RelativityOne instance, you will need to install the Workspace Portal application and configure your Relativity Server instance appropriately.
Required prerequisites for configuration
Please have the following actions completed before proceeding with configuration steps:
Configuring your master and duplicate RelativityOne instances
Please ensure that you complete the steps in the order listed.
1) Configuring your RelativityOne duplicate instance
- Create an OAuth2 client in your RelativityOne duplicate instance which will allow the RelativityOne master instance to authenticate with it.
- Navigate to the Authentication > OAuth2 client tab.
- Click New OAuth2 client.
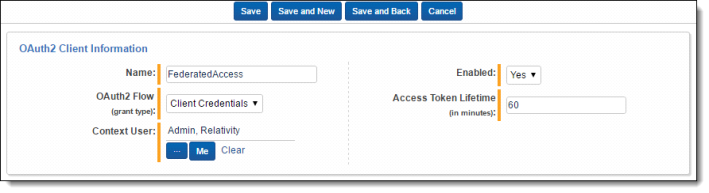
- Enter the following fields:
- Name - enter a friendly name that represents the connection (e.g., Hybrid Connection (Chicago).
- Flow - select Client Credentials.
- Context User - select the Workspace Portal / User Sync user you created under Required prerequisites for configuration.
- Enabled - select Yes.
- Access Token Lifetime - enter 60. 60 is the recommended value, but you can adjust this value based on your needs.
- Click Save. The Client Id and Client Secret fields populate when you click Save.
- Copy the generated Client Id, Client Secret, and the HRD (name of the authentication provider), and then paste this information into a text editor for later use.
If you have already set up an OAuth2 Client for User and Group Synchronization, and have the Client ID and Client Secret generated for that, you can use the existing OAuth2 client, and skip to step 2.
This will be the only point at which you can copy the generated Client Id and Client Secret.
2) Configuring your RelativityOne master instance
Create the instance connection referencing the duplicate instance and the OAuthClient that was set up in your duplicate instance.
- Navigate to the Workspaces tab.
- Click the Connect Instance icon (
 ).
). - Click the Connect Instance icon (
 ) to link a new instance to the current instance.
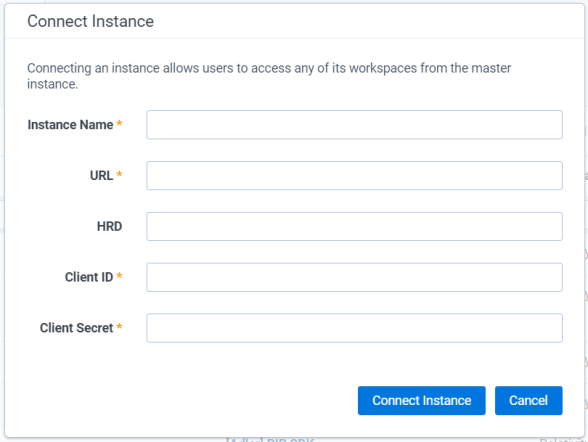
- Enter the following fields for each instance you are linking:
- Instance Name - enter a user-friendly name.
- URL - enter the instance URL of your duplicate instance. Use the following format: https://{host}/Relativity
- HRD - paste the name of the authentication provider that you copied after you created it in the duplicate instance.
- Client ID - paste the Client ID generated by the OAuth2 client you created in the duplicate instance you are linking to.
- Client Secret - paste the Client Secret generated by the OAuth2 client you created in the duplicate instance you are linking to.
- Click Save.
- Verify that this was successful by logging out and back in, and clicking on the Workspaces tab to see if the workspaces all show up here successfully from the linked instances.