


Feedback
Views
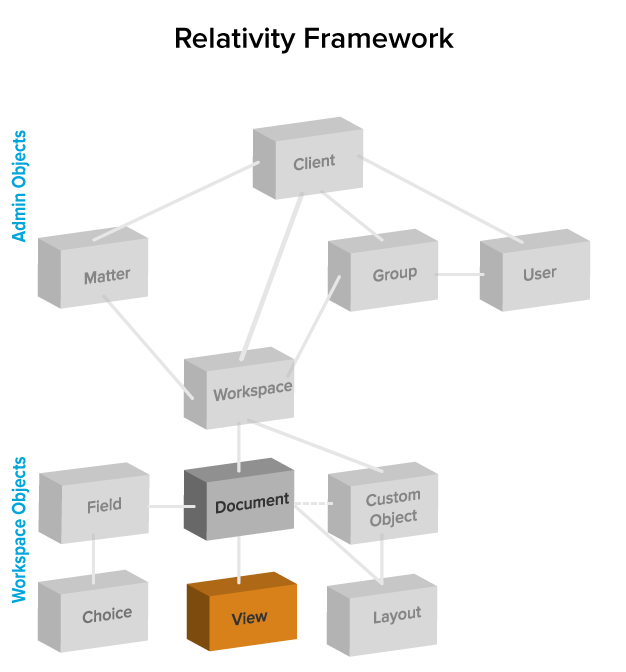
Views are customizable lists of items in Relativity. This diagram illustrates the relationship between views and other Relativity objects.
Views are effectively special saved queries that control three things:
- The items displayed on the list, based on a set of criteria.
- The fields of information displayed for the returned items.
- The sort order of the returned items.
Each view corresponds to a Relativity object. For instance, to create a custom list of documents to display in the Documents tab, you must create a document view.
If an Object Type List page does not have a view, it does not load and an error message appears that states no views have been created.
When you create a view, you can set conditions so that only objects that meet certain criteria appear in the view. However, you shouldn't rely on views to control security. If you need to prevent users from viewing an item, you must set the appropriate security permissions for that item.
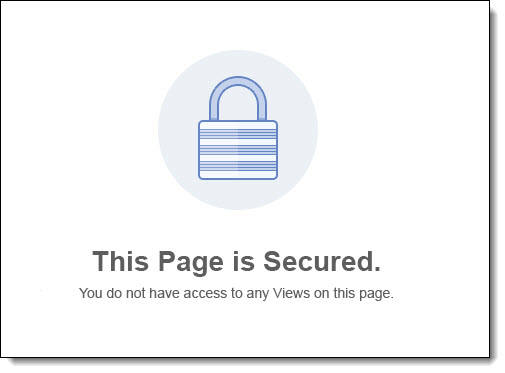
If a user does not have access to any of the available views, an error message appears that states the page is secured.
Also see these related recipes:
Workspace system views
There are several workspace system views. These views display lists of items in special locations throughout the workspace. They include:
- <Relational Field Friendly Name> - controls which fields appear in the related items pane for relational field groups. Common examples include:
- Family documents - controls which fields appear in the related items pane when viewing family groups.
- Duplicate documents - controls which fields appear in the related items pane when viewing duplicate groups.
These relational views are automatically generated when you make a relational field. By default, they are not included on the Documents tab and are only used to determine the fields that appear in the related items pane for that relational group.
- Search Results Pane view - controls which fields are visible in the related items pane when you right-click in the viewer to run an Analytics search for similar documents.
- History Pop up - controls which fields appear when clicking details from the related items pane document history.
- Production Documents - controls which fields display for documents included on a production details page. Include the fields you use to qualify a document for production in the production documents view. You can then filter the list for disqualifying field values, providing a final QC step in the production process.
- CaseMap Fields view - controls which fields are included in mass-sends to CaseMap.
- Markup History Details - controls which fields appear when you launch a document’s history details from the related items pane.
- Default Search view - controls which fields are returned, by default, on an advanced or saved search. You can always include additional fields from the advanced or saved search field selector. This view also controls the sort order of these fields as well. See
- Linked - controls which fields are shown in the pop-up. You can then link to a document in the viewer.
- Link Pane view - controls which fields are shown in the related items pane showing the linked documents.
- Batch Set Batches - controls which fields are shown for the list of batches displayed at the bottom of the Batch Sets tab.
- Document Batches (Default) - controls the pop-up for searching batches on a view or an advanced or saved search.
For more information on searching with Batch fields as search conditions, see
- Advanced Search Browser view - controls the fields displayed in the Advanced Search Browser.
This workspace system view is not editable in Relativity.
- Event Handlers on Object Type - controls the fields displayed in the pop-up for event handlers attached to an application.
This workspace system view is not editable in Relativity.
System views from Home
Any time you see a list of items in Relativity, it's a view. There are a number of system views available from Home, including page detail views and pickers.
- Page detail views:
- MattersOnClientPage - controls which linked matters’ fields appear on the client details page.
- UsersOnClientPage - controls which linked users’ fields appear on the client details page.
- UserViewRenderer - controls which users fields appear on the group details page.
- GroupViewRenderer - controls which group fields appear on the user details page.
- Pickers:
- ClientsOnPicker - controls which client fields appear when selecting a client on the picker. The client picker is available from the new matter or new user form.
- UsersOnPicker - controls which user fields appear when adding a user to a group. The user picker is available from the group details page.
- GroupsOnPicker - controls which group fields appear when adding groups for a user. The group picker is available from the user details page.
- WorkspacesOnPicker - controls which workspace fields appear when selecting a template workspace on the new workspace form.
- MattersOnPicker - controls which matter fields appear when selecting a matter on the new workspace form.
Pickers have special restricting functionality within Relativity. You can use picker views criteria to control which items are available on the picker. For example, you can set up Relativity so that only clients with an active status are available for linking to users and matters. To accomplish this, edit the criteria for the “ClientsOnPicker” view to include status = active.
Creating a view
A view can be created utilizing field categories or without them depending on where you create the view. Field categories allow you to quickly and accurately apply field conditions to the document list.
We do not recommend entering sensitive data in a view name because it cannot be secured with client domains.
Creating a view with field categories
To create a view that can utilize field categories, do the following:
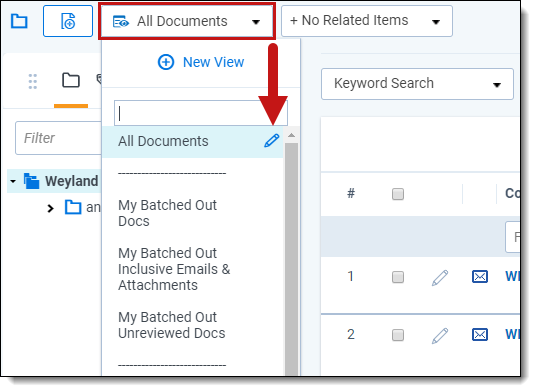
- Navigate to the Documents tab.
- Click on the View drop-down to expand the menu.
- Click New View.
- The View pop-up displays. Complete the fields on the pop-up. The fields for creating a new view are separated into five tabs.
Creating a view without field categories
To create a view without utilizing field categories, do the following:
- Navigate to the Views tab.
- Click New View.
- The View pop-up displays. Complete the fields on the pop-up. The fields for creating a new view are separated into five tabs. See the following sections to learn about each tab's fields.
- Click Save.
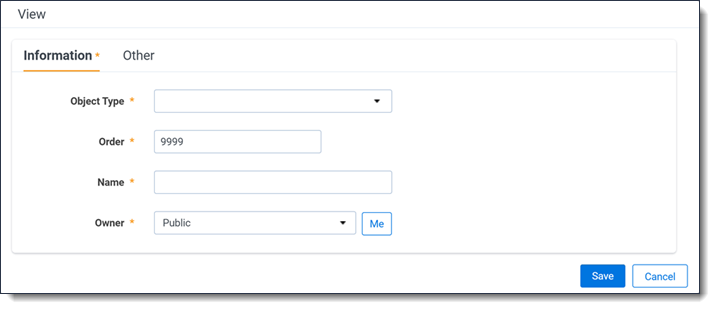
Information tab
The Information tab fields are:
-
Object Type - is the type of view you're creating.
When choosing an Object Type, ask yourself "What do I want to make a list of?" The answer is your object type.
A common example of a type of view is the document view, which can be used when creating a view with a criterion that only shows documents that have not yet been coded. Another example is a batch view, which can be used to display only batches assigned to a specific user.
- Order- sets where the view appears within the view drop-down list. Items that share the same value are sorted in alphanumeric order.
- Order can be any integer (positive or negative). No decimals are allowed.
- The default order is 9999.
It’s always a good idea to order by 10's, starting with 10, then 20, then 30, etc. By numbering in groups of 10 you can insert an item into any position later in the workspace, without the need to reorder all items.
- Name - the title of the view.
- Owner- sets the user(s) who can see the view. If the owner is set to Public, all users with rights to the view are able to see it. If the owner is set to a specific reviewer, the view is visible to only that reviewer. Clicking Me assigns the view to the logged in user.
Other tab
The Other tab fields are:
- Group Definition - includes propagated documents in the view and groups those documents together between blue lines within the document list.
- Query Hint - used to optimize views. Only use the query hint if instructed by the Relativity Customer Support team. Currently, you can use Hashjoin:(true/false) or Maxdop:(x) to populate the field.
- Relativity Applications- associate this view with an application created in the Applications tab.
- Visible in Dropdown- makes the view available in the selected object type's tab.
Fields tab
In the Fields tab you select the fields that appear on your view.
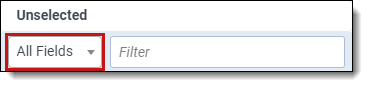
All potentially available fields appear in the left box, Unselected items. If you created a view that utilizes field categories, you can select a field category from the drop-list above the Unselected items box to filter the list.
Move any fields you want in your view to the right box, Selected items. You can move fields between boxes by:
- Double-clicking the field name.
- Using the arrows between the boxes.
- Holding Shift and click or drag to select a range of items, which you can then move using the arrows.
In the Unselected items box, fields appear in alphanumeric order. Choose the fields for your view carefully, and avoid adding long text fields. Depending on the field type, you're able to get only a few fields visible on the screen. Select only those fields a user needs to see, filter on, or sort by.
In the Selected items box, fields are ordered according to their position. The topmost fields in the Selected items box are the leftmost fields on the view. The bottommost fields in the Selected items box are the rightmost fields on the view. Place your cursor  in the Selected items box to order the fields using drag and drop.
There are several special system fields unique to views that you can add to a view:
- Edit - a hyperlinked field that opens the item in edit format.
- Security - a hyperlinked field that opens the item’s security console.
There are filtering capabilities that you can use to help you locate fields. You can use the filter above each box to search for fields found in the corresponding box.
The number of fields, or columns, you select can impact page load performance.
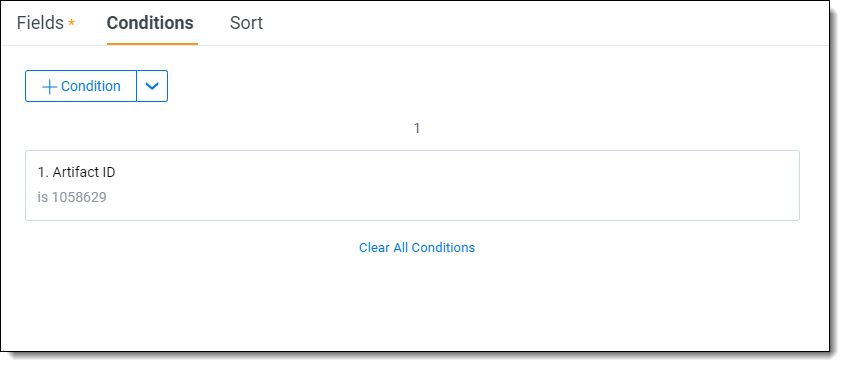
Conditions tab
In the Conditions tab you determine which items you want your view to return. A field condition can contain up to 4,000 characters.
When the item list for the view loads slowly due to a long running query, a message box displays with a Cancel Request link. This link is available when you perform other actions on item lists containing documents or Dynamic Objects that initiate a query in the background, as well as when you perform searches, filter, or sort on these objects.
The Set Conditions section is similar to the Conditions section in saved searches. For more information on the available options, see
To define the criterion for your view, you can choose to add conditions, logic groups, or both.
To set a condition, complete the following steps:
- Click the + Condition button.
- Select the field you want to apply a condition to by entering the name of the field or selecting the field from the drop-down list. The types of fields present differ based on the type of view you are creating.
If you are setting a condition on a view that can utilize field categories, you can conveniently filter the list of available fields by selecting a field category from the drop-down menu above the fields list.
- A pop-up appears to select your search operator and enter the value to be searched. Available operators differ depending on the type of field being searched.
With date-based fields, you can enter dates with the MM/DD/YYYY format or use the date range filter.
Depending on the field type and operator, you can choose the value(s) from a popup picker. A popup picker is available for selecting choices and objects that provide the following operators:
- Any of these
- None of these
- All of these (only for multi-object fields)
- Not all of these (only for multi-object fields)
- (Optional) Connect each criterion with an "AND" or "OR" operator.
- (Optional) You can click Clear All Conditions to start over. Or, you can click the
 to remove a single condition.
 - Click Save.
To set a Logic Group, complete the following steps:
- Click the down arrow to the right of the + Condition button and select Logic Group.
- Select the conditions you would like to group together and drag and drop them into the logic group frames. Move your cursor to the left side of the condition to enable drag and drop.
- Use the AND or OR operator to join logic groups.
- Click Save.
Sort tab
In the Sort tab you define the default sort order of the view. If you don't select a sort criterion, the view sorts by artifact ID. Users are able to temporarily sort the view by any field that has Allow Sort/Tally enabled on the view.
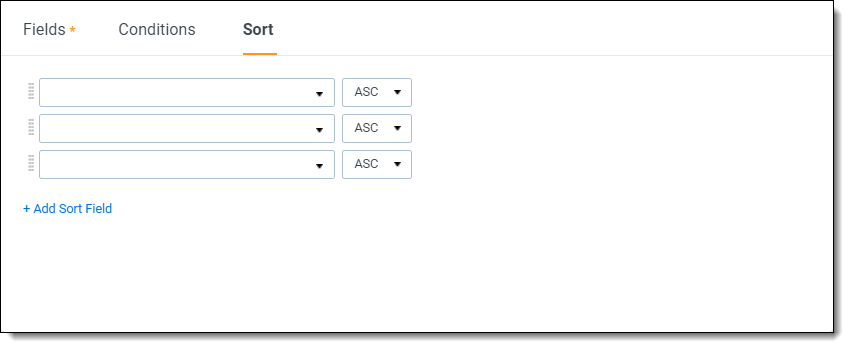
Each row represents a sort criterion. Select the desired sort field in the first column. The second column sets whether the sort should run ascending or descending. The sorts are applied in nested order.
Editing view information
You can edit views in three ways:
- In the Views tab in a workspace, click the Edit icon next to the desired view in the item list and move through the steps for
- For all Relativity Dynamic Objects (RDO), and most system objects, you can click on the view drop-down to display the list of views. Next, click Edit icon next to the view you wish to edit, and then move through the steps for
- Open the view that you want to change, click Edit in the view bar, and then move through the four-step wizard as demonstrated below.
Using the four-step wizard
When you edit a view from within the view itself, Relativity guides you through the four-step wizard. Complete the fields on the form and click Next after you complete each step. See the following sections to learn about each steps fields:
- Step 1: Basic Information
- Step 2: Fields
- Step 3: Conditions
- Step 4: Sort
Make sure to click Save when you are finished making your changes.
Basic Information
The Basic Information (Step 1 of 4) fields are:
- Owner - sets the user(s) who can see the view. If the owner is set to Public, all users with rights to the view are able to see it. If the owner is set to a specific reviewer, the view is visible to only that reviewer. Clicking Me assigns the view to the logged in user.
View Information
- Name - the title of the view.
- Order - sets where the view appears within the view drop-down list. Items that share the same value are sorted in alphanumeric order.
- Order can be any integer (positive or negative). No decimals are allowed.
- The default order is 9999.
It’s always a good idea to order by 10's, starting with 10, then 20, then 30, etc. By numbering in groups of 10 you can insert an item into any position later in the workspace, without the need to reorder all items.
- Visible in Dropdown - makes the view available in the selected object type's tab.
Advanced Settings
- Object Type - is the type of view you're creating.
- Visualization Type - displays items in the standard format for email conversation visualization. Note that while editing Document Views available in the Related Items pane, the Visualization Type property appears. This property is only editable on system-created views associated with Relational Fields. Otherwise this field is set to Standard List and is read-only.
- Relativity Applications - associate this view with an application created in the Applications tab.
 to select an existing application. This is only available for those who have the Manage Relativity Applications permission under Admin Operations.
 - Query Hint - used to optimize views. Only use the query hint if instructed by the Relativity Customer Support team. Currently, you can use Hashjoin:(true/false) or Maxdop:(x) to populate the field.
Fields
In the second step of the wizard you select the fields that appear on your view.
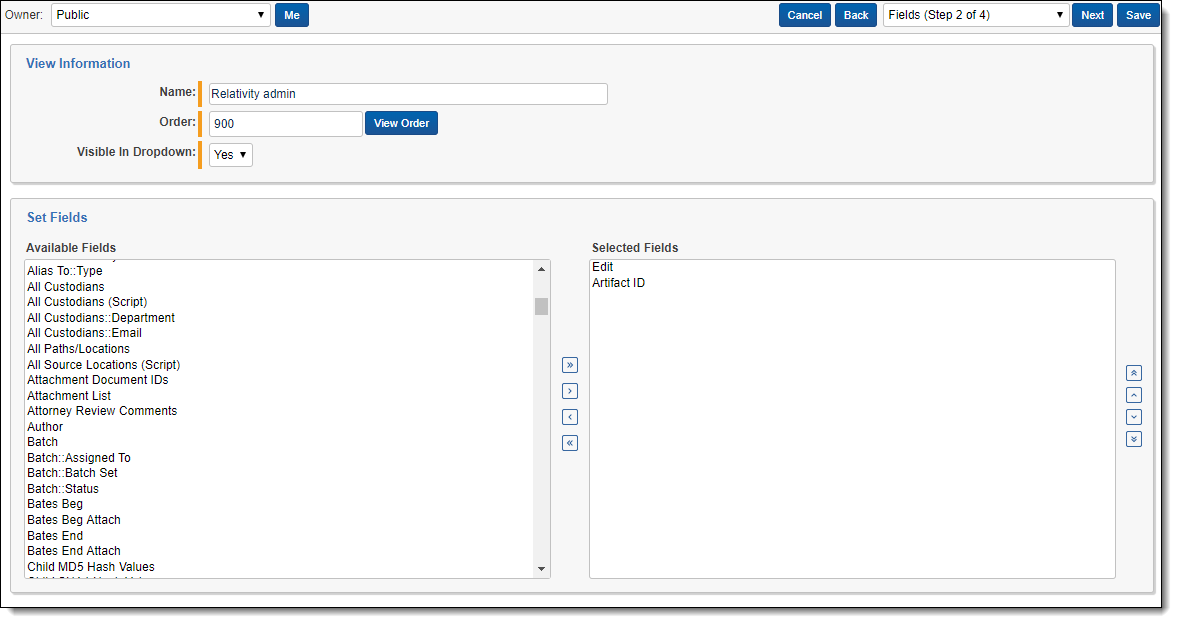
All potentially available fields appear in the left box, Available Fields. Move any fields you want in your view to the right box, Selected Fields. You can move fields between boxes by:
- Double-clicking the field name.
- Using the arrows between the boxes.
- Holding Shift and click or drag to select a range of items, which you can then move using the arrows.
In the Available Fields box, fields appear in alphanumeric order. If you move a field back to available fields from selected fields, it moves to the bottom of the list. Choose the fields for your view carefully, and avoid adding long text fields. Depending on the field type, you're able to get only a few fields visible on the screen. Select only those fields a user needs to see, filter on, or sort by. Use the up and down arrows on the right of the Selected Fields box to order the fields. The  button sends the selected field to the top of the Selected Fields list. The
  button sends the selected field to the bottom of the Selected Fields list.
There are several special system fields unique to views that you can add to a view:
- Edit - a hyperlinked field that opens the item in edit format.
- File icon - unique to document views and displays an icon representing the document’s Relativity native file type.
- Security - a hyperlinked field that opens the item’s security console.
In the Selected Fields box, fields are ordered according to their position in the selected fields box. The topmost fields in the box are the leftmost field on the view. The bottommost fields in the box are the rightmost field on the view. To reorder the fields, use the up and down arrows to the right of the selected fields box.
There are four buttons at the top of the wizard:
- Cancel - aborts the creation of the view. No information entered in the wizard is saved.
- Back - takes you back to the previous step of the wizard.
- Next - saves the information on the form and takes you to the next step of the wizard.
- Save - records the information on the form and completes the creation of the view.
Conditions
In the third step of the wizard you determine which items you want your view to return. A field condition can contain up to 4,000 characters.
When the item list for the view loads slowly due to a long running query, a message box displays with a Cancel Request link. This link is available when you perform other actions on item lists containing documents or Dynamic Objects that initiate a query in the background, as well as when you perform searches, filter, or sort on these objects.
The Set Conditions section is similar to the Conditions section in saved searches. For more information on the available options, see
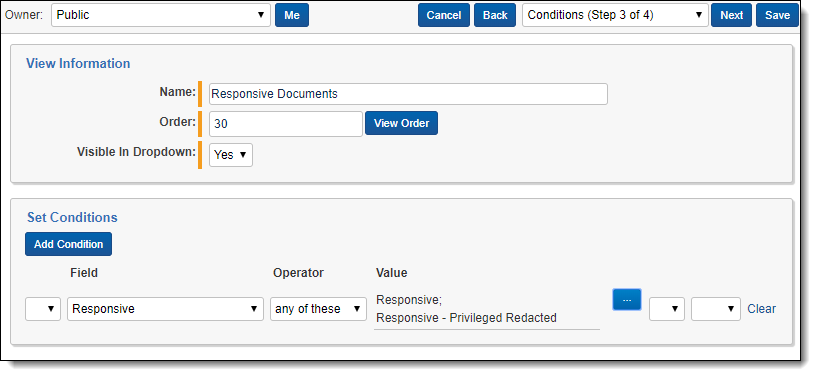
Each row of the conditions builder represents a separate criterion. Each box of the row represents a different part of the criterion.
- The first box, Criteria - select a single, double or triple parentheses. With this option you can create complex levels of grouping between different criteria. This is only available when you have more than one row.
- The second box, Field - select any available field in your workspace. The types of fields present differ based on the type of view you are creating.
- The third box, Operator - select your search operator. Available operators differ depending on the type of field being searched.
- The fourth box, Value - select the value to be searched.
With date-based fields, you can enter @today as the value instead of choosing a date.
- The fifth box - close any parentheses opened in the first box.
- The sixth box - connect each criterion with an “AND” or “OR” operator.
Depending on the field type and operator, you can choose the value(s) from a pop-up picker. A pop-up picker is available for selecting choices and objects that provide the following operators:
- Any of these
- None of these
- All of these (only for multi-object fields)
- Not all of these (only for multi-object fields)
When you click ![]() next to any of these operators, the following window appears:
next to any of these operators, the following window appears:
Check any item in the Available Items list at the top and click Add to put that item into the Selected Items list below. Click Set to add the Selected Item as a condition in the view.
Likewise, check any item in the Selected Items list and click Remove to place the item back into the Available Items list. Click Set to removes the item from the view condition.
The Available Items pop-up picker is also available when setting advanced search conditions and when performing a mass edit.
There are two additional buttons on the form:
- View Order - opens a pop-up that displays the order of existing items to determine where the new item should display.
- Add Conditions - displays a new conditions row where additional conditions can be set.
Sort
In the fourth and final step of the wizard you define the default sort order of the view. If you don't select a sort criterion, the view sorts by artifact ID. Users are able to temporarily sort the view by any field that has Allow Sort/Tally set to Yes included on the view.
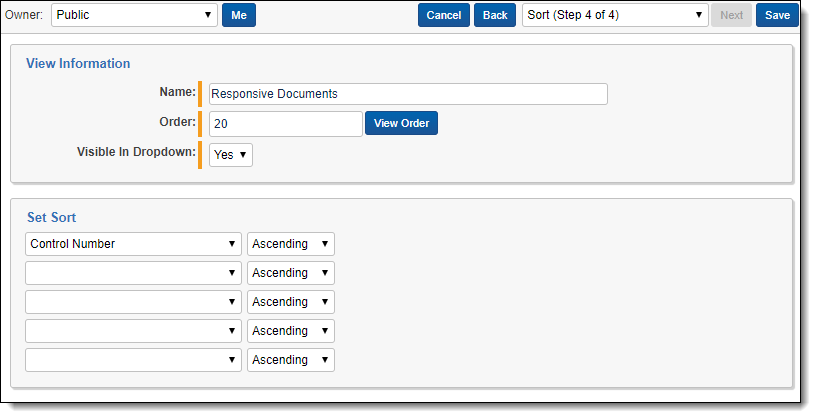
Each row represents a sort criterion. Select the desired sort field in the first column. The second column sets whether the sort should run ascending or descending. The sorts are applied in nested order.
Linking a dashboard to a view
To link a dashboard to a view:
- Create or edit a view.
- Choose an Object Type from the drop-down menu that is compatible with dashboards.
-
Select the desired dashboard from the Dashboard drop-down menu.
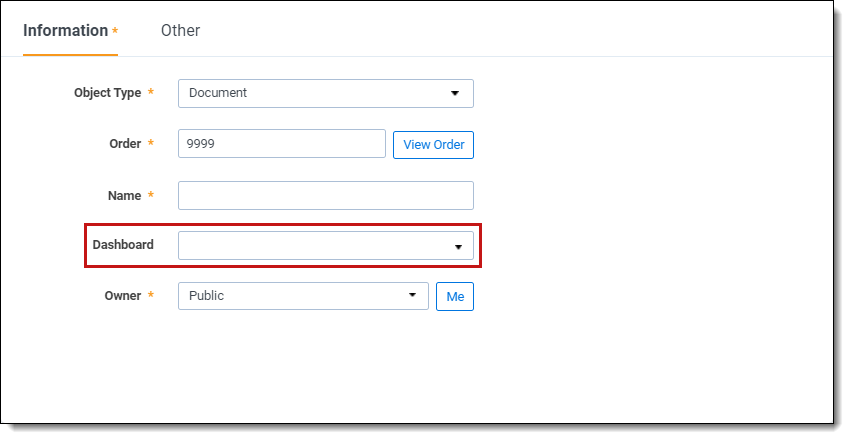
- Click Save.
If you switch to a different dashboard while in the view, the link breaks. There are two ways to restore this link:
- Log out of your environment, then log back in.
- Edit the view and hit Save again.
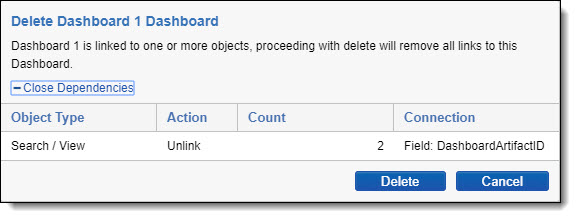
If you delete a dashboard, Relativity removes the link in the view.
If you delete a dashboard with dependencies, a pop-up appears with a list of dependencies.
Dashboards are available for dynamic object type views. They are also supported by the following static objects:
- Document
- Install Event Handler
- Mass Operation
- Markup Set
- Production