Feedback
Importing document metadata, files, and extracted text
You can use a document-level load file to import document metadata, native files, and extracted text. For large data sets, consider breaking the load file into smaller document counts. Use multiple computers and instances to load the individual load files. It may be helpful to break up the types of information into distinct subgroups; such as load metadata, natives, text, and images. Loading data in smaller amounts can assist with quality assurance. We recommend having no more than four concurrent RDC imports running on the same server or in the same workspace.
In addition, you may see warning or errors during an import under the following conditions:
- Native file with 0 KB - The RDC imports native files with the size of 0 KB. In the RDC, the Warnings tab displays a message indicating that the file is empty and only metadata has been loaded for the record. In the viewer, users see extracted text when it exists for the file. If the file has no extracted text, users see a blank placeholder, and no image or viewer options are available. See Configuring the RDC.
- Long file path names - If the load file contains a field used to set the folder path on the folders browser, and the field is longer than 255 characters for a document, the RDC displays an error message for that document on the Errors tab. The RDC doesn't import the document into Relativity. The RDC continues to import any other documents in the load file with fields shorter than 255 characters.
Importing RDC Permissions
The following permissions are required to use the importing feature in Relativity Desktop Client:
| Object Security | Tab Visibility | Admin Operations |
|---|---|---|
|
|
|
You must also be part of a group that has access to the parent folder of the workspace or you will receive an error when selecting that workspace in the RDC.
Importing documents
Use the following steps to import documents:
- Open the RDC and select a workspace.
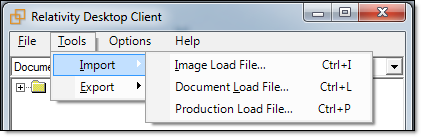
- On the Tools menu, point to Import and then click Document Load File. (In the RDC browser, you can right-click on a specific folder, point to Import and click Load File.) The Load File tab in the Import Document Load File window appears.
- (Optional) To use settings in from an existing import file, use these steps:
- On the Import Document Load File dialog, click the File menu, and select Load Import Settings.
- Browse for your load field map file (.kwe) in the Open Saved Field Map dialog, and then click Open.
- Click OK on the kCura.EDDS.WinForm dialog. Click Open on Choose Load File dialog. Settings from the file are used to populate fields in the Load File and Field Map tabs. (You can also modify any settings on these tabs as necessary.)
- Continue with step 7.
- Click
 to browse for a document load file on the Load File tab. Set the other options as necessary.
On the Load File tab, set the following options to indicate how your load file is configured:
- First line contains column names —select this option if your load file has a header.
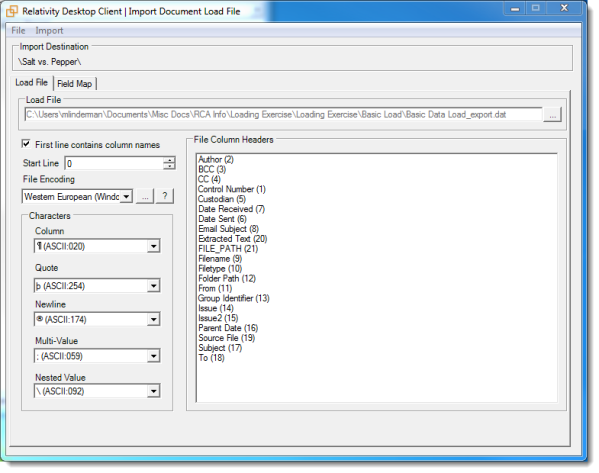
- Start Line - select the line number in the load file where you want the import process to begin. The default value is 0, which results in loading the entire file.
- File Encoding - select an encoding for the document load file. (Consult your processing vendor or department to determine the correct encoding option, if necessary.) If your file contains a language other than English, choose a Unicode option. Click
 for additional options or click
  for additional information about encoding.
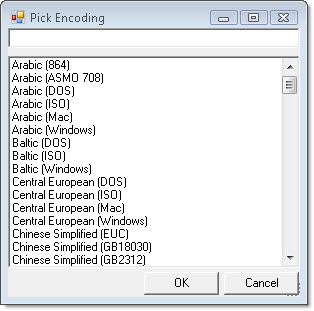
Review the following information about how the encoding of load files is handled:
- Relativity uses auto-detection to determine the encoding of your text files. If it finds a different file type in your text files, it changes to the appropriate method.
- Relativity immediately applies any changes that you make to the encoding of a load file, and displays these changes in the column header preview.
- Relativity provides you with the ability to audit the encoding of a load file.
- Relativity includes the functionality for previewing the import file as well as the encoding of the extracted text files.
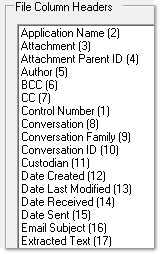
- File Column Headers - Relativity automatically updates this section of the Load File tab when you select the file encoding. This section may display the following message before you select an encoding for the load file.

After you select the encoding, this section displays the fields in the load file. The column headers in the file display as vertical list. The fields display in alphanumeric order. The numeric value in parentheses indicates the position of the field within the file. For example, the control number is the first column in this illustration, while the Application Name is second.
Since the load file is parsed based on the delimiter set, you may need to check delimiters used in the load file if the column headers are not lined up correctly. Determine the delimiters used in the file, and then select them in the Character section of this tab.
- Characters - select the delimiters used by your load file:
- Column delimiter - select the character used to separate columns.
- Quote - select the character used as the text qualifier.
- Newline - select the character used to indicate the end of a line in any extracted text or long text field.
- Multi-value delimiter - select the character used to separate choices within a field.
- Nested value - select the character used to separate the different levels of a multi-choice hierarchy.
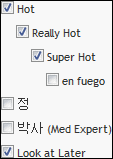
For example, you might import a field with following values: “Hot\Really Hot\Super Hot; Look at Later”. Using a semi-colon (;) as a multi-value delimiter, and a backslash (\) as a nested value delimiter, Relativity displays the choices as illustrated below:
- First line contains column names —select this option if your load file has a header.
- Click the Field Map tab. To automatically map fields, click Auto Map Fields below the lists of fields. The fields from the load file are mapped to any existing fields of the same name in the workspace.

Only fields matched in the center columns are loaded into the workspace. Other fields in the Workspace Fields and Load File Fields lists are ignored. You must always match the identifier field for the load file.
Consider the following when auto-mapping fields:
- Case isn't taken into account for the mapping. For example, a field named "email" in the load file would map to a field named "Email" in the workspace.
- Spacing is taken into account. For example, in a two-word field name, if there is one space between words in the workspace field, and two spaces between words in the load file field, the fields will not be mapped.
- Characters are mapped only to themselves. For example, an underscore is only mapped to another underscore, not to a space.
You can also manually map fields in the load file to existing fields in the workspace.
To manually map fields, highlight a field from the Workspace Fields list and click the right arrow to move the field into the center column. Then, highlight the corresponding field in the Load File Fields list and click the left arrow to move the field into the center column. You can move all fields in a list into a new column by clicking the double arrow buttons. Use the up and down arrow buttons to reorder the fields.Review these additional guidelines when you map fields for a workspace and load file:
- Before importing relational fields, review the Import Behavior option on the New or Edit Field form. You can use this option to determine how blank values are handled in relational fields.
- If you are importing a field that contains more than 200 choices, you will see these choices automatically displayed in a Popup Picker. You will see an error if duplicate choices exist for the field.
Overwrite and Overlay identifiers:
In the Overwrite section, select one of these options to indicate the type of load:
- Append Only - loads only new records.
- Overlay Only - updates existing records only. You must include an Overlay Identifier in an overlay load. This field acts as a link indicating to Relativity where to import the data.
- Append/Overlay - adds new records and overlays data on existing records
If you are performing an overlay or append/overlay, select an Overlay Identifier to specify the field that links your overlay load file to the workspace.
The fields in the drop-down menu are fixed-length fields with a manually-applied SQL index. This is NOT the same as adding the field to the full-text index. Contact your SQL database administrator to apply an index to a field.
Multi-Select Field Overlay Behavior:
The following fields are only available if you select the Append / Overlay or Overlay only Overwrite option:
- Merge Values - merges all values for multi-choice and multi-object fields in the load file with corresponding multi-choice and multi-option fields in the workspace. The fields are merged regardless of the overlay behavior settings in the environment.
- Replace Values - replaces all values for multi-choice and multi-object fields in the load file with corresponding multi-choice and multi-option fields in the workspace. The fields are merged regardless of the overlay behavior settings in the environment.
- Use Field Settings - merges or replaces all values for multi-choice and multi-object fields in the load file with corresponding multi-choice and multi-option fields in the workspace. The fields are merged according to the overlay behavior settings in the environment.
Folder Info:
In the Folder Info section, select Folder Information Column if you want to use a metadata field to build the folder structure for the workspace. In the drop-down box, choose the field that you want Relativity to use for building the folder structure. This field is commonly a source or folder path field. All folders are built under the Import Destination folder.
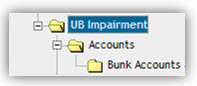
When building the folder structure, Relativity looks for backslashes to indicate a new sub-folder. The following folder structure would result from a field containing field with the value UB Impairment\Accounts\Bunk Accounts:
Before importing, you can use the Preview Choices and Folders option to check the number of choices and folders created by importing the records to the workspace.
The number of folders reported during preview is inaccurate if the folder name contains a backslash. Avoid using backslashes in folder names.
Do not select Folder Information Column if you do not want to build a folder structure based on metadata. When this option is not selected, Relativity loads all documents directly into the folder indicated by the import destination.
Parent Info:
The Parent Info section will display instead of the Folder info section if you are importing an object or objects that are children of other objects such as Search Terms Results. If desired, you can check Parent Information Column and select an object from the drop-down list to determine which parent object you would like to map it to. Alternatively, you can leave this option unchecked if you do not wish to map the object with a parent object.
The Parent Information Column can only be unchecked if Overlay only is selected in the Overwrite section.
Native File Behavior:
In the Native File Behavior section, select Load Native Files if you want to load native files along with database records. (Do not select this option if you do not have any native files to load.)
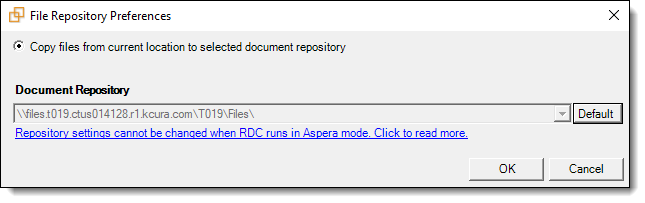
In the Native file paths contained in column drop-down box, select a field from your load file that contains a relative or absolute path to the native files. If the native files reside in a Relativity-accessible location, click Repository, and select one of these options:
- Copy files from current location to selected document repository - select this option to copy files from the location in the selected load file field to the selected document repository.
You can use the Default option to configure an environment level. See the CopyFilesToRepository instance setting.
- Do not copy files to a Relativity document repository - select this option if the native files have already been copied to their final location, which is accessible by Relativity.
Selecting this option causes the transfer mode to display as disabled.
Extracted Text:
In the Extracted Text section, set the following options to control how the Full Text or OCR is loaded into the database. You can import full text or OCR into any long-text field that has been mapped. These options are only available for selection if you've already mapped a long-text field:
- Cell contains file location- select this option if your extracted text is in document-level text files, and your load file contains a path to those text files. You don't need to select this option if a field in your load file contains extracted text.
- Encoding for undetectable files- select an encoding for the text file. Click for additional language options or click for additional information about encoding.
- Western European (Windows)- indicates the Windows standard encoding for English.
- Unicode - utilizes more than 107,000 characters covering 90 scripts.
- Unicode (Big-Endian)- is the same as Unicode, except that the byte order is reversed.
- Unicode (UTF-7)- represents Unicode text using a stream of ASCII characters to guarantee that the high bit will always be zero.
Unicode (UTF-8)- represents all characters in the Unicode character set using 8-bit bytes.
A warning message appears if you are missing information required to run the import. Update the settings for the required options, and click Import File again.
- (Optional) To preview information about the content you are importing to the workspace, select Import, and click one of these options:
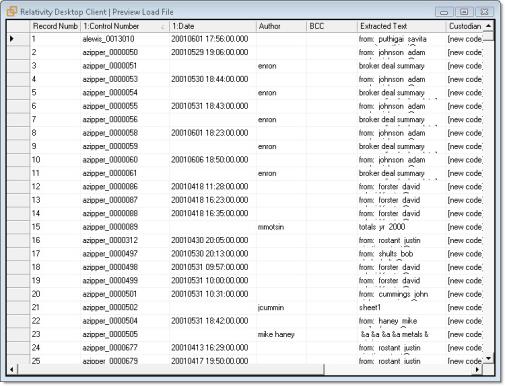
- Preview File - displays the first 1000 documents in the load file. Only mapped fields appear. Make sure that matched fields that appear in the preview are correct.
- Preview Errors - checks all documents for potential loading errors, but displays only the first 1000 errors. If your file does not contain errors, a no errors message appears.
You can use the error report to correct any errors, and then you can re-add the file to the RDC. Relativity only loads valid records. Records with errors are skipped. You can export the records for correction and reload. See Handling errors.
- Preview Choices and Folders - displays the number of choices created in the browser and the number of choices created by importing the records.
- Preview File - displays the first 1000 documents in the load file. Only mapped fields appear. Make sure that matched fields that appear in the preview are correct.
- On the Import menu, click Import File.
If Force folder preview is selected, a confirmation message appears, which contains information about the number of folders that will be created. Click OK to continue with the import.
- Review the progress of the import.
You can view the progress of an import through the RDC. Select the following tabs to display specific information:
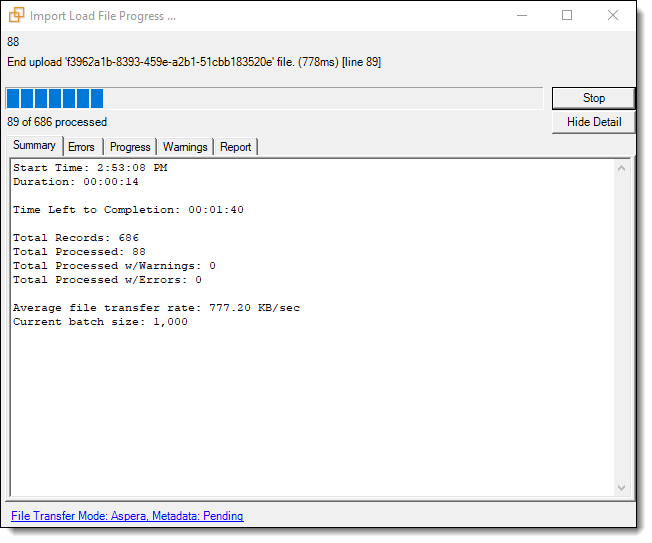
- Summary - displays general information about the number of records, processing warnings, and errors. The following screen shot displays file progress for an import job.
- Errors - lists any errors encountered during the load. The Errors tab displays any errors that occur when you import content with the RDC.
When you run an import job, the RDC only imports records with no errors into the workspace.
- Progress - displays a detailed view of the load progress.
- Warnings - displays information about loading or connection issues.
- Report - includes the following files that you can export:
- Export Error Report - exports a .csv file with a summary of errors.
- Export Error File - exports a .dat file, which is a document-level load file containing only records with errors.
- File Transfer Mode - displays the following information:
- Web mode - this mode uses the web server and it is the standard.
- Direct mode - this mode provides faster performance, but requires a connection to the network hosting the data, as well as specific Windows group permissions.
- Summary - displays general information about the number of records, processing warnings, and errors. The following screen shot displays file progress for an import job.
- (Optional) To save your import settings, point to the File menu, and then click Save Import Settings. Choose a location for the document load file (.kwe). See Saving import settings.
Importing Yes/No fields on documents
To ensure that you get the correct results when importing into Yes/No fields, use these guidelines:
- No values – Import Yes/No fields containing any values except those specified for Yes values.
- Yes values – Import Yes/No fields containing only "Yes", "Y", "True", "T", and any non-zero integer. (For example, if you import an "X", the RDC assigns a value of "No" to the documents.)
- Null values – Leave the Yes/No field empty.
You can change the display values on a Yes/No field, but your modification doesn’t affect how the RDC handles these values during a document import.
Stopping an import or export job
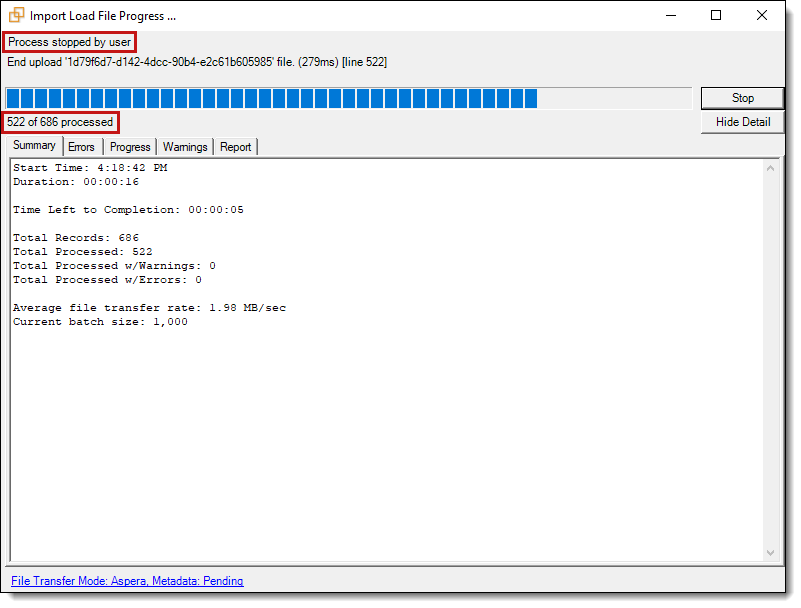
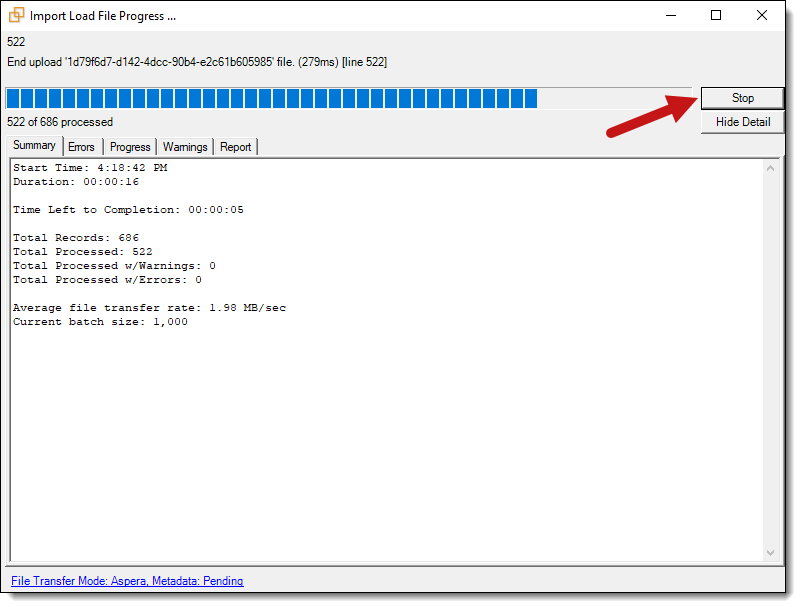
To stop an import or export job in the RDC, click Stop on the import load file progress window.
Once you click Stop, note that the Progress tab displays the following status messages:
- Job has been stopped – X documents have been transferred.
- Finalizing job...
- Job has been finalized.
Between Finalizing job and Job has been finalized, you could see a variety of job-specific messages, such as Native file uploads completed.
When you stop a job, only the files from the last configured batch are imported/exported, and the progress bar is reverted to display this.
For example, when you clicked Stop, the window displayed that 331 out of 371 files had been processed up to that point; however, because you configured the batch size in the config file to be 10MB, only 263 documents were actually processed because the metadata size for 263 docs is 10MB. Accordingly, the progress window then displayed a message of Process stopped by user with a processed count of 263 of 371.