


Feedback
Track document field edits by reviewer
You must have valid Relativity Community credentials in order to download any Community file linked to the documentation site. You'll need to enter those credentials on the Community login screen if you're not already logged in. If you're already logged in to the Community at the time you click a link, the file is automatically downloaded in the bottom left corner of your screen. If you get an error message stating "URL No Longer Exists" after clicking a Community link, it may be due to a single sign-on error related to the SAML Assertion Validator, and you should contact your IT department.
The Track Document Field Edits by Reviewer solution tracks the first or most recent change to a field that you specify and it populates two other fields, Reviewed By (User) and Reviewed On (Date), with information about those changes. An event handler will monitor the tracked fields and update the Reviewed On and Reviewed By fields based on the tracker's settings.
Before you begin
The Track Document Field Edits by Reviewer solution tracks the first or most recent change to a field that you specify and it populates two other fields, Reviewed By (User) and Reviewed On (Date), with information about those changes. The Reviewed By field stores the name of the user who made the change. The Reviewed On field stores the time when the user made the change. This solution can track Single Choice, Multiple Choice, and Yes/No fields. In addition, you can specify whether you want to track only the initial change or all changes to the field.
The following scripts that were previously associated with Track document field edits by Reviewer are no longer compatible:
Populate Reviewed By/Fields for Historical Edits
Track Document Field – Disabled Users
Track Documents Field Edits by Reviewer – Event Handler Maintenance
Components
This solution consists of the following components:
- Relativity application
- Relativity object
- Event handler
- Relativity script that runs at the workspace level
Relativity Server considerations
-
Service Bus or RabbitMQ must be installed and enabled in your Relativity instance to perform historical population.
Considerations
- All dates and times for Reviewed On & Reviewed By fields will now be in UTC due to Relativity software requirements.
- This solution does not support the client domains, multi-tenancy.
- The Reviewed By and Reviewed On fields are not created upon application import. These fields must be created per Field to Monitor.
- You can specify the Field to Monitor setting only once. If you set multiple tracking entries on one Field to Monitor item, Relativity displays an error.
- If a user is deleted, you cannot search for them by using the User field to filter the view, although you can see the user's name in the field at the document level.
- This solution does not track changes made using mass operations or propagation. Neither the event handler nor the Populate Historical Data mass operation take mass edits into account.
- Audit records are created only if the Reviewed By and Reviewed On fields are on the layout.
- If a user is removed from the groups in the workspace, they cannot be selected as a filter option for the Reviewed By field.
- The Populate Historical Data mass operation only populates historical data for users who coded documents and still have access to the workspace.
Deploying and configuring the solution
To deploy this solution, you start by adding it to the Application Library as a Relativity application. How you deploy and configure it depends on whether you are installing the solution for the first time or upgrading an earlier version of the solution. Follow the appropriate set of steps below to install or upgrade the solution in your Relativity instance. Once this is completed, create an agent for the application as described below.
Installing the solution for the first time
To begin using this solution, download and add it to the Application Library as a Relativity application.
To download the application:
-
Log in to the Relativity Community and click on the Relativity Applications folder.
-
Locate the newest Track Document Field Edits by Reviewer .rap file that is compatible with your Relativity version and select it.
The solutions in the Relativity Applications folder are sorted from most recently modified to oldest. As a result, solutions at the top of the page are normally the newest versions of the respective solutions. If you see more than one version of the solution, select the .rap with the higher version number to ensure you're deploying the most up-to-date solution.
-
Click Download.
To add the solution to the Application Library:
- Navigate to the Application Library tab.
- Click Upload Application.
- Click Select File.
- Navigate to and select the application file included in the solution, and then click Open.
- Click Save to upload the file to the Application Library.
To add the solution to a workspace:
- In the Workspaces Installed section, click Select to install the application to one or more workspaces.
- Select the workspaces where you want to install the application, and then click the Move selected left to right icon.
- Click Apply.
The application is installed to the selected workspaces. A list of workspaces where the application has been installed displays in the Workspaces Installed section.
Upgrading the solution
If you are upgrading this application from 5.7 or below to 2021.6.1 or above, ensure that you upgrade the Track Document Field Edits by Reviewer application in each workspace so that the new version of the application works properly.
To upgrade from an earlier version:
- Navigate to the Application Library tab.
- Click the name of the Track Document Field Edits by Reviewer application.
- Click Edit.
- Click Clear to clear the application file for the earlier version of the solution.
- Click Select File, select the Track Document Field Edits by Reviewer file, and then click Open.
- Click Save.
- If you receive a message asking if you want to update workspaces automatically, click Yes.
- Using the Workspaces Installed section of the application page, ensure that the upgrade is applied to every workspace where the application has already been installed.
Creating the Document Field Edits Tracker Historical Processor agent
Before you use this application, you must first create the Document Field Edits Tracker Historical Processor agent.
To create the agent:
- Navigate to the Agents tab.
- Click New Agent.
- Click Select next to Agent Type, choose Document Field Edits Tracker Historical Processor, and click Set.
- Optionally, edit the number of agents in the Number of Agents field, if desired.
- Click Select next to Agent Server, choose the agent server where you want to install the new agent, and click Set.
- Optionally, edit the value of the Run Interval, if desired.
- Leave all other settings at their default values, and then click Save.
Preparing the workspace
After you add the solution to the Application Library, you will need to add your Admin user account to a non-admin group. Once your user account has been added, we recommend that you test to make sure that the changes show up in the Reviewed By/On field, or whichever normal tracking fields you usually use.
Once this testing has been completed, you're ready to install and configure it in a workspace.
To do this:
- Create two new fields to store user and date data for the field you want to track.
- Configure the application to track and store data in the appropriate fields.
- Set permissions for users.
Creating the tracking fields
To create fields to store data about changes to the field that you want to track:
- In the workspace, navigate to the Fields tab.
- Create a new User field named "Reviewed By".
- Name: Reviewed By
- Object type: Document
- Field Type: User
- Create a new Date field named "Reviewed On".
- Name: Reviewed On
- Object type: Document
- Field Type: Date
Configuring the application
Now that you have created fields to store the tracking data, you are ready to configure the application to use those fields and capture the changes that you want to track.
To configure the application:
- In the workspace, navigate to the Document Field Edits Tracker tab.
- Click New Document Field Edits Tracker.
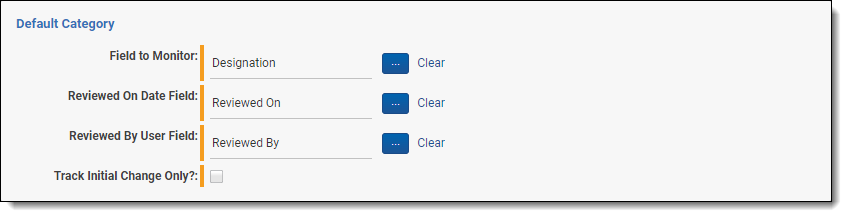
- Enter the following settings:
Field to Monitor—click
 and select the field that you want to track changes to. The field must be a single choice, multiple choice, or Yes/No field. When a user changes the field that you select, the Reviewed By and Reviewed On fields are updated to indicate the name of the user who made the change and when they made the change.
 Specify a Field to Monitor setting only once. If you set multiple tracking entries on one Field to Monitor item, you will receive an error.
- Reviewed On Date Field—click and select the Reviewed On (Date) field that you created to store data about when a user changes the field being tracked.
- Reviewed By User Field—click and select the Reviewed By (User) field that you created to store data about which user changed the field being tracked.
Track Initial Change Only—select this check box to update the Reviewed On and Reviewed By fields only when a user changes the tracked field from "not set" to a specific choice. If set to Yes, the selected Reviewed By User and Reviewed On Date fields will be updated with the first edit that was made on the document in the selected field. If set to No, the selected Reviewed By User and Reviewed On Date fields will be updated with the last edit that was made on the document in the selected field.
- Click Save.
Permissions
The following permissions are needed to use Track Document Field Edits by Reviewer:
| Object Security | Tab Visibility |
Other Settings |
|---|---|---|
|
|
|
Populating Historical Records
The population of historical data can now be done across multiple Document Field Edits Tracker objects and run against a single saved search.
Before completing the following steps, create a saved search that contains only the documents where you wish to track the field edits. Including too many documents in a saved search can cause performance degradation. To learn more about creating saved searches, see Creating or editing a saved search.
To populate history, do the following:
-
Ensure that the Document Field Edits Tracker Historical Processor Agent is enabled.
-
Navigate to the Document Field Edit Trackers tab.
-
Select the Document Field Edit Trackers you wish to run from the list.
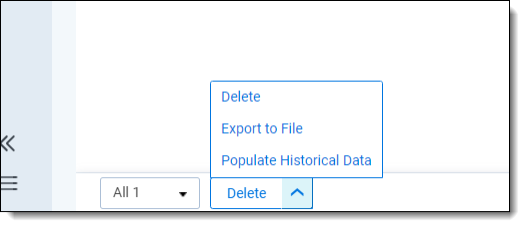
-
Click on the mass operations toolbar and select Populate Historical Data. You must have the Populate Historical Data mass operation permission to view and select this option.
-
Select the Saved search that contains the documents where you wish to track the previously selected Field to Monitor.
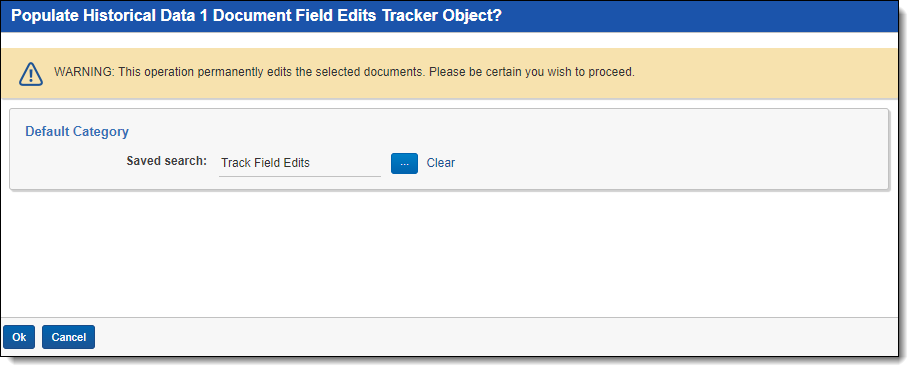
-
Click Ok.
Viewing the results
To view the results of running the solution, navigate to any view, layout, or other area that contains the Reviewed By and Reviewed On fields.