Transcripts tab
You can see a list of transcripts that were previously uploaded on the Transcripts tab. Alternatively, transcripts can also be opened on the Documents tab. On the Transcripts tab, you can mark a transcript as a key document and open it in the Viewer for review. You can also edit the details of a transcript and download reports on selected transcripts from the Transcripts tab.
There are currently two Transcripts tab in Relativity. The tab described near the top of this page is associated with Relativity.Transcripts and the one further below comes with the Transcripts application. The older Transcripts tab is scheduled for deprecation in the future.
Transcripts list
The Transcripts list displays any transcript files that were previously uploaded. To learn more about uploading transcripts, see Uploading transcripts.
You can open an uploaded transcript in the Viewer by clicking the Open in Viewer icon.

Alternatively, you can click on the row of a transcript to open the Transcript Details. To learn more, see Transcripts Details.
You can mark a transcript as key by clicking the star to the left of the name and then filter the list to only show key transcripts. You can also filter the list by clicking Filter and completing any of the following fields:
- Deposition Date—Select a beginning and end date to filter the transcript list to only display files uploaded during that time period.
- Deponent Name—Click on the drop-down menu and select any deponents you'd like to include in the filter results. Only uploaded transcripts with the selected deponents will display in the list when this filter is active.
- Show only key transcripts—Select this option to only display transcript uploads that currently have the star selected.
Transcript Details
The Transcript Details display the summary in a text editor so that you can make any edits you desire. You can also generate a new transcript summary from the Transcript Details. To learn more, see Transcripts Summary. The Summaries, Preview, and Details tab allow you to see more information about the transcript and edit its details, if desired.
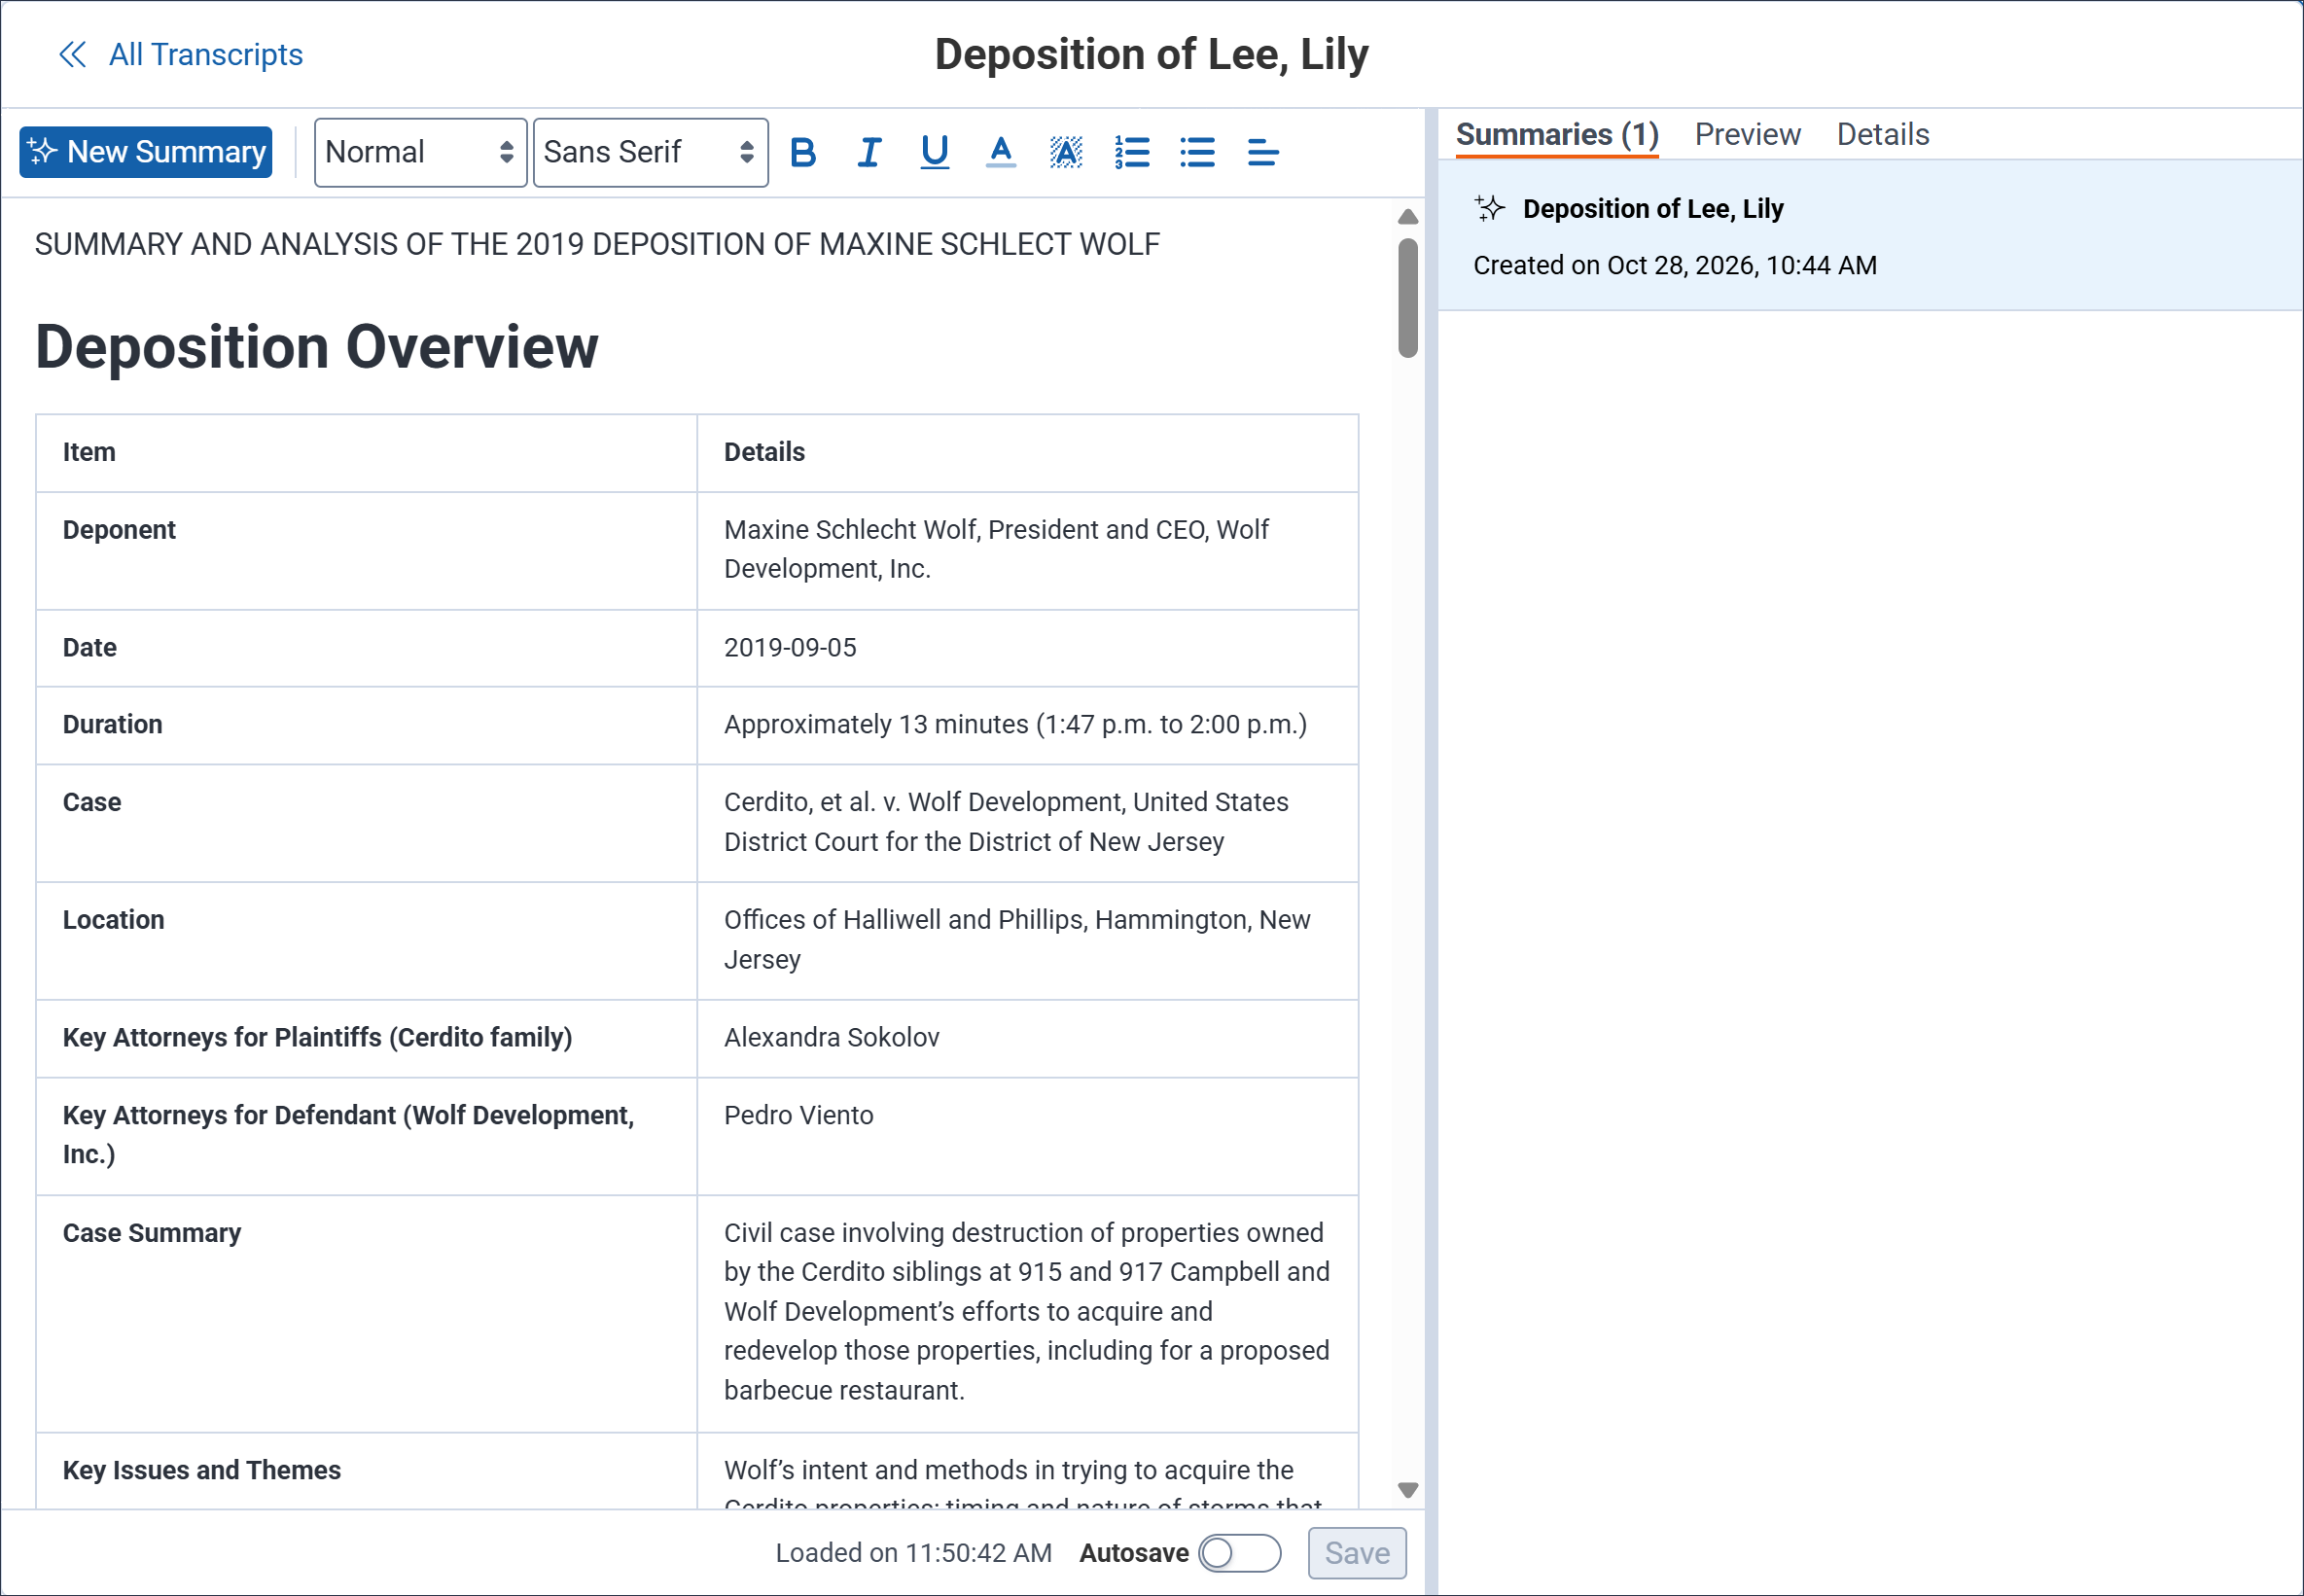
Editing a transcript summary
Using the text editor, you can edit a transcript summary to prepare it for your case.
After making an edit, a message denoting the unsaved changes displays in the editor and the Save button is available. Once you are finished editing, click Save. If you have unsaved changes and try to navigate away from the summary, a pop up displays. Click OK to discard any unsaved edits and navigate away from the current document or click Cancel to stay on the current summary so that you can save your edits.
Alternatively, you can enable autosave to save any edits you make every 15 seconds. After each autosave, the timestamp next to the autosave toggle updates to help you track when the last autosave occurred. With this option enabled, your changes are automatically saved when you navigate away from the current summary.
Transcript Details tabs
The Summaries tab displays each summary for the currently open transcript. You can click on any in the list to open that summary in the text editor.
The Preview tab displays the transcript in the Viewer so you can review it without leaving Transcript Details.
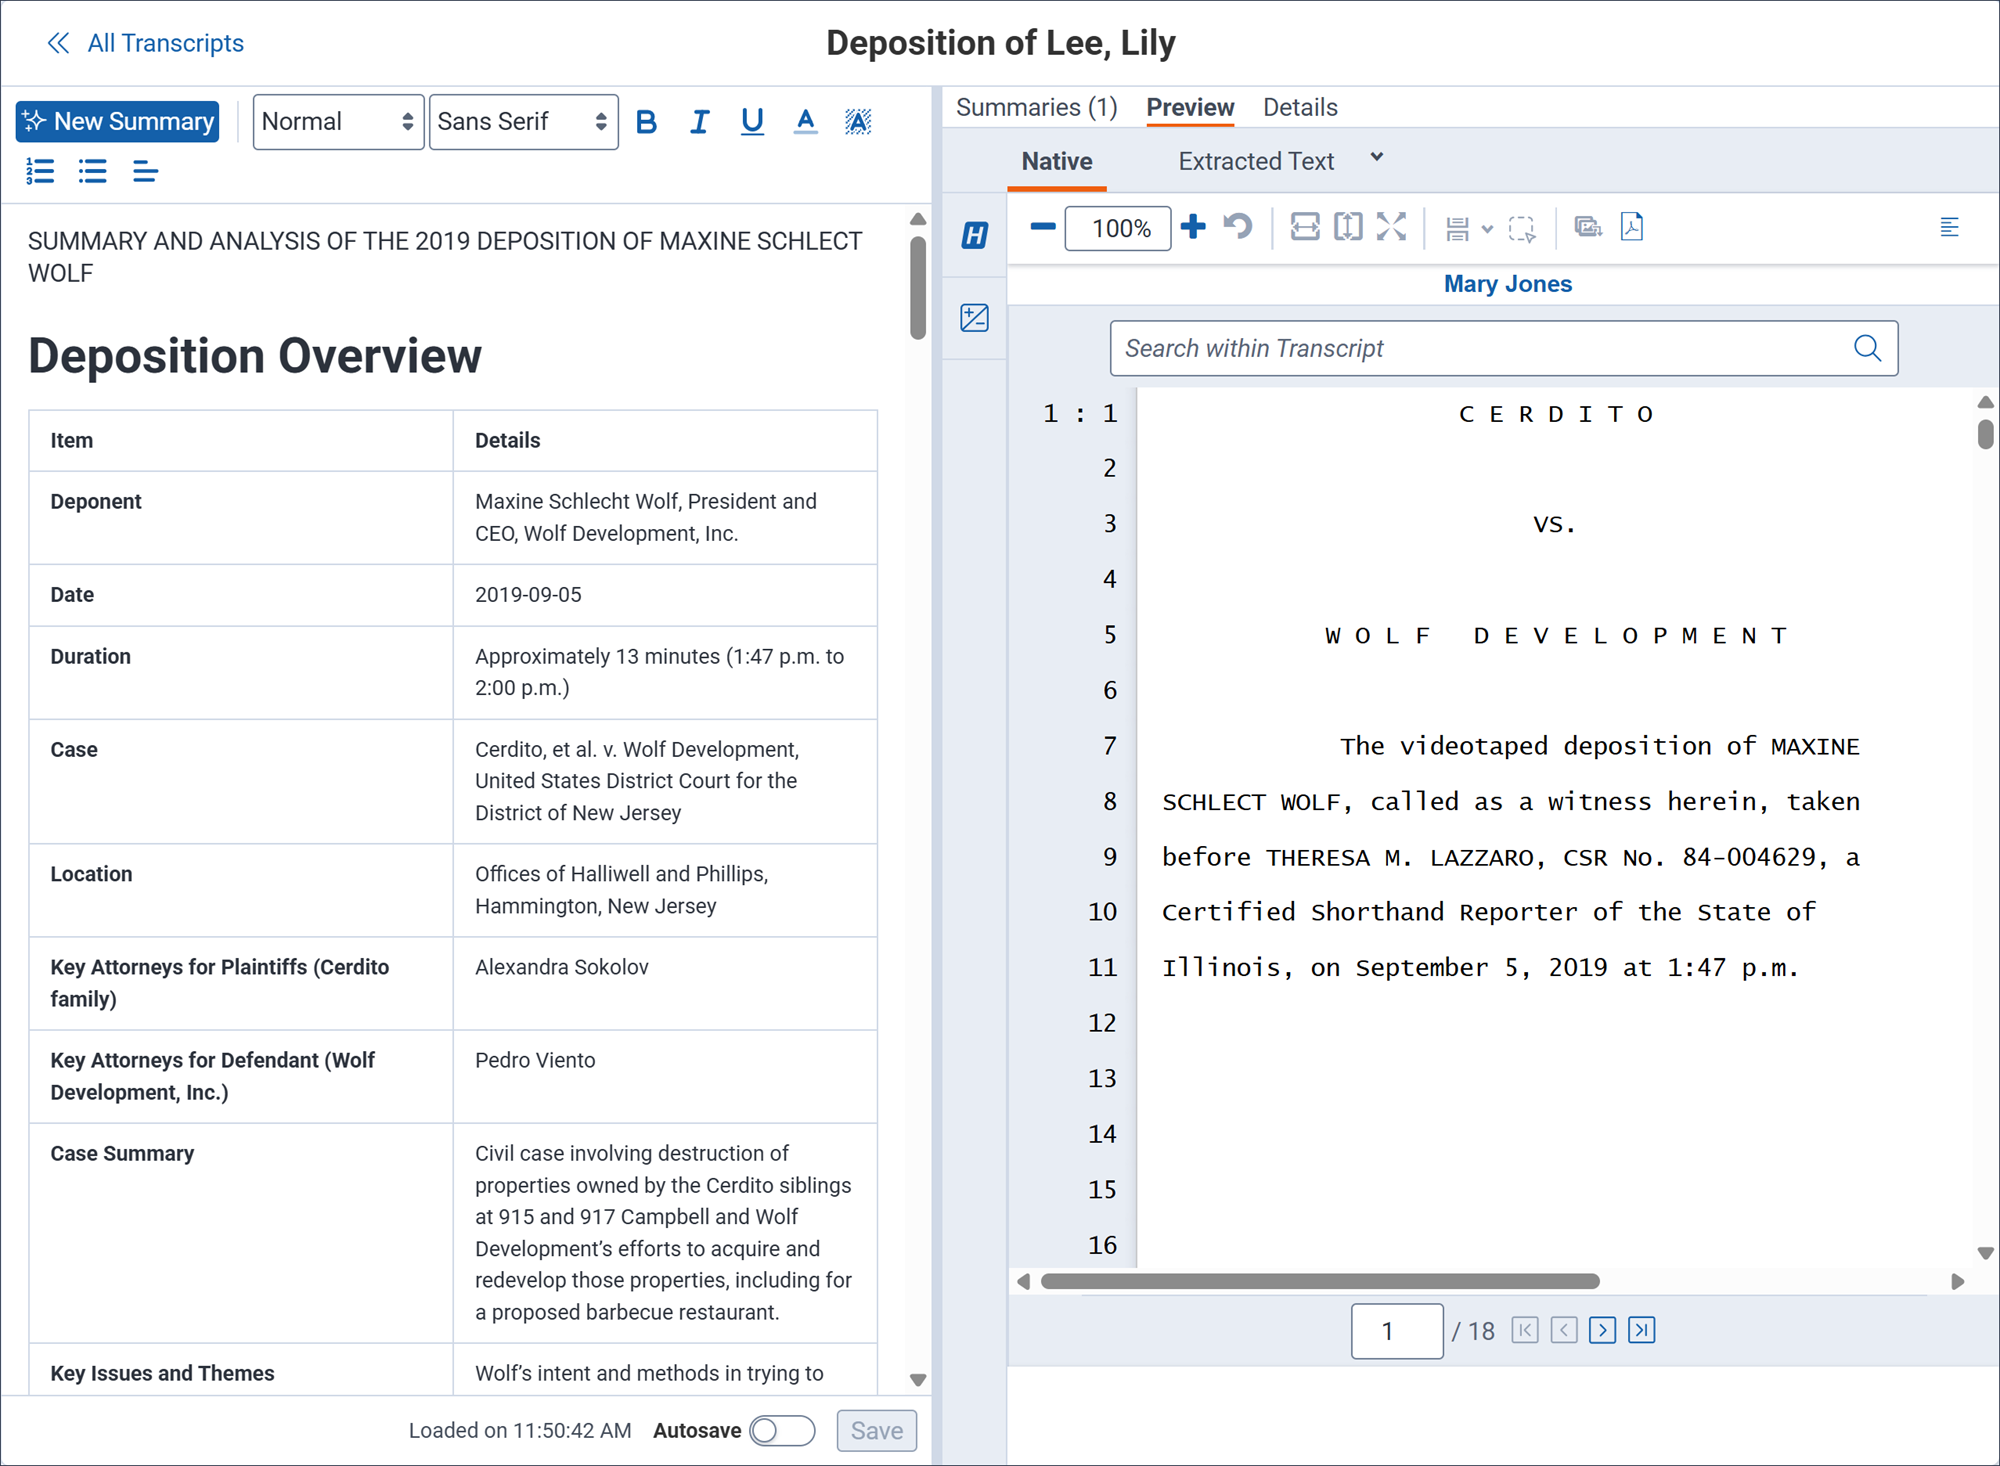
The Details tab lets you edit the transcript's details. To learn more, see Edit a transcripts details.
Edit a transcript's details
You can adjust a transcript's details from Details tab.
To edit a transcript's details:
- Navigate to the Transcripts tab and select the transcript in the list that you wish to edit.
- Click on the Details tab.
- You can edit the following transcript details:
- Date—Click on the textbox and select the desired date in the calendar menu.
- Status—Hover your cursor below Status and select an option to indicate the current status of the transcript.
- Deponent type—Hover your cursor below Deponent type and select an option to indicate what type of deponent is in the transcript.
- Taking attorney—Click on the textbox and enter the taking attorney's name using your keyboard. When finished, click outside of the field to save their name.
- Comment—Click on the textbox and enter an optional note about the transcript using your keyboard. When finished, click outside of the textbox to save the note.
- Proceeding type—Hover your cursor below Proceeding type and select an option to indicate the type of legal proceeding that is related to the transcript.
- Deponent name—Click on the textbox and enter the deponent's name using your keyboard. When finished, click outside of the textbox to save their name.
- Party—Hover your cursor under Party and select an option to indicate which party is related to the transcript.
- Defending attorney—Click on the textbox and enter the defending attorney's name using your keyboard. When finished, click outside of the textbox to save their name.
Create and export a transcript report
You can create one or more reports on the selected transcripts from the Transcripts tab and export them to your workstation. To learn more, see Transcript reports and printing transcripts.
Transcripts application
If you have installed the Transcripts application, you can access the Transcripts tab which contains individual tabs with views for Notes, Exhibits, URLs, Comments, Designations, and Designation types.
While everything described below is still accessible in Relativity, it is scheduled to be deprecated in the future. We recommend starting to use the new upload transcripts feature now so that you can prepare for the deprecation.
Notes tab
The Notes tab contains the following fields:
- Document - contains the name of the transcript file. It appears as a hyperlink that opens the file directly in the Viewer.
- Location - contains the page and line range in the transcript where the note is found. It appears as a hyperlink that opens the file in the Viewer and takes you directly to the location of the note.
- Note - contains the full text of the note. It appears as a hyperlink that takes you to the Notes Layout with full note details.
Exhibits tab
The Exhibits tab contains the following fields:
- Document - contains the name of the transcript file. It appears as a hyperlink that opens the file directly in the Viewer.
- Location - contains the page and line range in the transcript where the exhibit is linked. It appears as a hyperlink that opens the file in the Viewer and takes you directly to the place where the exhibit is linked. If the exhibit is not directly linked to a location in the transcript, this field will be empty.
- Document ref - contains the name of the linked exhibit. It appears as a hyperlink that opens the file directly in the Viewer.
URLs tab
The URLs tab contains the following fields:
The Comments tab contains the following fields:
- TranscriptsNote::Note - contains the full text of the note left on the transcript that a user commented on.
- System Created By - contains the name of the user who left the comment.
- System Created On - contains the date and time the user left the comment.
- Comment - contains the full text of the comment.
Designations tab
The Designations tab contains the following fields:
- Document - contains the name of the transcript file.
- Location - contains the page and line range in the transcript where the designation type is found. It appears as a hyperlink that opens the file in the Viewer and takes you directly to the designation type location.
- Designation Type - contains the type of designation assigned.
Designation Types tab
The Designation Types tab contains the designation types users have created. You can edit or delete designation types in this tab.


