


Feedback

Last date modified: 2026-Nov-16
This page summarizes the steps you must complete before you use Relativity FOIA. Most of the steps are detailed in the FOIA Admin topic, but this overview shows you the tasks ahead. Complete the steps in the order shown, because some depend on others.
Relativity FOIA is the agency-only environment for managing the Freedom of Information Act (FOIA) process from intake through reporting. Requesters interact with your agency through the Public Portal, where they browse released documents, submit requests, and track request status. They sign in to the portal through Login.gov.
Requests move through four workflow steps:
As an administrator, you complete the tasks on this page to configure how requests enter Relativity FOIA, how Relativity numbers and assigns them, how it calculates due dates, and how your agency communicates with requesters.
Relativity feature permissions are assigned through groups, which are then applied to workspaces, object types, tabs, and individual items. Administrators have precise control over feature actions accessible at multiple levels. To complete the getting started tasks, assign at least one group the Administer FOIA permission. This instance-level permission provides access to the FOIA Admin tab in the FOIA application.
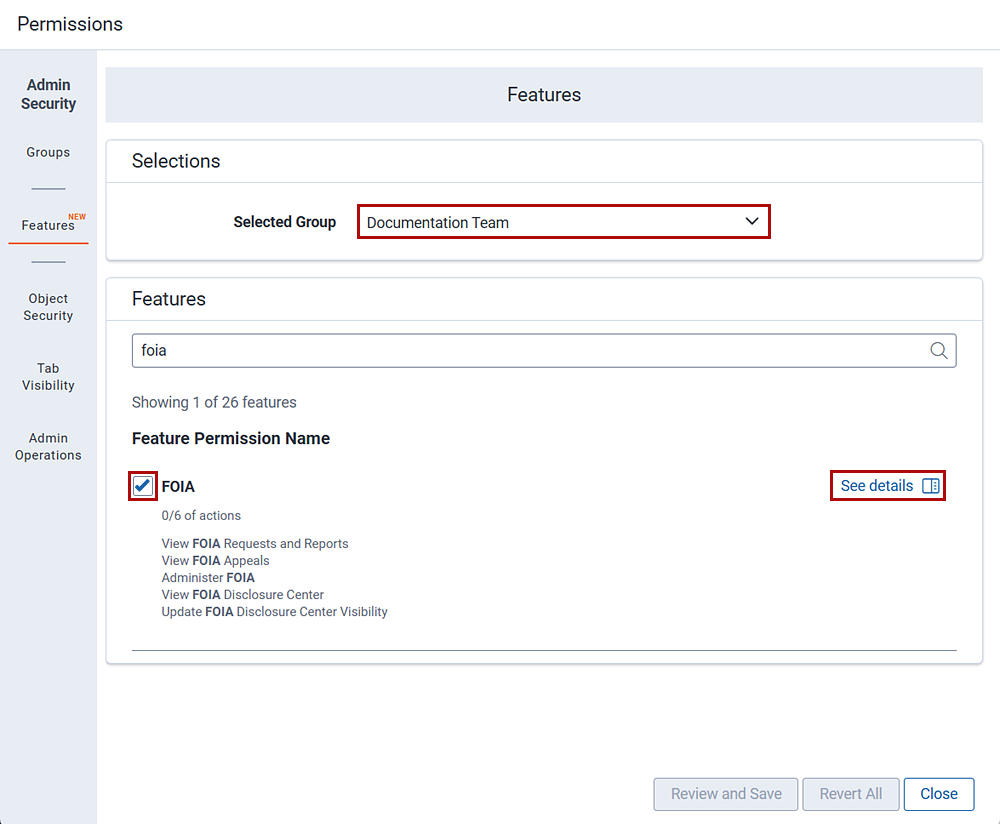
Steps:
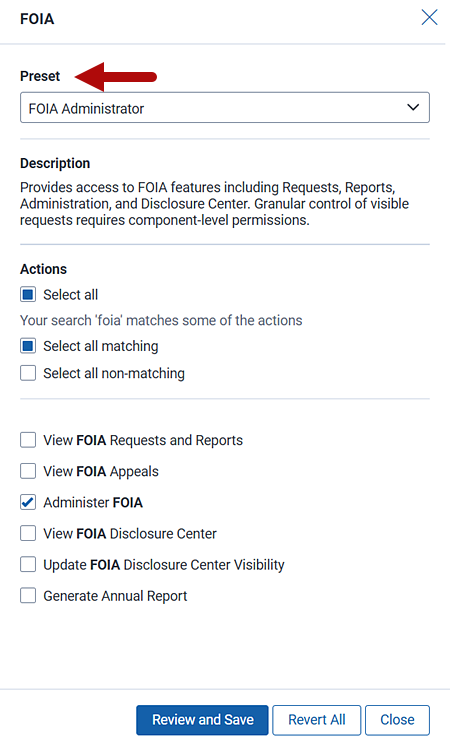
Navigate to the FOIA Admin tab, then click Agency & Component. Here, you will define your agency's FOIA program structure and set permissions for the groups within each component. Relativity FOIA uses the components you create here to assign requests and tasks during intake and processing. See Agency & Component in the FOIA Admin topic for step-by-step instructions.
Navigate to the FOIA Admin tab, then click Public Portal. You will set up your agency profile and configure the intake form that requesters use on the public portal. You can also control whether your agency is visible on the portal by setting the Portal Status. See Public Portal settings in the FOIA Admin topic for step-by-step instructions.
Navigate to the FOIA Admin tab, then click Tracking Number. You will configure the format of request, consultation, and appeal numbers. See Tracking Number in the FOIA Admin topic for step-by-step instructions.
Navigate to the FOIA Admin tab, then click Working Days. You will set the statutory clock. FOIA due-date calculations run against the business hours, time zone, and holiday calendar you define here. See Working Days in the FOIA Admin topic for step-by-step instructions.
Navigate to the FOIA Admin tab, then click Email. You will specify the From and Reply-To addresses for communications sent from the FOIA application by connecting RelativityOne to Microsoft Graph. See Email (Microsoft Graph) in the FOIA Admin topic for step-by-step instructions.
Navigate to the FOIA Admin tab, then click Email Templates. You can review a list of pre-populated templates modeled after DOJ best practices. You can also customize the templates to meet your agency's requirements or add new templates. Agencies select from this list when sending communications from within the FOIA application. See Email Templates in the FOIA Admin topic for step-by-step
Navigate to the FOIA Admin tab, then click Document Release. You will set the retention period for documents released to a single requester through a private reading room. After the retention period ends, the URL provided to the requester expires and the requester can no longer access the documents. See Document Release in the FOIA Admin topic for step-by-step instructions.
