


Feedback
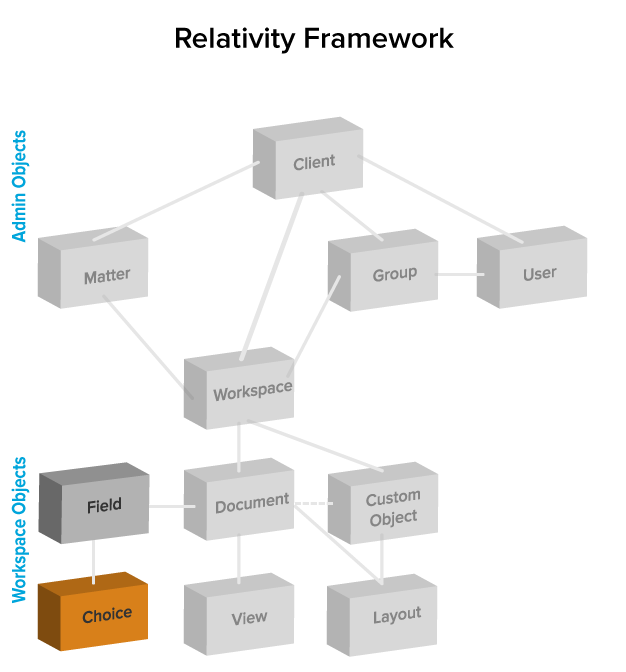
Choices
Choices are the predetermined values that you apply to single and multiple choice list fields. With the necessary permissions, you can create choices for workspace fields and admin fields.
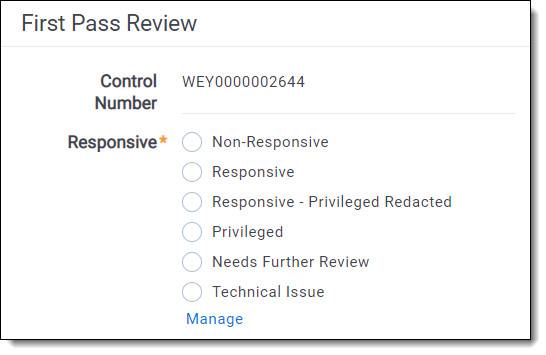
In a workspace, you use choices in coding fields to allow users to record decisions on a document. For example, a Responsiveness field might have choices like Responsive, Not Responsive, and Not Sure. You can add and edit workspace choices directly within Field forms and the Choices tab. Within the Field forms, any saved single or multiple choice field contains the choice editor, so you can create and manage choices directly within the field. Within, the Choices tab you may also add single or multiple choices, reorder choices, and create parent and child choices.
From Home, choices are predetermined values applied to pre-workspace objects, such as workspaces, clients, and matters. These choices function the same as choices within a workspace.
Accessing the Choice editor
With the Choice Editor, you can add and edit choices from the Fields tab, the Choices tab, and layouts.
To access the Choice editor from the Fields tab:
- Navigate to the Fields tab.
- Click on the Name of an existing single or multiple choice field or create and save a new single or multiple choice field.
-
Locate the Choice editor in the Choices section on the Fields form.
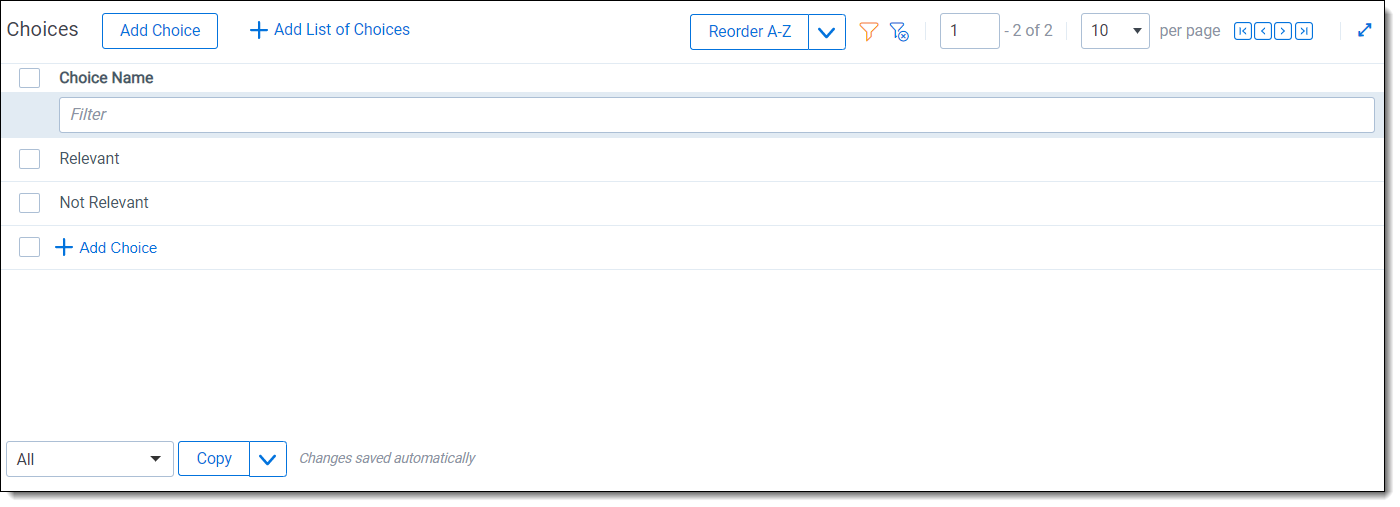
To access the Choice editor from the Choices tab:
- Navigate to the Choices tab.
- Click Edit next to a choice.
-
The Choice editor opens.

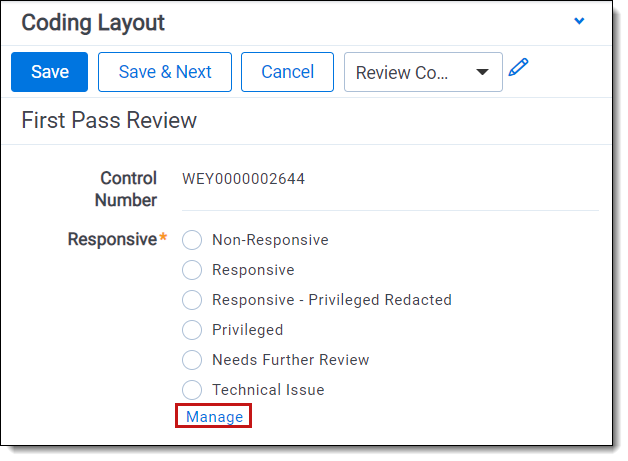
To access the Choice editor from layouts:
- Open a document in the Core review interface.
- Click Edit on the layout.
-
Click Manage for the field that you want to add another choice.
-
The Choice editor opens.
Permission considerations for the Choice editor
In order for a group to be able to edit and add choices, you must grant them Edit and Add permissions on the Choice object.
If the Add Field Choice By Link box is checked, users can view the Choice editor through the Manage link on the layout, but they still cannot edit and add choices without those permissions.

Adding choices
Using the Choice editor, you can add a single or multiple choices to a field.
To add a choice from the Fields tab:
- Navigate to the Fields tab.
- Click on the Name of an existing field or create and save a new single or multiple choice field.
- Locate the Choice editor in the Choices section on the Fields form.
-
Click Add Choice at the top or bottom of the Choice editor.
- Enter the name of the choice you want to add. The new choice is automatically saved.
- (Optional) Click Details to customize the choice, and then click Save. See Choice detail fields.
To add a single choice from the Choices tab:
- Navigate to the Choices tab.
- Click New Choice.
- In the Field section, select an Object.
- In the Field section, select a Field that you want to associate the new choice with. The Choices section appears.
- In the Choices section, click Add Choice.
- Enter the name of the choice you want to add. The new choice is automatically saved.
- (Optional) Click Details to customize the choice, and then click Save. See Choice detail fields.
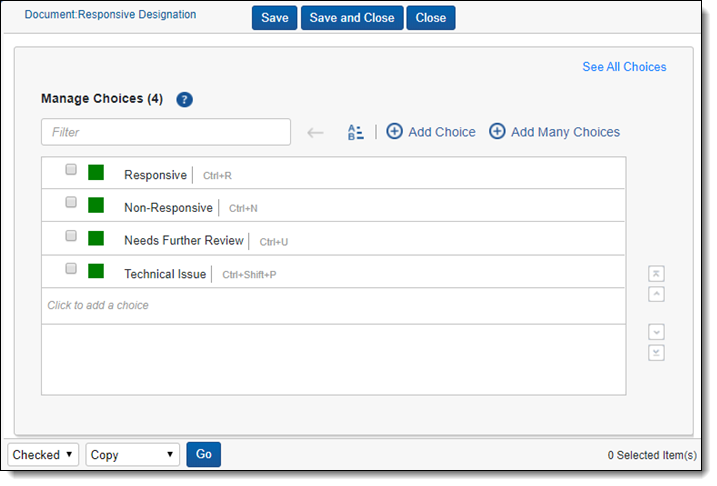
To add a choice from a layout:
- Under the field that you want to add a new choice, click Manage. The Manage Choices window opens.
- Click Add Choice or Click to add a choice.
- (Optional) Click Options to customize the choice, and then click Apply.
- Click Apply.
To add many choices:
You can't create more than 300 choices at one time. If you attempt to create more than 300 choices at one time, then only the first 300 choices get created.
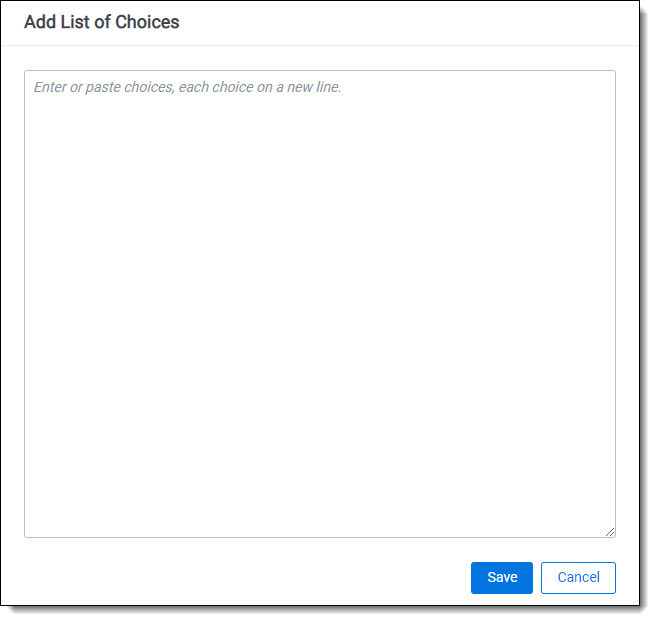
- From the Choice editor, click Add List of Choices. The Add List of Choices textbox appears.
-
Enter each choice on a separate line. You can also copy and paste a large list of choices, but ensure each choice is entered on a separate line.
-
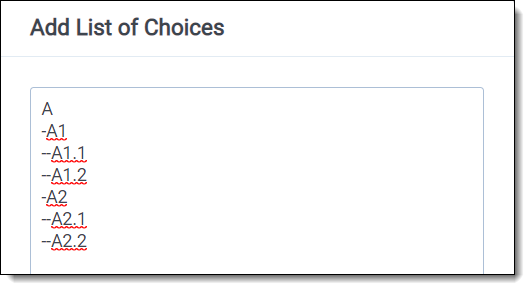
(Optional) To create families of choices, use hyphens at the beginning of each separate line. Each hyphen represents a level between parent and child choices. If a choice contains a hyphen, but there is no parent relation, a warning will display.
- Click Save.
Editing choices
After you create a choice, you can edit the name and the details of the choice using the Choice editor.
To edit the name of a choice:
- Navigate to the Choice editor. See Accessing the Choice editor.
- Click on the name of the choice that you want to rename.
- Enter the new name of the choice. The new name is automatically saved.
To edit the details of a choice:
- Navigate to the Choice editor. See Accessing the Choice editor.
- Hover over the name of the choice that you want to edit.
- Click Details.
- Modify the details of the choice. See Choice detail fields.
- Click Save.
Choice detail fields
The Choice Details editor has two tabs: Choice Settings and Advanced Settings.
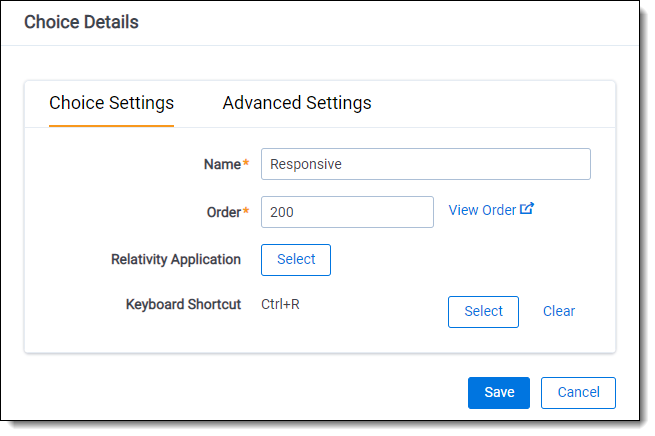
- Order - a number that represents the position of the choice in relation to the field's other choices. The lower the number, the higher the position on the list. Pane order can be any positive or negative integer, but you can't use decimals.
- Parent choice - sets the parent choice.
- Relativity Applications - associates an existing application in your workspace to the new choice, in order to link to Relativity Dynamic Objects.
- Keyboard Shortcut - designates a keyboard shortcut for the document choice you're editing or creating. You can use the shortcut to code and edit documents in the core reviewer interface. You need to be in edit mode before you can use keyboard shortcuts for choices. This setting is only available for document fields and consists of the following checkboxes. You have to use Ctrl and/or Alt or you get an <Invalid Keyboard Shortcut> warning next to the Key drop-down field:
- Ctrl - sets the Control key as part of the combination used to trigger the keyboard shortcut.
- Alt - sets the Alt key as part of the combination used to trigger the keyboard shortcut.
- Shift - sets the shift key as part of the combination used to trigger the keyboard shortcut.
- Key - sets the key you want to use in combination with the key specified in one or more of the checkboxes (Ctrl, Alt, and Shift).
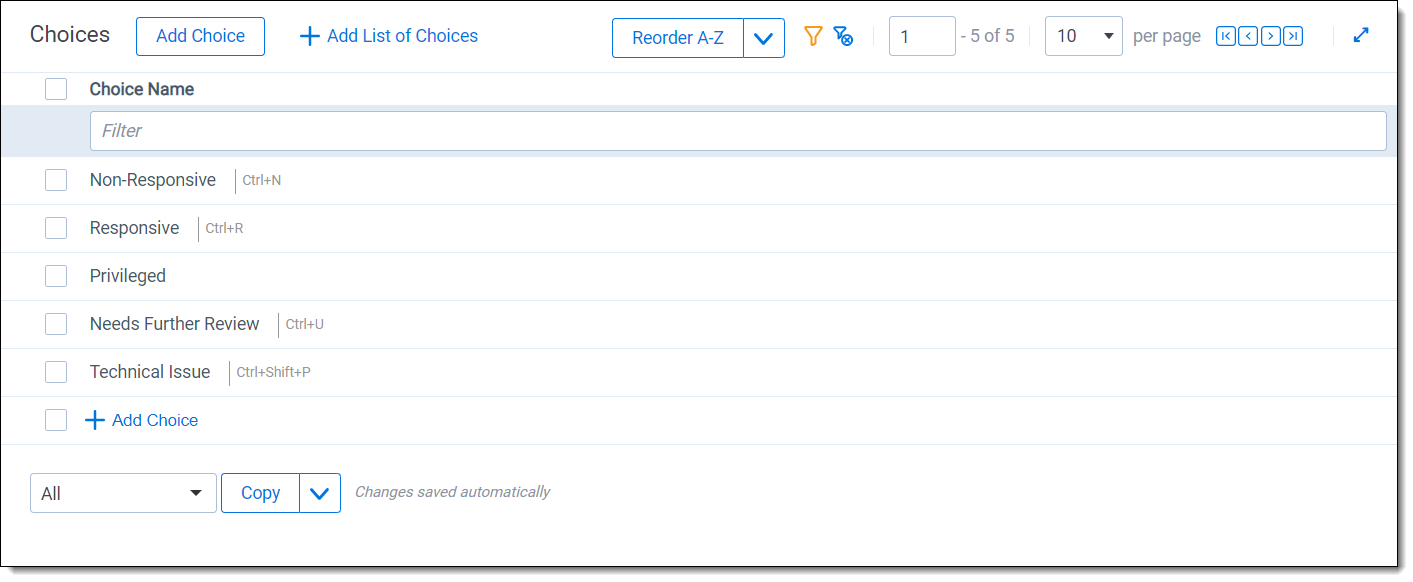
A pipe character and the keyboard shortcut appear next to the name of the choice when you create a keyboard shortcut.
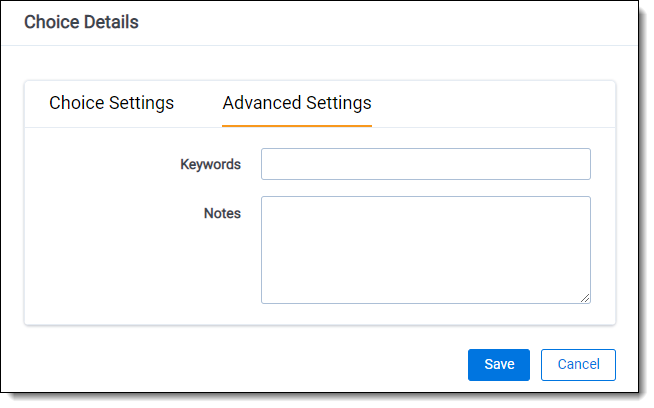
- Keywords - keywords associated with the choice.
- Notes - any notes, such as a description, that you want associated with the choice.
Deleting choices
To delete a choice:
- Navigate to the Choice editor. See Accessing the Choice editor.
- Hover over the name of the choice that you want to delete.
- Click Delete.
You can also delete multiple choices using the Delete mass operation from the Choices tab.
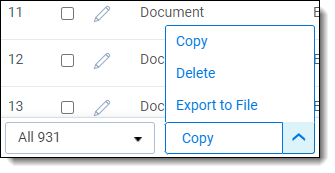
Performing mass operations on choices
You can perform mass Copy, Delete, and Export to File on choices from the Choices tab.
- If you apply a mass operation on a parent choice, the mass operation is not automatically applied to the child choice.
- When deleting a parent choice in the Choice editor, Relativity also deletes the children.
- When using mass delete from a list page, you must delete all the children choices of a parent choice first before you can delete the parent choice.
See Mass copy, Mass delete, and Mass export to file.
Organizing choices
Using the Choice editor, you can reorder choices and create families of choices.
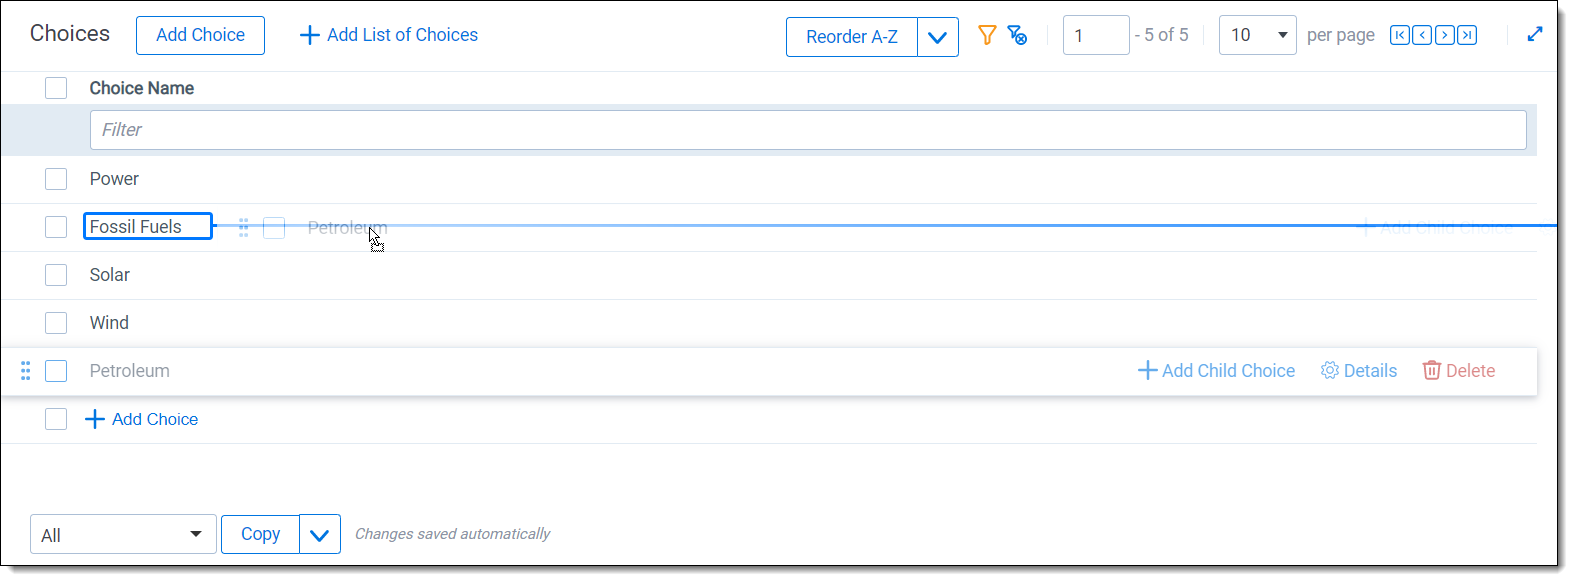
To reorder choices, click the choice row you want to move and drag and drop the choice to the desired position. A blue bar appears in the position where the choice is moved to.
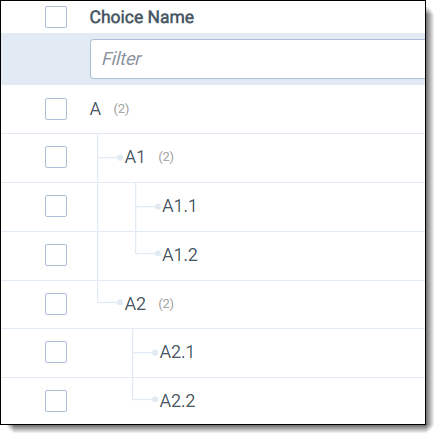
Creating choice families
Using the Choice editor, you can create choice families by nesting choices to create a parent choice. When a child choice is selected in a layout, the parent choice is automatically selected as well. A dotted gray line connects the parent choice to its children. In the screenshot below, Fossil Fuels is the parent choice of child choices, Petroleum and Natural Gas.
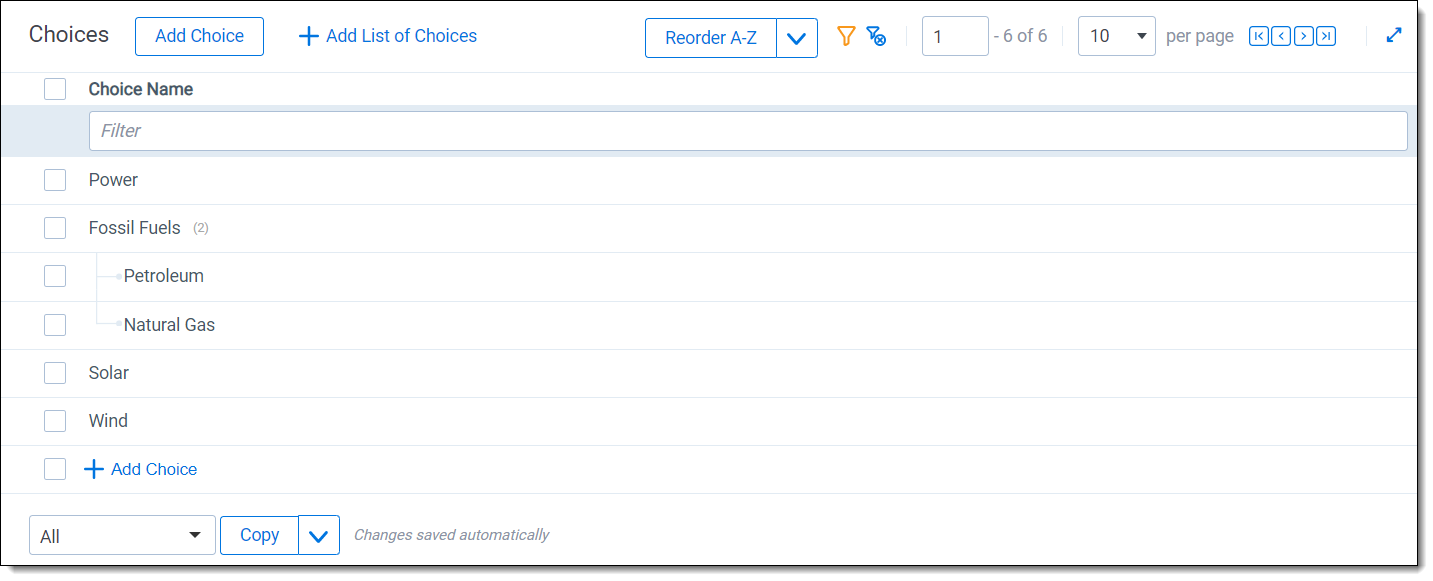
You can only nest multiple choice field types.
To create a child choice, click the choice row and drag the choice into a preexisting choice. The preexisting choice becomes the parent choice. A double blue bar appears under the new parent tab where the child tab is moved to.
You can also alphabetize choices, parent choices, and child choices. To reorder choices in ascending alphabetical order, starting with A, click the Reorder drop-down menu and select Reorder A-Z. To reorder choices in descending order, starting with Z, click the drop-down on the reorder button and click Reorder Z-A.
- You must have edit permissions for the field to reorder choices. If you don't have edit permissions for the field, the Reorder A-Z button will not appear in the Choice editor.
- Once you alphabetize the choices you can also rearrange choices within the sort. The alphabetize button will not automatically re-alphabetize the choices if you move choices individually.
You can reorder top level choices in the Choices List using the Sort top level choices feature. You can use this method to edit the sort order of choices according to your preferences without manually editing each choice directly. This only reorders top level choices, not nested choices.
Follow these steps to Sort top level choices:
- Click Select All Choices. The Choices List opens.
- Click the Sort Top Level Choices link in the Sort Top Level Choices column for the field whose choices you want to reorder.
- Select a choice in the Order for codes of type window.
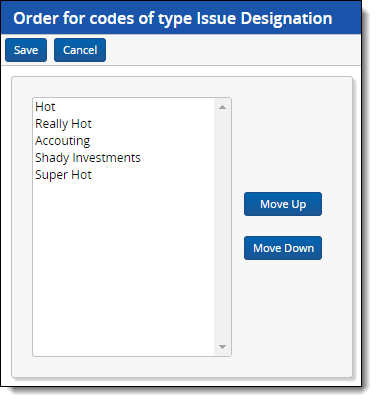
- Use the Move Up or Move Down buttons to order your choices.
- Click Save.
It is a suggested practice to order your choices in multiples of 10 so that it is easier to insert more choices in your intended order in the future. If you enter choices with orders that are not in multiples of 10 and use the Sort top level choices feature to reorder your choices, then Relativity automatically reorders all previously entered order numbers in multiples of 10.
Fields in workspaces
- Field - the single choice or multiple choice list field in which you want the choice to appear.
- Name - the choice value that appears to users. For example, if you want the choice to read "Responsive," name it "Responsive." Choice names can be up to 200 characters.
- Order - a number that represents the position of the choice in relation to the field's other choices. The lower the number, the higher the position on the list. Items that share the same value appear in alphanumeric order. Pane order can be any positive or negative integer, but you can't use decimals.
We recommend setting the tab order by 10's, starting with 10, then 20, 30, etc. Numbering in groups of 10 lets you later insert an item into any position without reordering all items (e.g., 10, 20, 25, 30, 40).
- Parent choice - when you create a sub-choice, you can select a parent choice under which the current choice appears. Be aware that once you set your family of choices and tagged values, editing a parent choice causes inconsistencies.
If you need to change a parent choice, create a new choice family, mass edit the applicable documents, and then remove the old choice.
- Relativity Applications - associate an existing application in your workspace to the new choice, in order to link to Relativity Dynamic Objects.
- Keyboard Shortcut - designates a keyboard shortcut for the document choice you're editing or creating. You can use the shortcut to code and edit documents in the Review Interface. You need to be in edit mode before you can use keyboard shortcuts for choices. This setting is only available for document fields and consists of the following checkboxes. You have to use Ctrl and/or Alt or you get an <Invalid Keyboard Shortcut> warning next to the Key drop-down field:
- Ctrl - sets the Control key as part of the combination used to trigger the keyboard shortcut.
- Alt - sets the Alt key as part of the combination used to trigger the keyboard shortcut.
- Shift - sets the shift key as part of the combination used to trigger the keyboard shortcut.
- Key - sets the key you want to use in combination with the key specified in one or more of the checkboxes (Ctrl, Alt, and Shift).
Admin choices
From Home, choices are predetermined values applied to pre-workspace objects, such as workspaces, clients, and matters. These choices function the same as choices within a workspace.
To create or edit an admin choice:
- Click your name in the upper right corner of Relativity and click Home.
- Click the Choices tab.
- Click New Choice. If you want to edit an existing choice, click the Edit link next to the Choice name.
- Complete the fields on the form. See Admin fields.
- Click Save.
Admin fields
- Field - sets the type of admin choice. You can select one of the following options:
- Case status - choices available in the Status field on workspace objects.
- Client status - choices available in the Status field on client objects.
- dtSearch Index Share Location - choices available in the Index share field on dtSearch index objects.
- File location - choices available in the Default file repository field on workspace objects.
- Matter status - choices available in the Status field on matter objects.
- Processing Source Location - choices available in the Select source for files to process field in processing set objects.
- User type - choices available in the Type field under user information for user objects.
- Name - the choice value that appears to administrators. For example, if you want the choice to read "Internal," name it "Internal." Choice names can be up to 200 characters.
- Order - a number that represents the position of the choice in relation to the field's other choices. The lower the number, the higher the position on the list. Items that share the same value appear in alphanumeric order. Pane order can be any positive or negative integer, but you can't use decimals. You can click the View Order button to access the order of other choices.
We recommend setting the tab order by 10's, starting with 10, then 20, 30, etc. Numbering in groups of 10 lets you later insert an item into any position without reordering all items (e.g., 10, 20, 25, 30, 40).
You can also add or edit an admin choice on the Choices tab. See Adding choices .