


Tabs
You can also apply any workspace template with a tabs arrangement that best serves your review needs. Some workspace templates also include custom tabs for specialized functionality.
You can add custom tabs in workspaces or at Home. Users with admin rights also have access to a Tabs tab from Home. The functionality of this Tabs tab is the same as the Tabs tab in a workspace.
In addition, Relativity automatically creates a tab when you add a new object type.
This page contains the following sections:
You're a system admin facilitating a document review project involving thousands of patients whose private personal health information was stolen during a security breach.
You're in the process of creating an application for tracking the many attorneys associated with this litigation. You want to add to this application a list of all the law firms where these attorneys work to go along with the master list of attorney names you've already created.
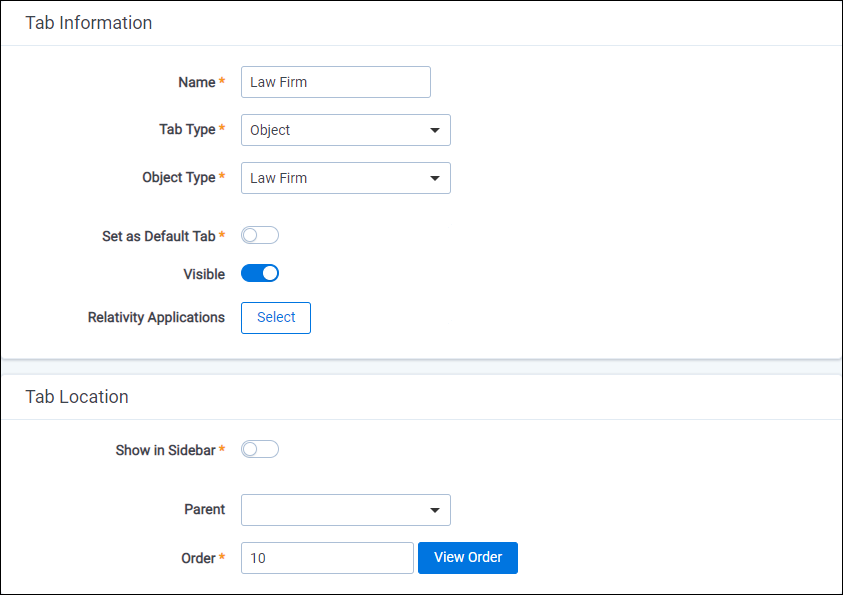
To do this, you want to create a new tab to hold the names of these law firms. You go to the Tabs tab and create a new tab with a name of Law Firms and an order of 10. You keep the Link Type field at its default value of Object. For the Object Type field, you select the Law Firm, which you just created as one of the several objects that will make up the application you're creating.
Once you save the Law Firms tab, you can now populate it with the names of firms that employ the many attorneys involved in your case.
Creating and editing tabs
To create or edit a tab, follow these steps:
- Click the Tabs tab.
- Click New Tab. If you're editing an existing tab, click the
 icon in the row of the tab you would like to edit.
 - Complete the fields on the form. See Fields.
- Click Save.
Fields
Information on the fields in the Tab Information and Tab location are described below.
Tab Information
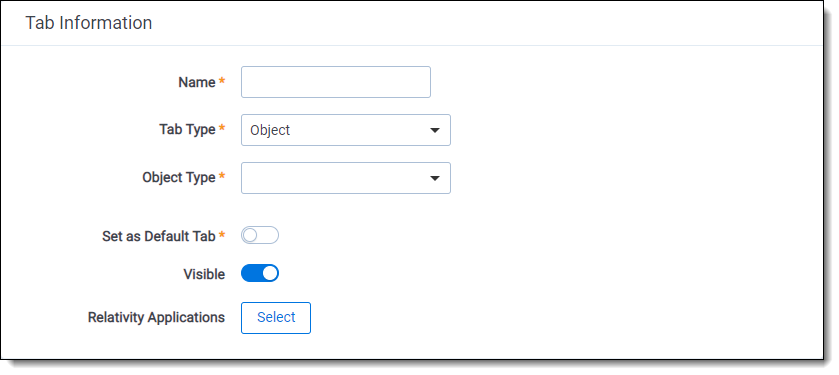
- Name - the tab’s name. This field must be between 1 and 50 characters. Be as concise as possible when naming tabs.
- Tab Type - determines the type of tab you want to create:
- Object - creates a tab for a non-document object in your workspace.
- Parent - establishes the tab as a parent tab. Existing tabs can then be set as children of the parent tab, which causes them to display in the Sidebar's fly-out menu or in the Tab strip when the parent tab is currently selected.
- External - link to any URL or object type in Relativity.
Note: Selecting External from the Link Type menu causes the Link field to appear below the Parent field. In the Link field, you can enter a web address to link to a URL.
Allowed external domains can be whitelisted via the DomainNameWhiteListUrls instance setting.You can create a link from a tab to an Relativity Dynamic Object (RDO) or a script, using either an Artifact ID or GUID. To create links to other objects, you must use their GUIDs. For information about working with objects that don't have GUIDs, see Assigning a GUID to an object.
Use the following token to link to an object: ObjectArtifactIdentifier=[identifier], where [identifier] is the GUID of the object, or in the case of RDOs and scripts, the GUID or Artifact ID. For example, you would use the format ObjectArtifactIdentifier=736b1c1f-d22f-43cf-9094-cc8acf94c60 to create a link from a tab to the object with this GUID.
- Object Type - determines which object’s information is displayed in the tab for those specified as Link Type = Object.
- Set as Default Tab - toggle on to make this tab serve as the workspace’s default tab. Reviewers logging in to the workspace are taken to the default tab. If a reviewer does not have access to the default tab, he or she is directed to the Documents tab instead.
- Visible - toggle on to display this tab from the Sidebar, Tab strip, and/or Quick nav.
- Relativity Applications - add this tab to a Relativity application. Clicking
 brings up a list of available applications.
Tab Location
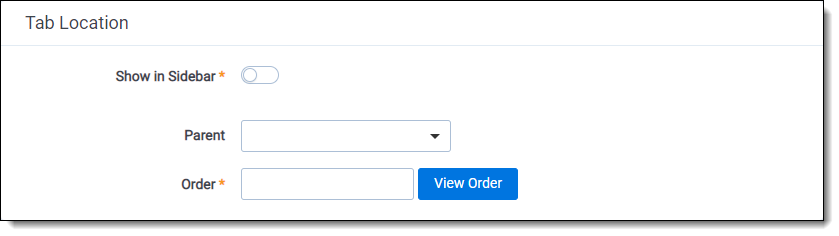
- Show in Sidebar - toggle on to add this tab to the Sidebar. Depending on the number of tabs that have already been added to the Sidebar, the Order value assigned to this tab, and your browser's resolution, the tab may be displayed in the More menu if it does not fit into the current Sidebar.
- Parent - select a parent tab to assign the current tab as a child tab. The current tab will display in the fly-out menu for the parent tab.
- Order - represents the position of the tab by a numerical value. It can be any positive or negative integer. You cannot use decimals in this field. The lowest-numbered tab displays at the top of the Sidebar. The highest-numbered tab displays at the bottom of the Sidebar or in the More menu. Items that share the same value are sorted in alphanumeric order.
- View Order - displays a list of active tabs and their current order when you click the View Order button.
Note: It’s always a good idea to set tab order by 10's, starting with 10, then 20, then 30, etc. By numbering in groups of 10 you can insert an item into any position later in the workspace, without the need to reorder (for example, you can use 10, 20, 25, 30, 40 to insert a new tab between 20 and 30).
Nesting children tabs
You may prefer to nest several tabs within a parent to reduce clutter in your Relativity interface and make tabs easier to locate. You must first specify a tab as a parent (step 1) and then specify children tabs (steps 2-4).
-
- Click the icon next to the tab you want to nest.
- Choose the parent tab name under the Parent drop-down menu.
- Click Save.
Repeat for each child tab you wish to nest. Hover your cursor over the parent tab to display the nested child tabs in a fly-out menu.
Assigning a GUID to an object
You need to assign a GUID to a Relativity object that only has an Artifact ID, before you can link a tab to it. To assign a GUID to an object, you run a SQL script on database for the workspace where the object resides. This script adds this identifier to the record for the object on the Artifact.Guid table in the database.
You need to complete this assignment process for all Relativity objects except for the following cases:
- RDOs and scripts - you can link these objects to tabs using their Artifact IDs or GUIDs, if available. See Creating and editing tabs.
- Objects in applications - Relativity automatically assigns GUIDs to objects added to applications.
Use the following procedure to assign a GUID to an object:
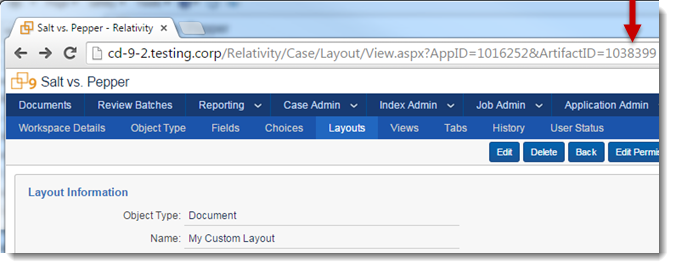
- Obtain the Artifact ID for an object from the URL used to access it, or by adding the Artifact ID field to the list view for the object in Relativity.
- Log in to your database server. You must be a database admin.
- Locate the workspace database for the object that requires a GUID.
-
Execute the following SQL script on the workspace database for the object:
DECLARE @artifactID int = 0 -- Your artifact that is missing a GUID. IF NOT EXISTS (SELECT 1 FROM EDDSDBO.[ArtifactGuid] WHERE ArtifactID = @artifactID) BEGIN INSERT INTO EDDSDBO.[ArtifactGuid] VALUES (@artifactID, NEWID()) END SELECT [ArtifactGuid] FROM EDDSDBO.[ArtifactGuid] WHERE ArtifactID = @artifactID - Assign the GUID added to the database to the ObjectArtifactIdentifier token to link a tab to the object. See Creating and editing tabs.