


With our commitment to quality, we provide you with comprehensive support during your initial installation of Relativity.
Use the following instructions to install Relativity for the first time in your environment. These instructions provide you with the information necessary to install Relativity.
For instructions about how to upgrade an existing Relativity environment, see
Installation prerequisites
Before you install Relativity, review the following information to confirm that your environment meets the installation requirements. Make sure that you created the directories and obtained the user names and passwords that the installer requires.
Note: We recommend changing the default password for the system admin account and the Relativity service account when you first log in to a new environment.
Secret Store installation
The Secret Store is a required infrastructure component that provides an additional layer of security for Relativity secrets. A secret can be user credentials, a database connect string, an instance setting that contains confidential information such as your SMTP credentials, or a TLS certificate. All confidential information is stored in the Secret Store database that can be accessed only from authenticated servers.
The Secret Store is required for installing and upgrading Relativity. You must install and configure the Secret Store before installing Relativity on any other machines in your environment. You must also configure all machines to access the Secret Store. For more information, see Relativity Secret Store.
Download the Relativity installer
Download the Relativity installer from the Relativity Community. To access these files, you must be a designated administrative contact for your company or receive permission from an administrative contact before the Community team will grant access to these files.
Note: If you want to set up a single-server installation of Relativity, change the setting for all applicable components from 0 to 1 in the Feature Selection section of the RelativityResponse.txt file before running Install.bat. During a single server installation, the installer will not add any component that is not set to 1 for a new installation. Any feature set to 0 in the RelativityResponse.txt file gets uninstalled if it detects a previous installation for that component.
Using the Relativity installer
A basic instance of Relativity requires multiple servers. You must configure two or more machines to fulfill the following roles:
- Primary SQL Server—The primary database called the EDDS resides on the primary SQL Server.
- Distributed database server—the secondary database that accommodates a distributed instance of the primary SQL Server and can store multiple workspace databases.
- Agents server—the server that launches all Relativity agents and runs the agents framework.
- Web server—the server that facilitates web background processing and handles authentication tasks.
- Relativity service bus server—the server used to configure Relativity to work with the Service Bus for Windows Server farm or RabbitMQ.
Save the following files to the root directory of any server contributing to the Relativity environment:
- Relativity.exe—the executable file that installs Relativity components determined by the values entered in the RelativityResponse.txt file.
- Notes:
- You must save Relativity.exe on a drive local to the server. Running Relativity.exe from a shared location results in upgrade or installation failure.
- The Relativity.exe file does not open a user interface. Use Install.bat to proceed with installation.
- Install.bat—the code that prompts Relativity.exe to proceed with the installation process. You must edit line 11 of the Install.bat file with the exact name of the Relativity installation file.
start /wait "" "INSERT EXACT NAME OF RELATIVITY INSTALLATION FILE" /log InstallLog.txt /responsefilepath=RelativityResponse.txt
- Notes:
- You may need to run this file from an elevated command line prompt to avoid permission issues.
- You must surround the name of the Relativity installation file with quotation marks.
- RelativityResponse.txt—the text file that determines which components Relativity.exe installs, uninstalls, or upgrades on the server.
Note: Every line in the RelativityResponse.txt file that starts with ### is a comment and meant to provide instruction.
Command line alternative to the RelativityResponse.txt file
You can pass in response file parameters on the command line during installation if you do not want your password information in a file stored locally on the machine hosting Relativity components. The command line parameters overwrite, or if left blank, insert the parameters that are in the RelativityResponse.txt file.
Use the following steps to enter parameters you do not want to include in the RelativityResponse.txt file.
- Launch the Windows command prompt as an system admin.
- Navigate to the directory that stores Relativity.exe, Install.bat, and RelativityResponse.txt.
- Enter the following command:
start /wait Relativity.exe /log installLog.txt /responsefilepath=RelativityResponse.txt EDDSDBOPASSWORD=my_password
Note: If you do not have your password in the RelativityResponse.txt file and the password includes a space, you must insert quotation marks around the password if you opt to use command line input. The following example assumes that your password is: my password
start /wait Relativity.exe /log installLog.txt /responsefilepath=RelativityResponse.txt EDDSDBOPASSWORD="my password"
Optional installer inputs
You can edit the Install.bat file in a text editor to alter the default behavior of the Relativity installer. There are four optional inputs:
- Dry Run—this configuration only runs validations and does not perform a full installation. Dry run is quick way to determine whether an installation will fail due to a misconfigured environment or response file. It is also useful in debugging scenarios where a validator is failing. Instead of running the full installation process, you can run a dry run, determine if the issue is fixed, and then run the installation.
start /wait "" "12.1.537.3 Relativity.exe" /log InstallLog.txt /responsefilepath=RelativityResponse.txt /dryrun
- Skip Validations—this configuration skips validations in the bundle. The validations still run during MSI execution.
start /wait "" "12.1.537.3 Relativity.exe" /log InstallLog.txt /responsefilepath=RelativityResponse.txt /skipvalidations
- Uninstall—this configuration uninstalls Relativity, but you can also accomplish the same task through the Windows Control Panel in the Add or Remove Programs list.
start /wait "" "12.1.537.3 Relativity.exe" /log InstallLog.txt /responsefilepath=RelativityResponse.txt /uninstall
- Repair—this configuration repairs a failed installation.
start /wait "" "12.1.537.3 Relativity.exe" /log InstallLog.txt /responsefilepath=RelativityResponse.txt /repair
Using PowerShell script
An alternative installation method to using the Install.bat file is available in the form of a sample Windows PowerShell script. You can obtain a sample PowerShell batch script from your Relativity support representative. It contains default values for the various installer processes you can modify in a text editor according to your preferences. The sample script contains custom logic for basic input prompting, parsing, and status indication. The sample file is intended to be an example of a script that uses custom logic to drive the different installer behaviors. For example, the script prompts you to enter the location of the installer executable, but the script also contains default editable values for the RelativityResponse.txt file and log file locations. It displays any errors that occur and the last line in the most recent log file. You can execute it from a PowerShell prompt and pass options in, like the location of the installer executable or the installer mode.
Primary SQL Server installation
The master database called the EDDS resides on the primary SQL Server. You must first install the primary SQL database server.
After you install the primary SQL Server, you can run the distributed database server. Next, install the Relativity service bus. You can then run the agent and web server installations in parallel.
Open the RelativityResponse.txt file in a text editor and edit the parameters as follows to install Relativity on the machine that serves the role of the primary SQL Server:
Feature selection
- INSTALLPRIMARYDATABASE—set this value to 1.
INSTALLPRIMARYDATABASE=1
- INSTALLDISTRIBUTEDDATABASE—verify that this value is set to 0. You cannot store the distributed database on the same machine as the primary database.
INSTALLDISTRIBUTEDDATABASE=0
Primary database properties
- DEFAULTFILEREPOSITORY—enter the default file repository. This path must be a shared folder to which both the user running the installer and the Relativity Service Account have read and write permissions.
DEFAULTFILEREPOSITORY=\\yourmachine\FileShare
- EDDSFILESHARE—enter the EDDS fileshare path. This path must be a shared folder to which both the user running the installer and the Relativity Service Account have read and write permissions.
EDDSFILESHARE=\\yourmachine\Fileshare
- CACHELOCATION—enter a valid UNC path for the viewer cache location. The user running the installation and the Relativity Service Account must have read and writer permissions to this path. The installer only uses this value on a new installation of Relativity. It ignores this setting during an upgrade.
Use the following format for this path to avoid any errors during installation:
CACHELOCATION=\\yourmachine\ViewerCache
If you don’t specify a value, then it defaults to the DEFAULTFILEREPOSITORY setting as follows:
\\<DEFAULTFILEREPOSITORY>\cache
- DTSEARCHINDEXPATH—enter the dtSearch index. This path must be a shared folder to which both the user running the installer and the Relativity Service Account have read and write permissions.
DTSEARCHINDEXPATH=\\yourmachine\dtSearch
- RELATIVITYINSTANCENAME—enter the Relativity instance name.
RELATIVITYINSTANCENAME=My Relativity Instance
- ADMIN_EMAIL—enter the email address that you want to use for the default Relativity admin account. If you do not specify an email address, the installer uses the default value of relativity.admin@relativity.com.
ADMIN_EMAIL=relativity.admin@relativity.com
- SERVICEACCOUNT_EMAIL—enter the email address that you want to use for the default Relativity service account. If you do not specify an email address, the installer uses the default value of serviceaccount@relativity.com.
SERVICEACCOUNT_EMAIL=serviceaccount@relativity.com
Note: Use different email addresses for the ADMIN_EMAIL and SERVICEACCOUNT_EMAIL parameters. If you use the same email address for both parameters, the installation fails.
- ADMIN_PASSWORD—enter the password that you want to use for the default Relativity admin account.
ADMIN_PASSWORD=myPassword
- SERVICEACCOUNT_PASSWORD—enter the password that you want to use for the default Relativity service account.
SERVICEACCOUNT_PASSWORD=myPassword
Note: To change the ADMIN_PASSWORD or SERVICEACCOUNT_PASSWORD password, you must also update the associated email address. If you enter a new password but do not update the email address, then new password is ignored. For example, if you use an existing or default email address, then the password remains unchanged. However, you can change the email addresses for the admin and service accounts without updating the password.
Common database properties
We recommend that the following database paths are local to the SQL Server and accessible. However, we also support UNC paths on SQL Server 2012 and above.
- DATABASEBACKUPDIR—enter the database backup directory.
DATABASEBACKUPDIR=C:\Backup
- LDFDIR—enter the LDF directory.
LDFDIR=C:\Logs
- MDFDIR—enter the MDF directory.
MDFDIR=C:\Data
- FULLTEXTDIR—enter the full text directory.
FULLTEXTDIR=C:\FullText
Save your edits to the RelativityResponse.txt file, and launch the Install.bat file to proceed with the installation.
A sample RelativityResponse.txt file for a primary SQL database installation using Windows authentication looks like this:
INSTALLPRIMARYDATABASE=1
INSTALLDIR=C:\Program Files\kCura Corporation\Relativity
PRIMARYSQLINSTANCE=ML12
EDDSDBOPASSWORD=MySecretPassword
SERVICEUSERNAME=example\exampleusername
SERVICEPASSWORD=MySecretPassword
DEFAULTFILEREPOSITORY=\\yourmachine\FileShare
EDDSFILESHARE=\\yourmachine\Fileshare
CACHELOCATION=\\yourmachine\ViewerCache
DTSEARCHINDEXPATH=\\yourmachine\dtSearch
RELATIVITYINSTANCENAME=My Relativity Instance
ADMIN_EMAIL=relativity.admin@relativity.com
SERVICEACCOUNT_EMAIL=serviceaccount@relativity.com
ADMIN_PASSWORD=myPassword
SERVICEACCOUNT_PASSWORD=myPassword
DATABASEBACKUPDIR=C:\Backup
LDFDIR=C:\Logs
MDFDIR=C:\Data
FULLTEXTDIR=C:\FullText
USEWINAUTH=1
Note: Every line in the RelativityResponse.txt file that starts with ### is a comment and meant to provide instruction.
Distributed SQL server installation
A distributed SQL server environment has two or more SQL instances linked together. When creating a new Relativity workspace, you can choose any of the SQL servers to house the database. This helps to spread the load of active workspaces across multiple servers.
If your Relativity environment uses a distributed SQL server, then you need to run the installer on a machine other than the one that hosts the primary SQL database. You must install the primary SQL server before you install a distributed server. You can then install the distributed database server in parallel with the web and agent servers. Make sure that you review the steps for database server setup on the Pre-installation page.
To set up a distributed SQL server, ensure the following:
- There is already a primary SQL server with Relativity installed.
- Your environment has at least two or more SQL servers running Windows Server 2019, 2016, or 2012 R2R2 and SQL Server 2017 or SQL Server 2019. The SQL Server 2019 requires Windows Server 2016 or 2019. It is not compatible with Windows Server 2012.
Creating linked servers
Each SQL server in the Relativity instance that will be distributed must have a linked server entry for every other SQL server. For example, if there will be four distributed SQL servers, each SQL server must have a linked server entry for the other three SQL servers in the sys.servers table.
To check for any existing linked servers, execute the script below from each SQL server:
select * from sys.servers
On each server to be linked, run the following scripts:
Note: The remoteServerName is the name of the SQL server you want to link to.
sp_addlinkedserver 'remoteServerName'
exec sp_serveroption @server='remoteServerName', @optname='rpc', @optvalue='true'
exec sp_serveroption @server='remoteServerName', @optname='rpc out', @optvalue='true'
exec sp_addlinkedsrvlogin @rmtsrvname = N'remoteServerName', @locallogin = NULL , @useself = N'True'
The following screen shot provides an example of running the above script from the primary SQL server:

The following screen shot provides an example of running the same script on the distributed servers in the same environment:

Distributed SQL server installation
Open the RelativityResponse.txt file in a text editor and edit the parameters as follows to install Relativity on the machine that serves the role of the distributed SQL server:
Feature selection
- INSTALLPRIMARYDATABASE—set this value to 0. You cannot store the distributed database on the same machine as the primary database.
INSTALLPRIMARYDATABASE=0
- INSTALLDISTRIBUTEDDATABASE—set this value to 1.
INSTALLDISTRIBUTEDDATABASE=1
Common properties
- INSTALLDIR—enter the installation directory. This is the target directory for all files related to the local installation. This path must be local to the machine and accessible by the server. You must use ASCII characters for this path.
INSTALLDIR=C:\Program Files\kCura Corporation\Relativity
- PRIMARYSQLINSTANCE—enter the primary SQL instance. If you are installing to a cluster, specify the cluster and instance name. If you are installing to a named instance, specify the server and instance name. All features require this input.
PRIMARYSQLINSTANCE=ML12
- EDDSDBOPASSWORD—enter the EDDSDBO password.
EDDSDBOPASSWORD=MySecretPassword
- SERVICEUSERNAME—enter the service user name. The Windows login credecntials must already exist.
SERVICEUSERNAME=example\exampleusername
- SERVICEPASSWORD—enter the Service password.
SERVICEPASSWORD=MySecretPassword
- USEWINAUTH - Set this to 1 to use Windows authentication for the SQL server.
USEWINAUTH=1
Note: If the USEWINAUTH value is set to one, then the user running the installer must be a SQL sysadmin, and any values entered for SQLUSERNAME and SQLPASSWORD are ignored.
- SQLUSERNAME—enter the SQL user name to use SQL server login authentication.
SQLUSERNAME=mySqlUserName
Note: This value is ignored if USEWINAUTH is set to one.
- SQLPASSWORD—enter the SQL password to use SQL server login authentication.
SQLPASSWORD=myPassword
Note: This value is ignored if USEWINAUTH is set to one.
Distributed database properties
- DISTRIBUTEDSQLINSTANCE—enter the distributed SQL instance. You cannot store the distributed database on the same machine as the primary SQL server.
DISTRIBUTEDSQLINSTANCE=ML14
Common database properties
We recommend that the following database paths are local to the SQL Server and accessible. However, we also support UNC paths on SQL Server 2012 and above.
- DATABASEBACKUPDIR—enter the database backup directory.
DATABASEBACKUPDIR=C:\Backup
- LDFDIR—enter the LDF directory.
LDFDIR=C:\Logs
- MDFDIR—enter the MDF directory.
MDFDIR=C:\Data
- FULLTEXTDIR—enter the full text directory.
FULLTEXTDIR=C:\FullText
Save your edits to the RelativityResponse.txt file, and then launch the Install.bat file to proceed with the installation.
A sample response file for a distributed SQL database installation using Windows authentication looks like this:
INSTALLDISTRIBUTEDDATABASE=1
INSTALLDIR=C:\Program Files\kCura Corporation\Relativity
PRIMARYSQLINSTANCE=ML12
EDDSDBOPASSWORD=MySecretPassword
SERVICEUSERNAME=example\exampleusername
SERVICEPASSWORD=MySecretPassword
DISTRIBUTEDSQLINSTANCE=ML14
DATABASEBACKUPDIR=C:\Backup
LDFDIR=C:\Logs
MDFDIR=C:\Data
FULLTEXTDIR=C:\FullText
USEWINAUTH=1
Note: Every line in the RelativityResponse.txt file that starts with ### is a comment and meant to provide instruction.
Relativity service bus installation
Relativity requires RabbitMQ or Service Bus for Windows Server. Depending on the message broker you have installed, complete the following steps:
You must include the Relativity service bus server as a node in the Service Bus for Windows Server farm. The Relativity installer saves information about the farm to the primary SQL Server database. It also performs setup tasks on farm, so that Relativity can connect to the service bus.
Open the RelativityResponse.txt file in a text editor and edit the parameters as follows to install Relativity on the machine that serves the role of the service bus server:
Feature selection
- INSTALLSERVICEBUS—set this value to 1 to install the Relativity service bus.
INSTALLSERVICEBUS=1
- Notes:
- If the service bus server is already installed on this machine and the INSTALLSERVICEBUS property is set to zero, the installer removes the previously existing service bus server.
- When using Service Bus for Windows Server, the Relativity Installer with the INSTALLSERVICEBUS=1 feature selection must be run on a server that is hosting Service Bus for Windows Server.
Common properties
Note: The following non-alpha-numeric characters are not allowed in passwords: \, ", <, >.
- INSTALLDIR—enter the installation directory. This is the target directory for all files related to the local installation. This path must be local to the machine and accessible by the server. You must use ASCII characters for this path.
INSTALLDIR=C:\Program Files\kCura Corporation\Relativity
- PRIMARYSQLINSTANCE—enter the primary SQL instance. If you are installing to a cluster, specify the cluster and instance name. If you are installing to a named instance, specify the server and instance name. All features require this input.
PRIMARYSQLINSTANCE=ML12
- EDDSDBOPASSWORD—enter the EDDSDBO password.
EDDSDBOPASSWORD=MySecretPassword
- SERVICEUSERNAME—enter the service username. The Windows login must already exist.
SERVICEUSERNAME=example\exampleusername
- SERVICEPASSWORD—enter the service password.
SERVICEPASSWORD=MySecretPassword
- USEWINAUTH—set this to one to use Windows authentication for the SQL Server.
USEWINAUTH=1
Note: If the USEWINAUTH value is set to one, then the user running the installer must be a SQL sysadmin, and any values entered for SQLUSERNAME and SQLPASSWORD are ignored.
- SQLUSERNAME—enter the SQL username to use SQL Server login authentication.
SQLUSERNAME=mySqlUserName
Note: This value is ignored if USEWINAUTH is set to one.
- SQLPASSWORD—enter the SQL password to use SQL Server login authentication.
SQLPASSWORD=myPassword
Note: This value is ignored if USEWINAUTH is set to one.
- SERVICEBUSPROVIDER—if applicable, enter Windows when using Service Bus for Windows Server as your message broker. The value defaults to Windows.
SERVICEBUSPROVIDER=Windows
Save your edits to the RelativityResponse.txt file, and launch the Install.bat file to proceed with the installation.
Note: The values in the Service Bus section of the response file DO NOT need to be filled out when using Service Bus for Windows Server.
A sample response file for a service bus only installation looks like this:
INSTALLSERVICEBUS=1

INSTALLDIR=C:\Program Files\kCura Corporation\Relativity
PRIMARYSQLINSTANCE=ML12
EDDSDBOPASSWORD=MySecretPassword
SERVICEUSERNAME=example\exampleusername
SERVICEPASSWORD=MySecretPassword
USEWINAUTH=1
SERVICEBUSPROVIDER=Windows
Note: Every line in the RelativityResponse.txt file that starts with ### is a comment and meant to provide instruction.
Troubleshooting the service bus installation
Use the following information to troubleshoot issues that may occur during the service bus installation:
- In the RelativityResponse.txt file, ensure that you set the INSTALLSERVICEBUS property to 1 before you run the installer.
- Verify that the following instance settings contain the correct values:
Note:
When using RabbitMQ as your chosen message broker, RabbitMQ must be installed and configured prior to running the Relativity Installer.
Open the RelativityResponse.txt file in a text editor and edit the parameters as follows to install Relativity on the machine that serves the role of the service bus server:
Feature selection
- INSTALLSERVICEBUS—set this value to 1 to install the Relativity service bus.
INSTALLSERVICEBUS=1
- Notes:
- If the service bus server is already installed on this machine and the INSTALLSERVICEBUS property is set to zero, the installer removes the previously existing service bus server.
- When using RabbitMQ, the Relativity Installer with the INSTALLSERVICEBUS=1 feature selection can be run on any server with network connectivity to both the Primary SQL Server and the RabbitMQ server / cluster.
Common properties
Note: The following non-alpha-numeric characters are not allowed in passwords: \, ", <, >.
- INSTALLDIR—enter the installation directory. This is the target directory for all files related to the local installation. This path must be local to the machine and accessible by the server. You must use ASCII characters for this path.
INSTALLDIR=C:\Program Files\kCura Corporation\Relativity
- PRIMARYSQLINSTANCE—enter the primary SQL instance. If you are installing to a cluster, specify the cluster and instance name. If you are installing to a named instance, specify the server and instance name. All features require this input.
PRIMARYSQLINSTANCE=ML12
- EDDSDBOPASSWORD—enter the EDDSDBO password.
EDDSDBOPASSWORD=MySecretPassword
- SERVICEUSERNAME—enter the service user name. The Windows login must already exist.
SERVICEUSERNAME=example\exampleusername
- SERVICEPASSWORD—enter the service password.
SERVICEPASSWORD=MySecretPassword
- USEWINAUTH—set this to one to use Windows authentication for the SQL Server.
USEWINAUTH=1
Note: If the USEWINAUTH value is set to one, then the user running the installer must be a SQL sysadmin, and any values entered for SQLUSERNAME and SQLPASSWORD are ignored.
- SQLUSERNAME—enter the SQL username to use SQL Server login authentication.
SQLUSERNAME=mySqlUserName
Note: This value is ignored if USEWINAUTH is set to one.
- SQLPASSWORD - Enter the SQL password to use SQL Server login authentication.
SQLPASSWORD=myPassword
Note: This value is ignored if USEWINAUTH is set to one.
- SERVICEBUSPROVIDER—enter RabbitMQ when using RabbitMQ as your message broker
SERVICEBUSPROVIDER=RabbitMQ
- SERVERFQDN—enter the fully qualified domain name of your message broker.
SERVERFQDN=myRabbitMQFQDN
- SHAREDACCESSKEY—enter the password Relativity will use when connecting.
SHAREDACCESSKEY=myRabbitMQPassword
- SHAREDACCESSKEYNAME—enter the username Relativity will use when connecting.
SHAREDACCESSKEYNAME=myRabbitMQUserName
Note: This value is case sensitive.
- SERVICENAMESPACE—enter the virtual host Relativity will use.
SERVICENAMESPACE=Relativity
- TLSENABLED—set this to zero if RabbitMQ is not configured for TLS, and set this to one if RabbitMQ is configured for TLS.
TLSENABLED=1
Save your edits to the RelativityResponse.txt file, and launch the Install.bat file to proceed with the installation.
A sample response file for a service bus only installation looks like this:
INSTALLSERVICEBUS=1
INSTALLDIR=C:\Program Files\kCura Corporation\Relativity
PRIMARYSQLINSTANCE=ML12
EDDSDBOPASSWORD=MySecretPassword
SERVICEUSERNAME=example\exampleusername
SERVICEPASSWORD=MySecretPassword
USEWINAUTH=1
SERVICEBUSPROVIDER=RabbitMQ
SERVERFQDN=myRabbitMQFQDN
SHAREDACCESSKEY=myRabbitMQPassword
SHAREDACCESSKEYNAME=myRabbitMQUserName
SERVICENAMESPACE=Relativity
TLSENABLED=1
Note: Every line in the RelativityResponse.txt file that starts with ### is a comment and meant to provide instruction.
Troubleshooting the service bus installation
For more information to troubleshoot issues that may occur during the service bus installation, see Troubleshooting RabbitMQ .
ServiceBusFullyQualifiedDomainName instance setting
The Relativity installer populates the ServiceBusFullyQualifiedDomainName instance setting according to the following rules during a new installation:
- When using Service Bus for Windows Server, if the FarmDNS property for the service bus farm has a value, then the installer sets the ServiceBusFullyQualifiedDomainName instance setting to this value.
- When using Service Bus for Windows Server, if the FarmDNS property does not have a value, then the installer sets the ServiceBusFullyQualifiedDomainName instance setting to a semi-colon delimited list of all hosts in the farm.
- When using RabbitMQ, ServiceBusFullyQualifiedDomainName specifies the fully-qualified domain name for the machine or load balancer where Relativity can reach the environment’s cluster. The Relativity installer automatically sets this value during an installation or upgrade based on the inputs in the RelativityResponse.txt file.
Note: The semi-colon delimited list is not supported for RabbitMQ.
For more information, see
Troubleshooting the service bus installation
Use the following information to troubleshoot issues that may occur during the service bus installation:
- In the RelativityResponse.txt file, ensure that you set the INSTALLSERVICEBUS property to 1 before you run the installer.
- Verify that the following instance settings contain the correct values:
Note:
Web server installation
The web server hosts Relativity and its services, such as the Services and Web APIs. First, you upgrade the primary SQL Server, and install or upgrade the Relativity service bus. You can then run the web, agent, and distributed database server installations in parallel. The following settings assume that the web server resides on a machine that does not host the primary or distributed databases.
Note: When you install Relativity, it is configured to use HTTPS by default. If you decided not to use HTTPS in your environment, you must set the CookieSecure instance setting to False before logging in to Relativity, or you receive an error message.
Open the RelativityResponse.txt file in a text editor and edit the parameters as follows to install Relativity on the machine that serves the role of the web server:
Feature selection
- INSTALLWEB—set this value to 1.
INSTALLWEB=1
Note: If the web server is already installed on this machine and the above value is set to zero, the installer removes the previously existing web server.
Common properties
Note: The following non-alpha-numeric characters are not allowed in passwords: \, ", <, >.
- INSTALLDIR—enter the installation directory. This is the target directory for all files related to the local installation. This path must be local to the machine and accessible by the server. You must use ASCII characters for this path.
INSTALLDIR=C:\Program Files\kCura Corporation\Relativity
- PRIMARYSQLINSTANCE—enter the primary SQL instance. If you are installing to a cluster, specify the cluster and instance name. If you are installing to a named instance, specify the server and instance name. All features require this input.
PRIMARYSQLINSTANCE=ML12
- EDDSDBOPASSWORD—enter the EDDSDBO password.
EDDSDBOPASSWORD=MySecretPassword
- SERVICEUSERNAME—enter the service user name. The Windows login must already exist.
SERVICEUSERNAME=example\exampleusername
- SERVICEPASSWORD—enter the service password.
SERVICEPASSWORD=MySecretPassword
- USEWINAUTH—set this to 1 to use Windows authentication for the SQL server.
USEWINAUTH=1
Note: If the USEWINAUTH value is set to one, then the user running the installer must be a SQL sysadmin, and any values entered for SQLUSERNAME and SQLPASSWORD are ignored.
- SQLUSERNAME—enter the SQL user name to use SQL Server login authentication.
SQLUSERNAME=mySqlUserName
Note: This value is ignored if USEWINAUTH is set to one.
- SQLPASSWORD—enter the SQL password to use SQL Server login authentication.
SQLPASSWORD=myPassword
Note: This value is ignored if USEWINAUTH is set to 1.
Web properties
- ENABLEWINAUTH—set this property to 1 to enable Integrated Authentication for your Relativity instance. It updates IIS configuration and sets the value of the UseWindowsAuthentication instance setting to True.
ENABLEWINAUTH=1
Note: After Integrated Authentication is enabled by the installer, you must configure it for individual Relativity users.
Save your edits to the RelativityResponse.txt file, and launch the Install.bat file to proceed with the installation.
A sample RelativityResponse.txt file for a web only installation looks like this:
INSTALLWEB=1
INSTALLDIR=C:\Program Files\kCura Corporation\Relativity
PRIMARYSQLINSTANCE=ML12
EDDSDBOPASSWORD=MySecretPassword
SERVICEUSERNAME=example\exampleusername
SERVICEPASSWORD=MySecretPassword
USEWINAUTH=1
ENABLEWINAUTH=1
Note: Every line in the RelativityResponse.txt file that starts with ### is a comment and meant to provide instruction.
Verifying the machine key settings on the IIS
When setting up the IIS for a Relativity installation, you need to verify that the machine keys are configured to use the appropriate methods for the encryption and decryption of forms authentication data.
Use these steps to set the machine key for the IIS:
- Open the IIS Manager.
- Highlight your Relativity website to display configuration options in the Feature View on the IIS dashboard.
- Double-click the Machine Key icon.
- Update the following fields for your version of Windows server:
- Windows Server 2008 R2—select SHA1 for the Encryption method and AES for the Decryption method.
Note: You could also select Auto for the Decryption method, but we recommend setting it to AES.

- Windows Server 2012 R2—select SHA1 for the Validation method and AES for the Encryption method.

- Windows Server 2008 R2—select SHA1 for the Encryption method and AES for the Decryption method.
- Save your changes.


Agent installation
The agent server runs background processes for Relativity, such as those used for imaging, branding, and others. First, you upgrade the primary SQL Server, and install or upgrade the Relativity service bus. You can then run the web, agent, and distributed database server installations in parallel.
The following settings assume that the same machine does not host the agent server that hosts the primary or distributed SQL database servers.
Open the RelativityResponse.txt file in a text editor and edit the parameters as follows to install Relativity on the machine that serves the role of the agent server:
Feature selection
- INSTALLAGENTS—set this value to 1.
INSTALLAGENTS=1
Note: This value only effects first time installations. The setting is ignored by all subsequent upgrades.
Common properties
Note: The following non-alpha-numeric characters are not allowed in passwords: \, ", <, >.
- INSTALLDIR—enter the installation directory. This is the target directory for all files related to the local installation. This path must be local to the machine and accessible by the server. You must use ASCII characters for this path.
INSTALLDIR=C:\Program Files\kCura Corporation\Relativity
- PRIMARYSQLINSTANCE—enter the primary SQL instance. If you are installing to a cluster, specify the cluster and instance name. If you are installing to a named instance, specify the server and instance name. All features require this input.
PRIMARYSQLINSTANCE=ML12
- EDDSDBOPASSWORD—enter the EDDSDBO password.
EDDSDBOPASSWORD=MySecretPassword
- SERVICEUSERNAME—enter the service user name. The Windows login must already exist.
SERVICEUSERNAME=example\exampleusername
- SERVICEPASSWORD—enter the service password.
SERVICEPASSWORD=MySecretPassword
- USEWINAUTH—set this to 1 to use Windows authentication for the SQL server.
USEWINAUTH=1
Note: If the USEWINAUTH value is set to 1, then the user running the installer must be a SQL sysadmin, and any values entered for SQLUSERNAME and SQLPASSWORD are ignored.
- SQLUSERNAME—enter the SQL user name to use SQL Server login authentication.
SQLUSERNAME=mySqlUserName
Note: This value is ignored if USEWINAUTH is set to one.
- SQLPASSWORD—enter the SQL password to use SQL Server login authentication.
SQLPASSWORD=myPassword
Note: This value is ignored if USEWINAUTH is set to one.
Agent properties
- DEFAULTAGENTS—set this to 1 for core agents servers or 0 for non-core agents.
DEFAULTAGENTS=1
Save your edits to the RelativityResponse.txt file, and launch the Install.bat file to proceed with the installation.
A sample RelativityResponse.txt file for a agents only installation looks like this:
INSTALLAGENTS=1
INSTALLDIR=C:\Program Files\kCura Corporation\Relativity
PRIMARYSQLINSTANCE=ML12
EDDSDBOPASSWORD=MySecretPassword
SERVICEUSERNAME=example\exampleusername
SERVICEPASSWORD=MySecretPassword
DEFAULTAGENTS=1
USEWINAUTH=1
Note: Every line in the RelativityResponse.txt file that starts with ### is a comment and meant to provide instruction.
Install the worker manager server
After completing the Relativity installation, you must install the worker manager server.
Configuring an SMTP Server
You can configure your SMTP server to relay messages from Relativity agents and web servers. You need to configure your SMTP server so it can send email messages outside of your domain with encrypted attachments. In addition, you must update specific instance setting values on the Instance setting table in the EDDS database.
Use this procedure to configure your SMTP server:
- To enable SMTP communication, verify that port 25 is open on your Relativity agent and web servers. Also, verify that it is configured to allow relaying.
- Use the kCura.Notification.WinForm utility to verify that SMTP relay works properly. Click here to download this utility, extract it, and run it in your environment.
- Log in to Relativity as a system admin.
- Click the Relativity Script Library tab to display a list of Relativity scripts.
- Click New Relativity Script.
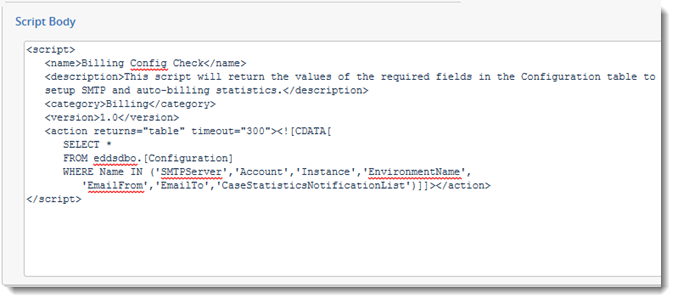
- Copy and paste the following code in the Script Body box. This script outputs a list of instance settings and their current settings.
SELECT *
FROM eddsdbo.[Configuration]
WHERE Name IN ('SMTPServer','Account','Instance','EnvironmentName','EmailFrom','EmailTo','CaseStatisticsNotificationList')
Your code should look similar to this screen shot:
- Click Save.
- Click Run Script to display a pop-up window on the details view.
- Click Run to display a list containing the settings in your instance settings.
- Select Export to File in the mass operation drop-down box and click Go. Save the file in a local directory. You can also optionally output a .csv file with these settings.
Note: If you have already set any of the instance settings, keep a copy of these settings in case you need to refer to it later.
- Click the Relativity SMTP Configuration script on the Relativity Script Library tab, to update the instance settings.
- Click Run Script to display a dialog where you can update the settings for your instance settings.
- Enter your new settings in the dialog. The following table illustrates sample entries. The Account, Instance, EnvironmentName, and EmailFrom must match the values for your Relativity account.
Field Sample setting Account Salt Corporation CaseStatisticsNotificationList relativitystats@relativity.com. The script for the Billing statistics report sends the output directly this email address. Instance SaltCorpUK EnvironmentName Salt Corporation EmailFrom This email address displays in the From field on outgoing email messages. EmailTo Error notifications are sent to this email address. This value is optional. SMTPServer SMTP server information for your environment, such as 192.168.1.10 or smtp.relativity.com. - Click Run.
Testing your SMTP server configuration
You can test the configuration of your SMTP server to make sure that it has the proper settings.
Use this procedure to test your SMTP configuration:
- Create a test workspace.
- Build a small dtSearch index in your test workspace, and enter your email address in the Email notification recipients field.
- Build the index and verify that you received an email.
- Check the Errors tab to determine if any errors occurred from the Home tab.
- Re-run this test on an email address outside of your domain.
- Check the Errors tab to determine if any errors occurred from home.
Enable telemetry
After you install Relativity, complete the steps to enable telemetry in your environment. Telemetry collects metrics for performance, usage, and billing.
Log files
The Relativity installer automatically creates log files to assist in troubleshooting. There is no set list of log file names, but all the log files save to the same directory and share the same naming scheme as the log specified in the batch script.
For example, the following command saves a log to the directory that the command prompt is pointing to when run:
start /wait Relativity.Installer.exe /log Install.log
The above command yields the following logs:
- Install.log—this is the main installer log. Check this log first when troubleshooting. The log records the error and directs you to the next log file to check. This is the only log created during a dry run.
- Install_0_<package identifier>.log—this is the log for the first package run.
- Install_1_<package identifier>.log—this is the log for the second package run.
- Install_2_<package identifier>.log—this is the log for the third package run.
Package identifiers might display as VCRedist2005x86, Agents, PrimaryDatabase, or something else.